Grade Level
5-6, 7-8Duration
unknown
Materials
Tissue paper in various colors, wax paper, glue, paintbrushes, masking tape
Media
Mixed media
Lesson Objectives
For the student to…
Look at and appreciate stained glass examples in art history as well as understand the purpose and uses for stain glass.
Choose a subject matter and conduct research to find reference imagery for creating art.
Introductory Activity
Begin the lesson with a brief description of what stained glass is and how it functions. The purpose of most windows is to allow a view of the outside and admit light into a building. The purpose of stained glass windows, however, is not to allow people to see outside, but to beautify buildings, control light, and sometimes to tell a story. Stained glass was believed to have first been created by ancient Egyptians and/or the Romans. During the Medieval period, stained glass window making flourished, reaching its peak during the Gothic period, in which stained glass windows were used in cathedrals; to a lesser degree, stained glass continued to be made throughout history ad and continues to be made today.
Share examples of stained glass with the class. Provide a variety of design samples. Include abstract, realistic, and radial designs.
Students use Google Image search for their subject matter. Adding the word “silhouette” to their image search assists students in finding solid figures.
Have students practice drawing their potential subject in sketchbooks first before drawing on the final construction paper.
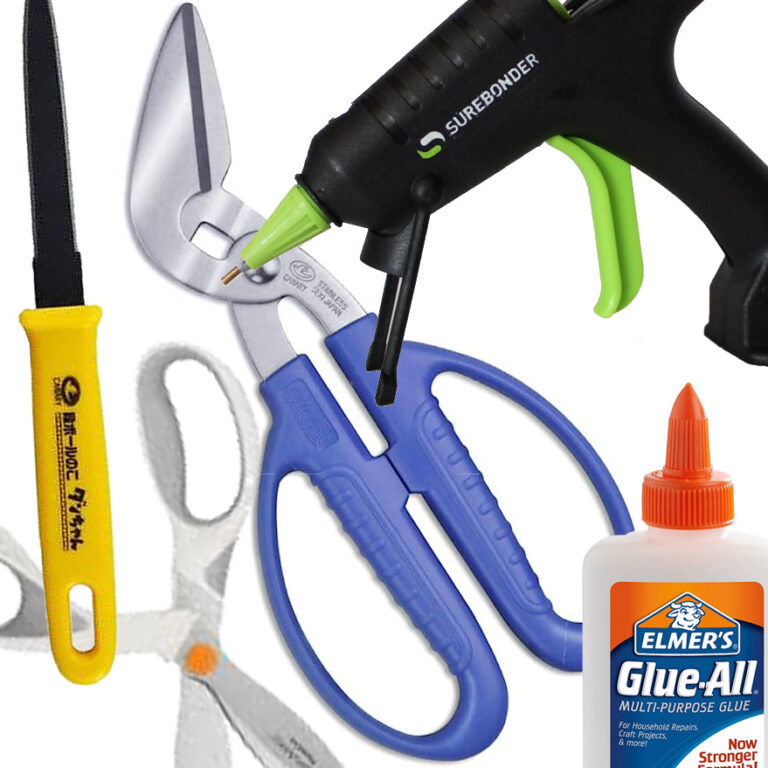
Demonstrate how to use an X-Acto knife.
a. Pull the knife toward your body using your whole arm for the most control. I encourage students to pretend their wrist is broken and they have a cast on their arm.
b. When you get to a turn, don’t turn the blade, turn the paper. The goal is to have the knife always moving in the same direction so you have control.
c. Don’t put anything you value in the path of the blade, especially your body!
Lesson Process
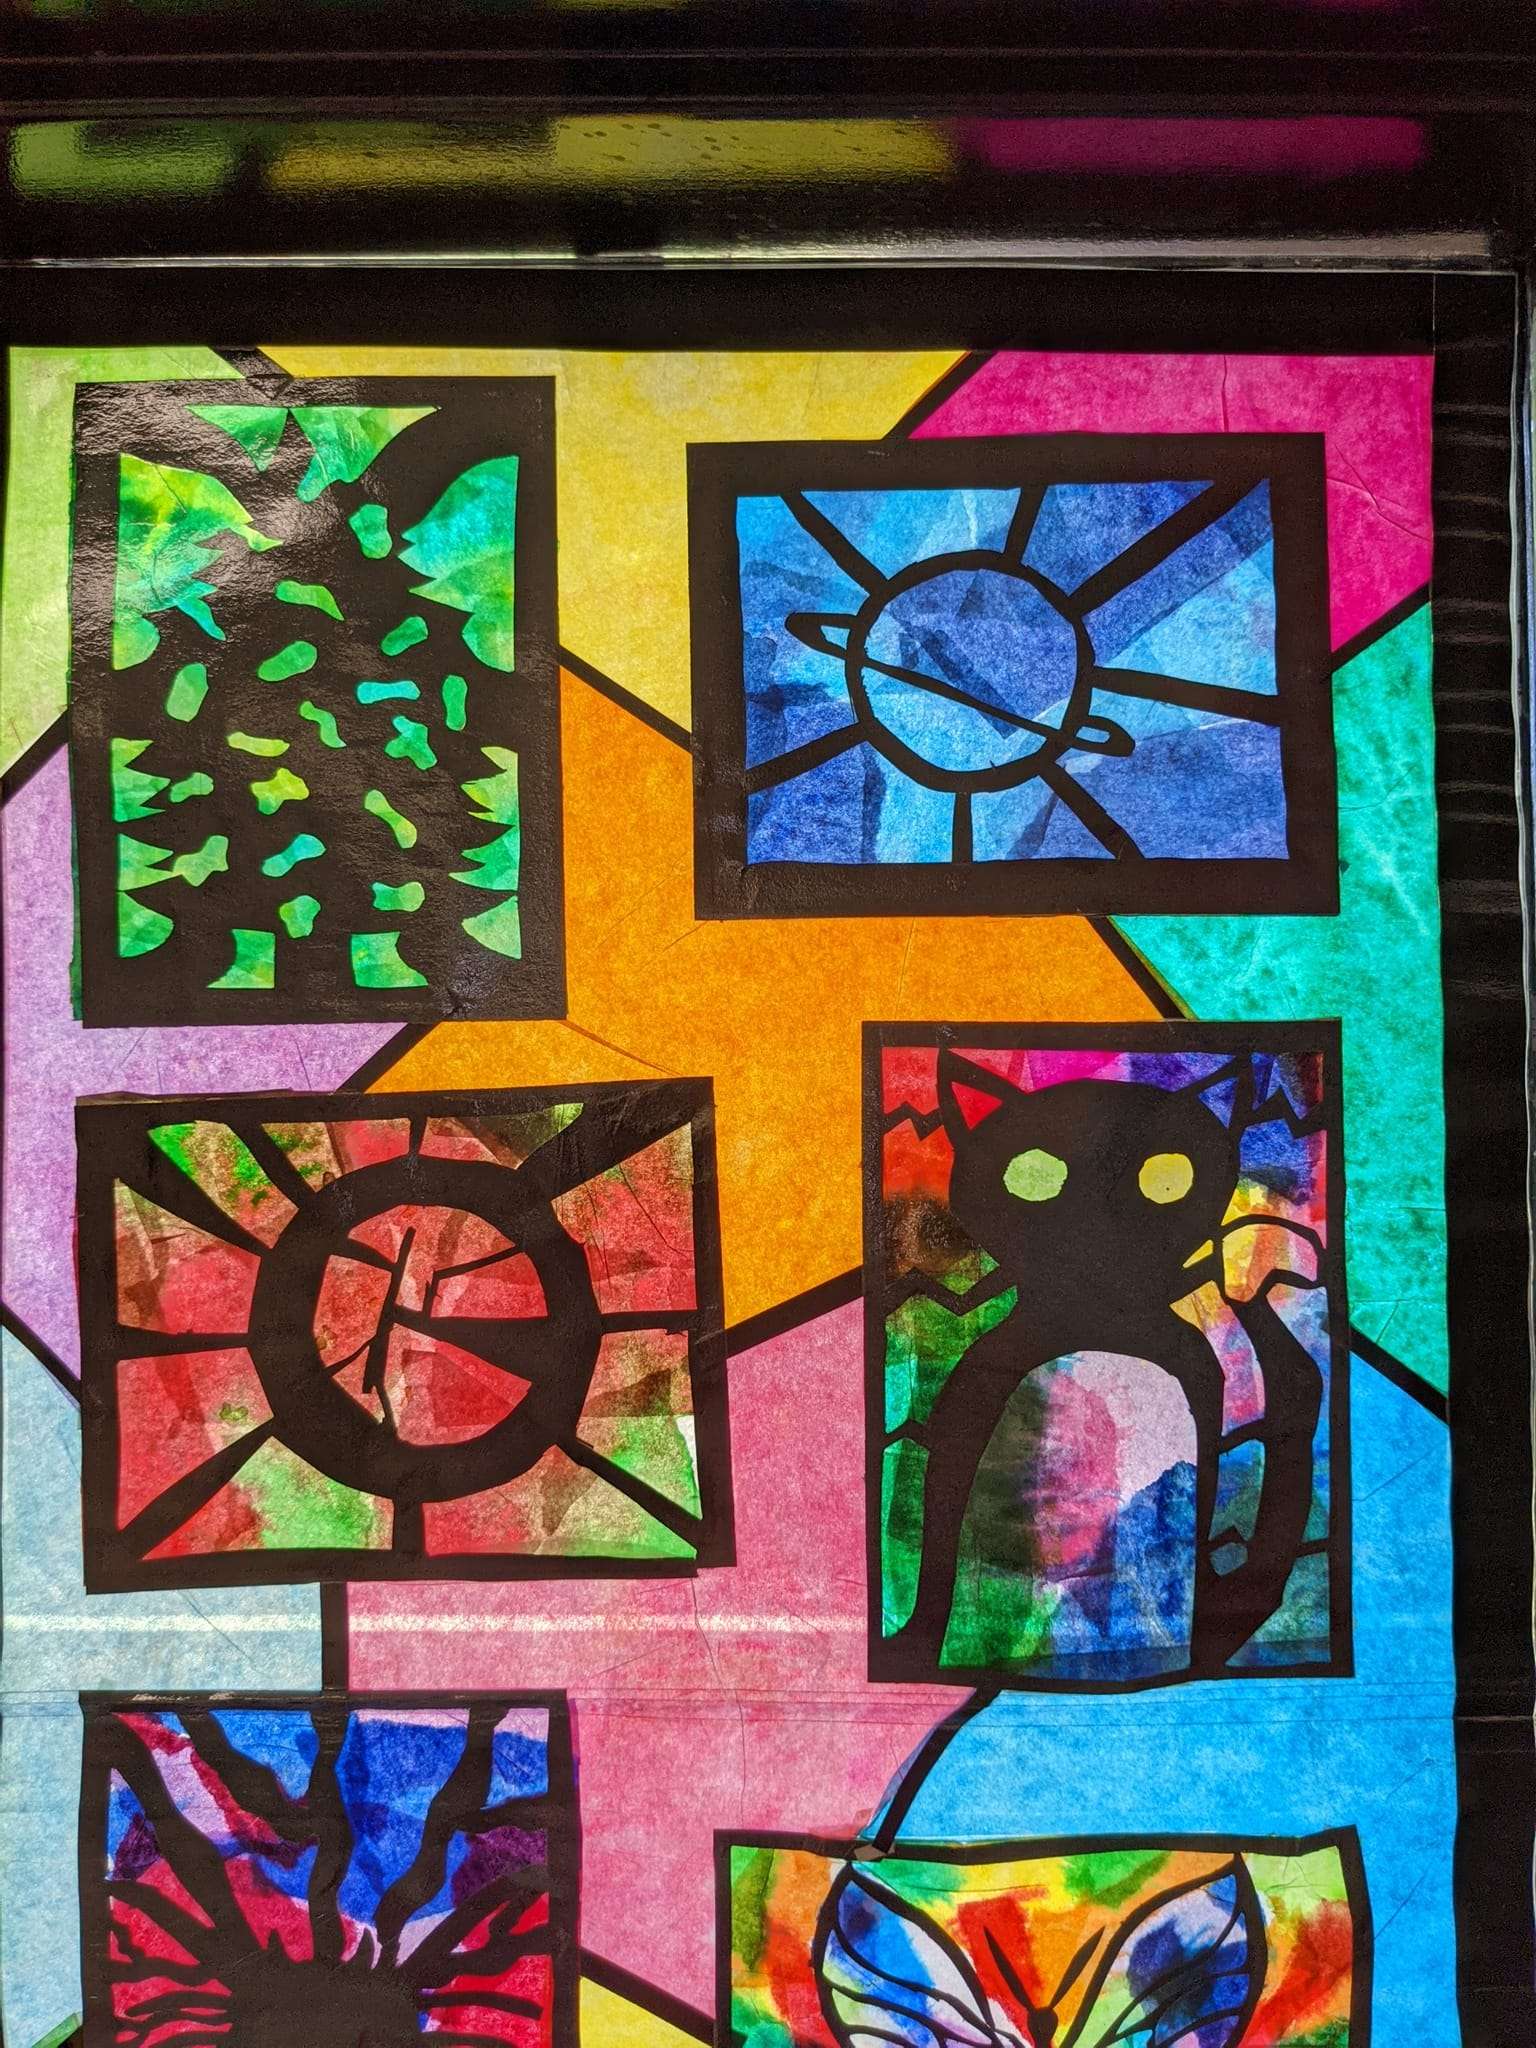
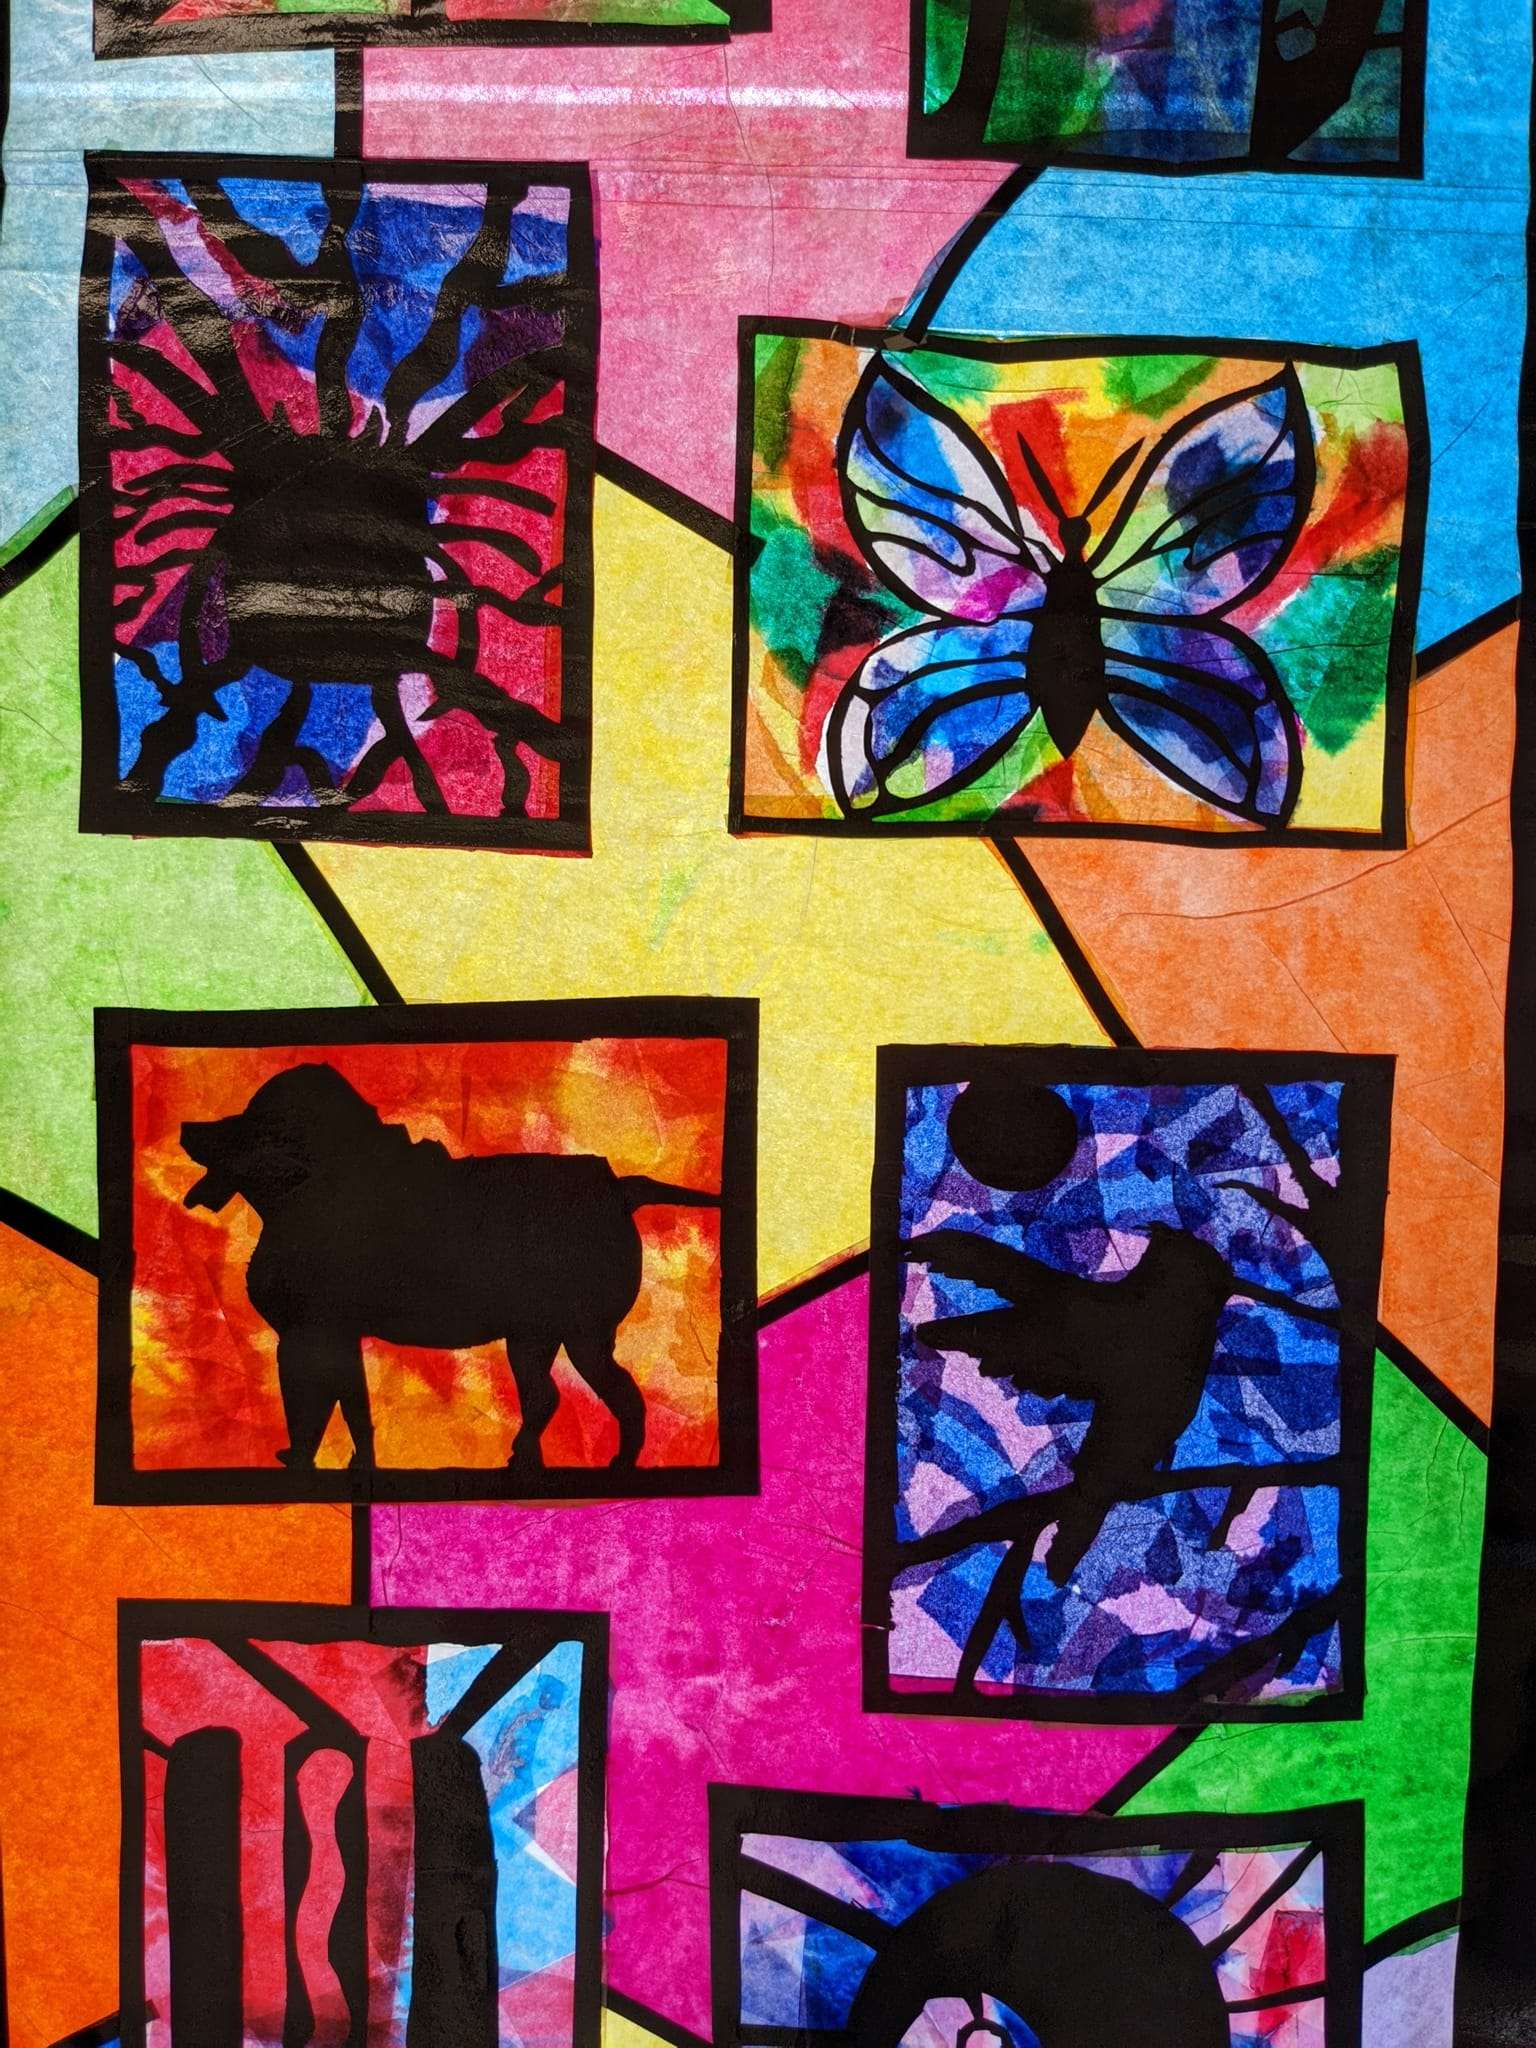
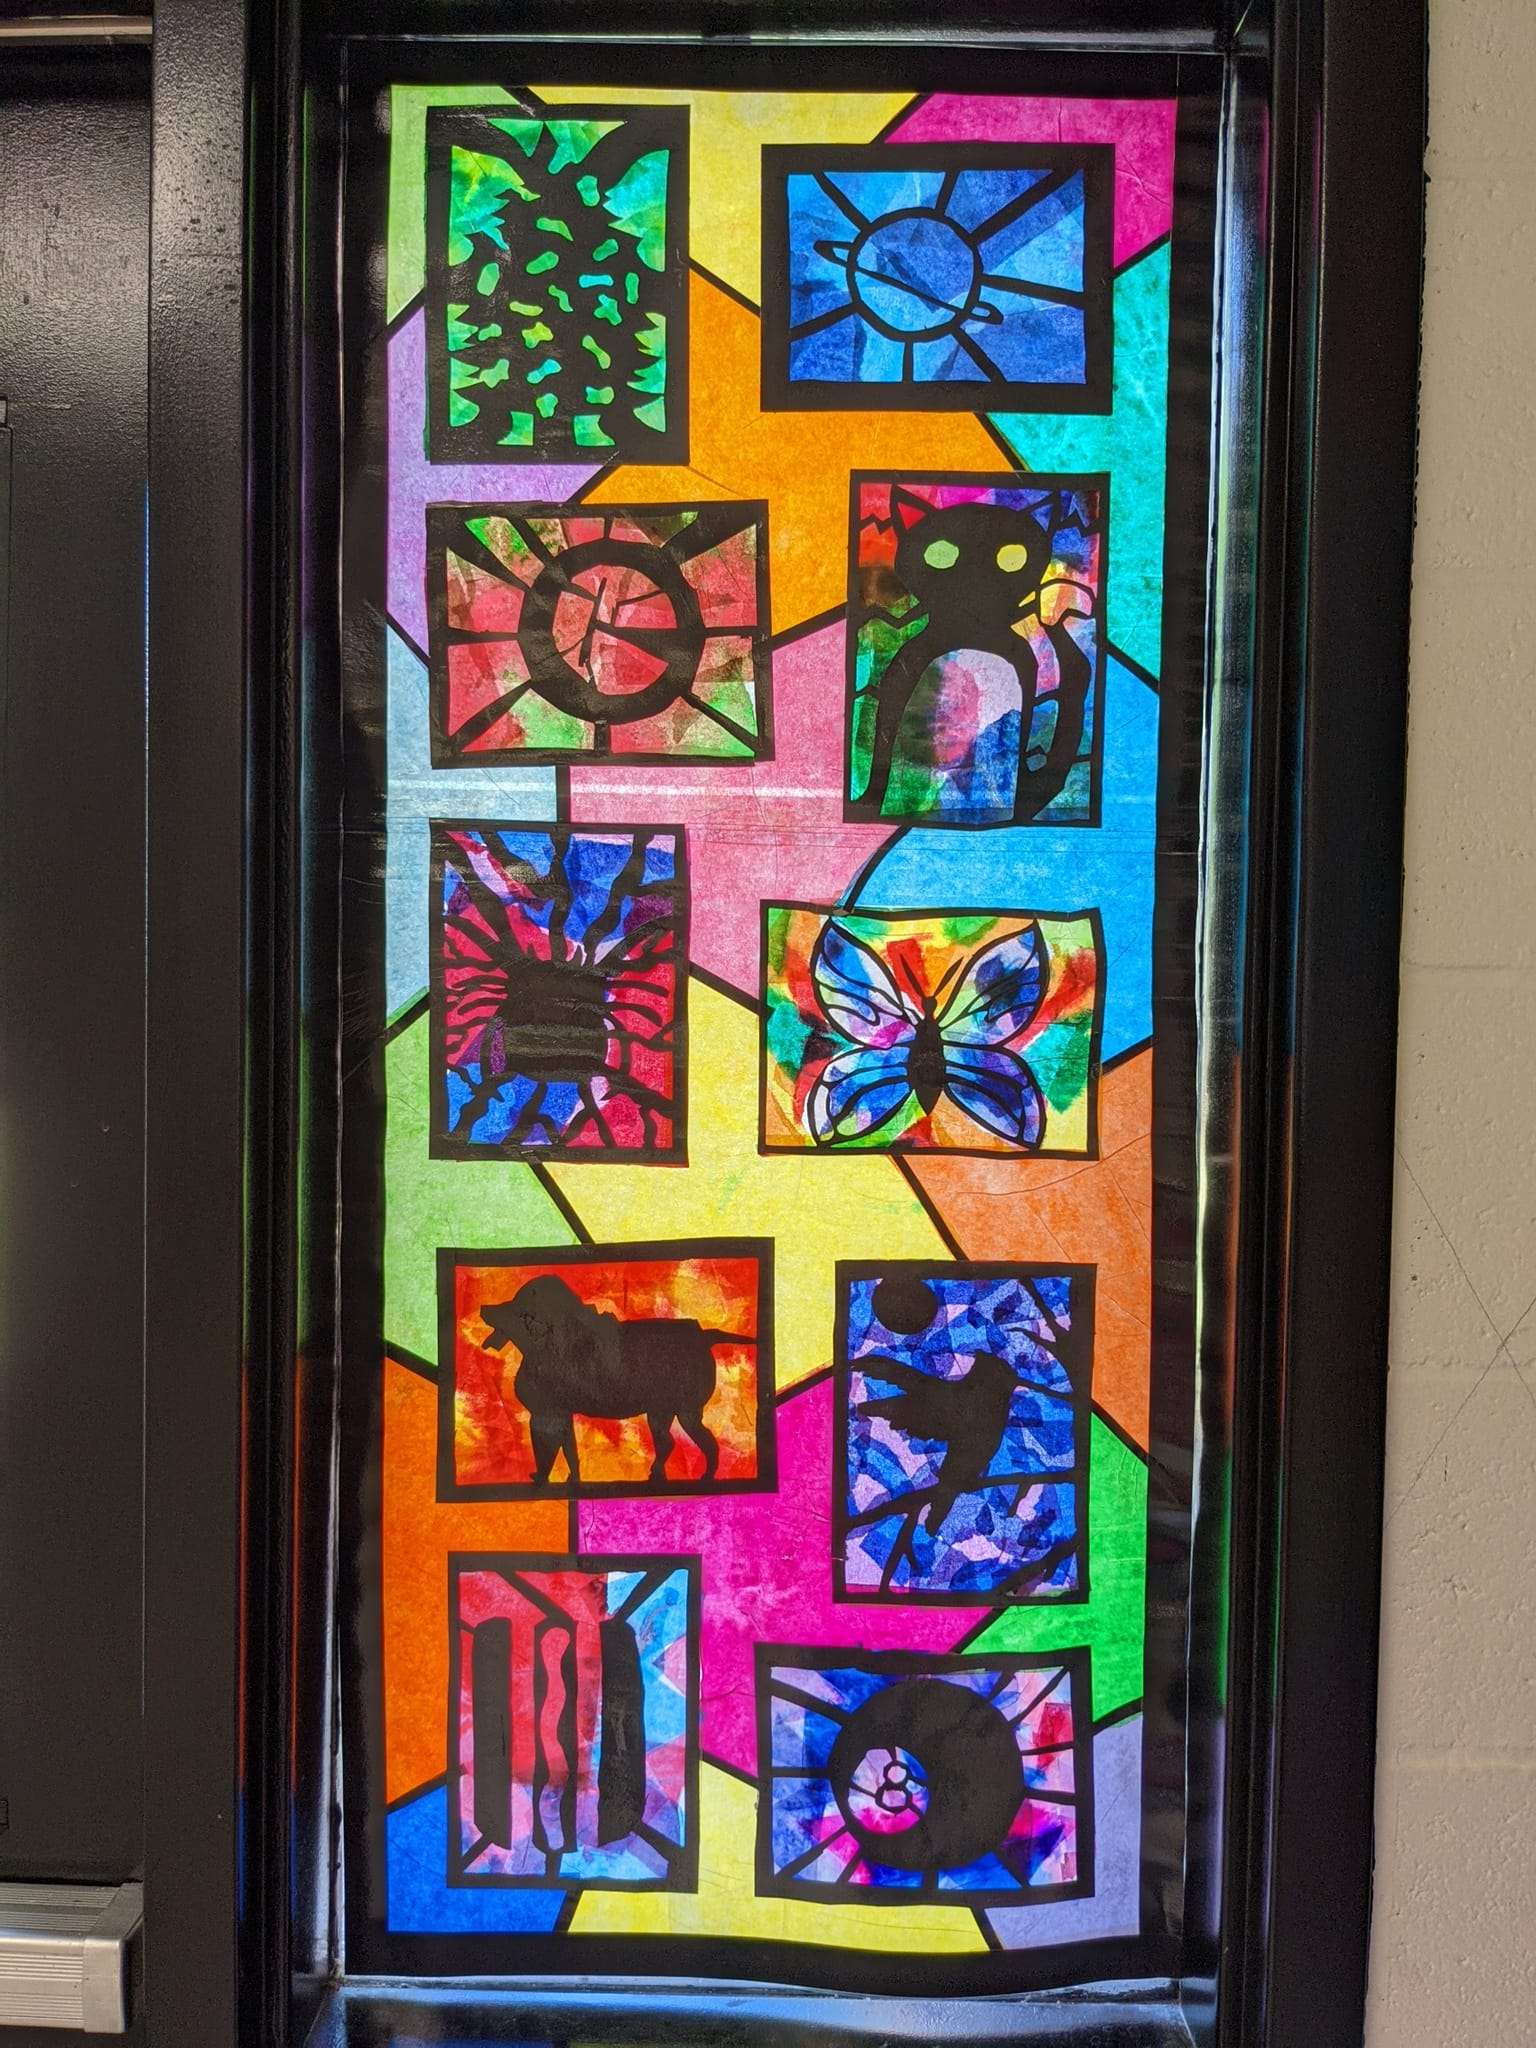
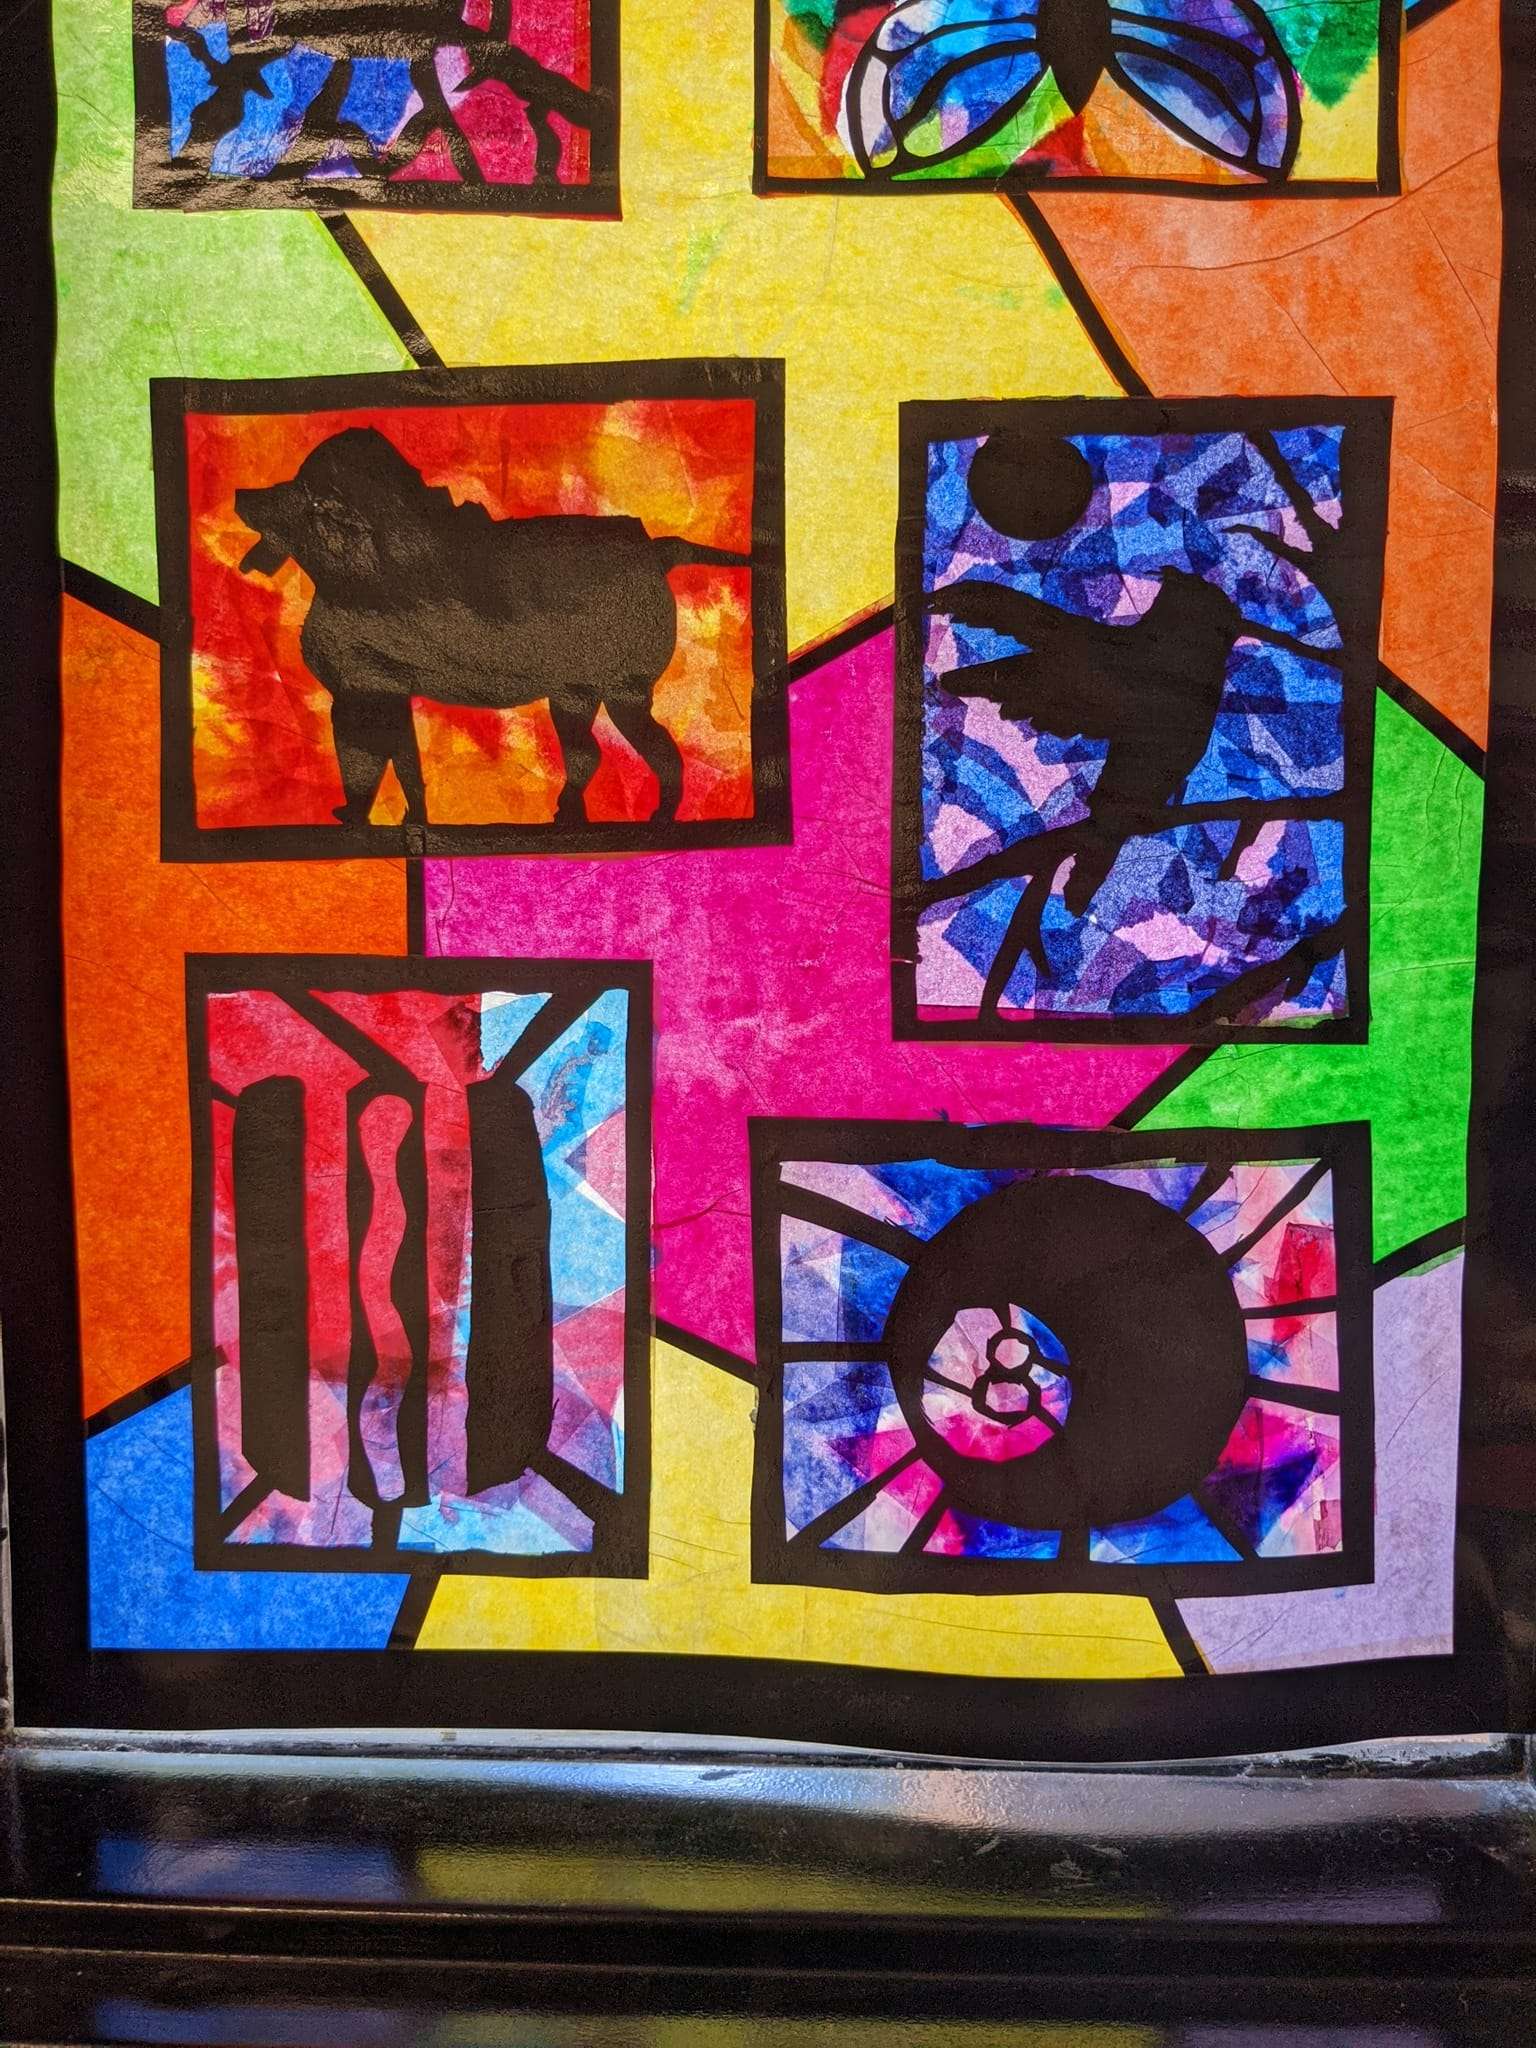
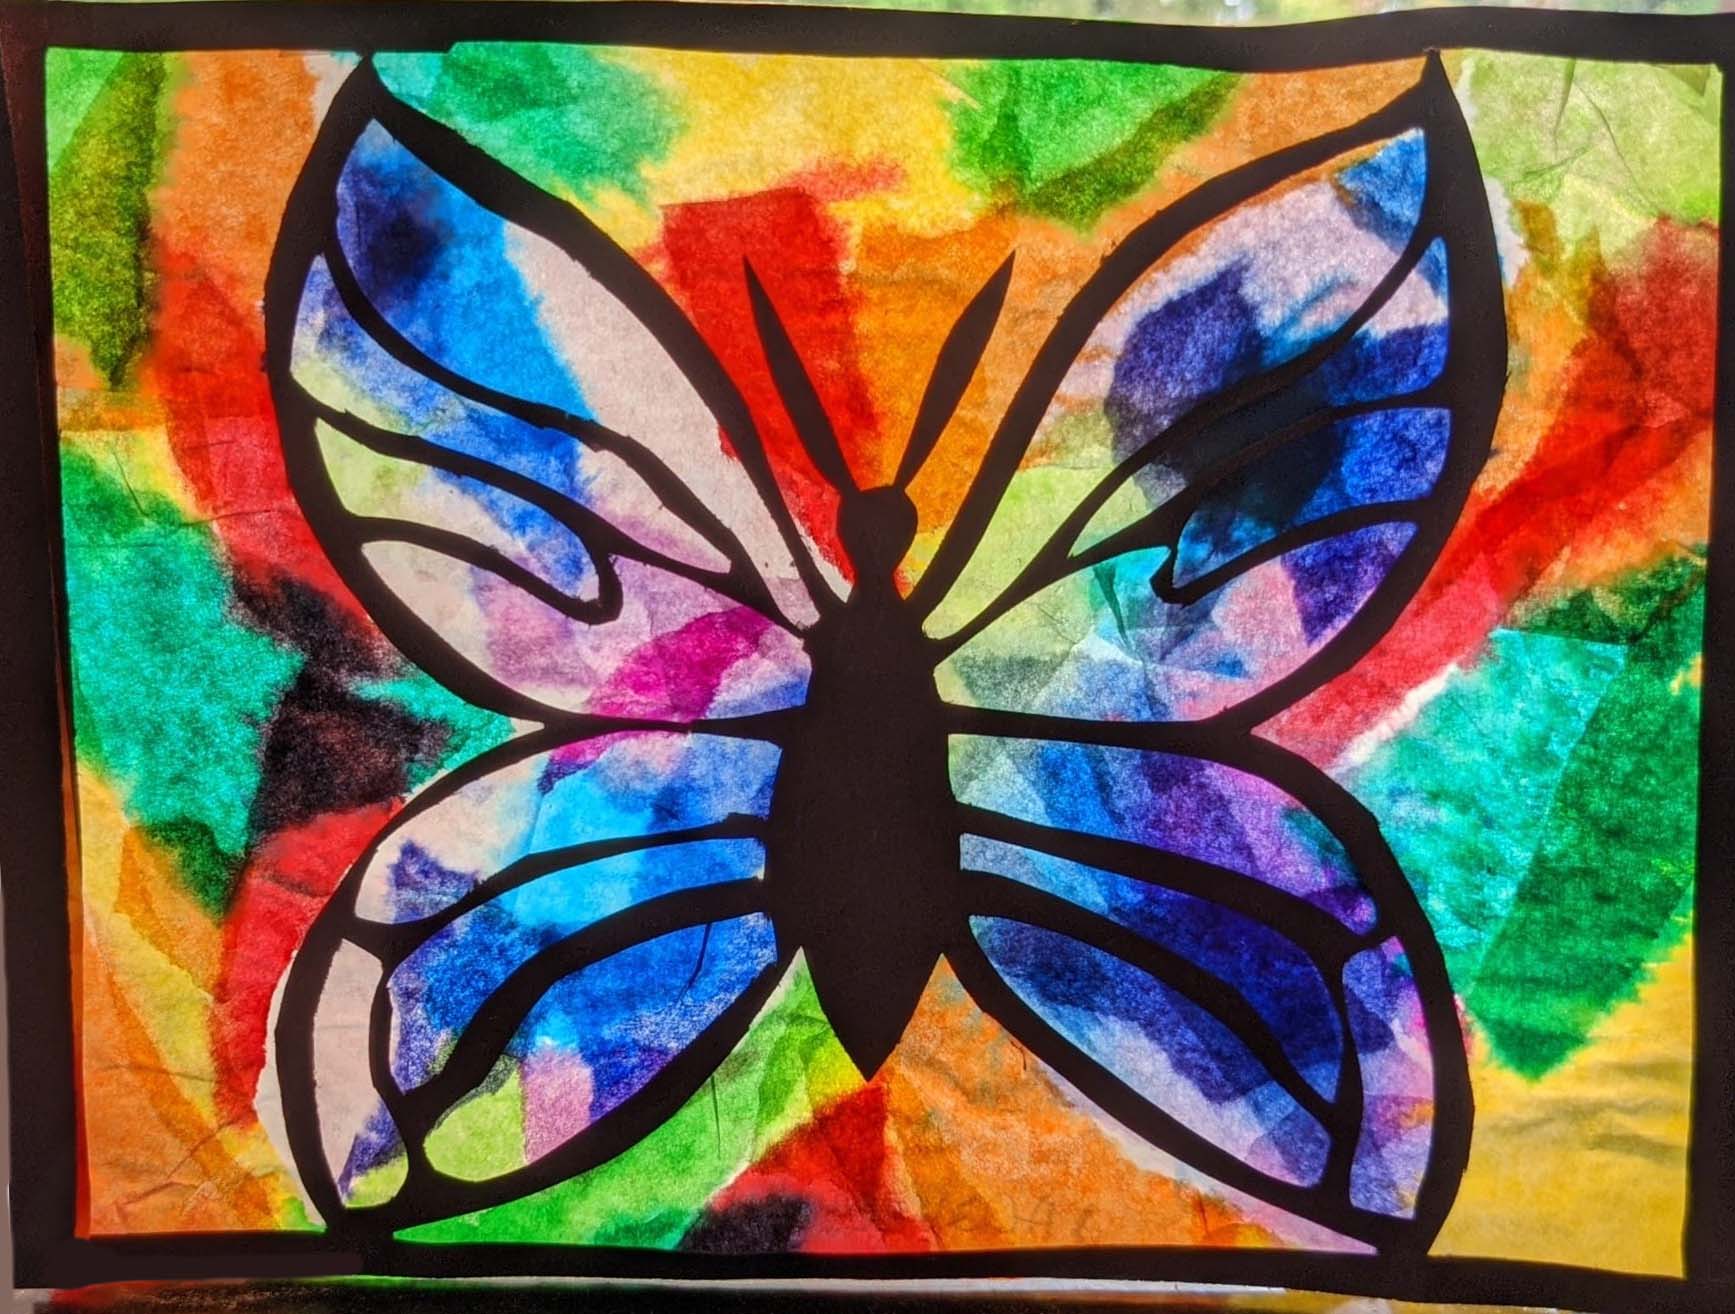
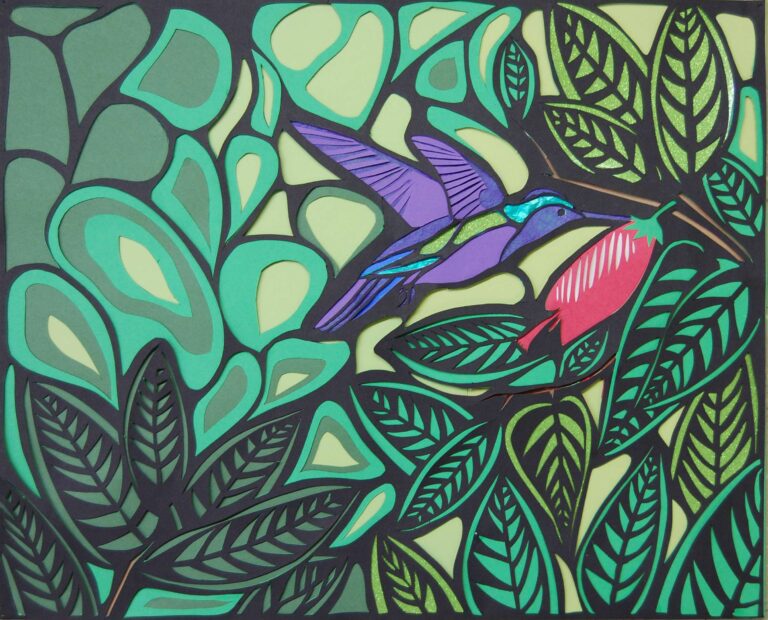
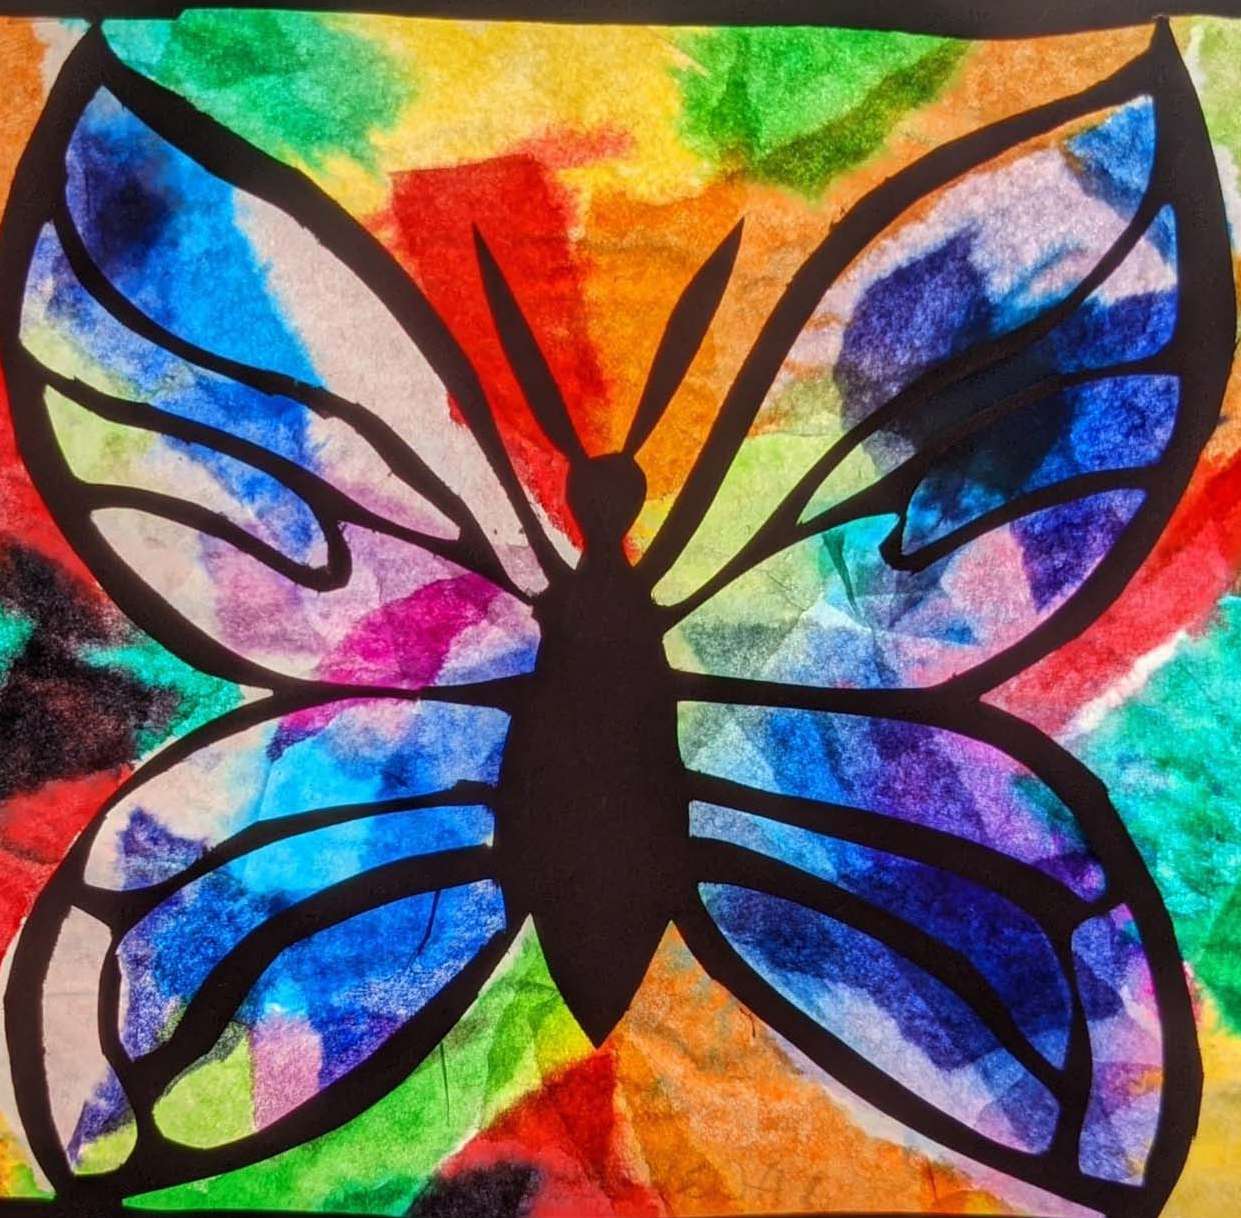
Draw the subject matter on a piece of 5×7 (or whatever size you prefer) black construction paper.
Students have to make sure their images stays connected to the border, so they are only cutting out the negative spaces.
Once the construction paper piece is finished, I give each kid a 5×7 piece of wax paper, glue & water mixture, a paint brush, and color tissue.
Students tear or cut the tissue I into smaller shapes. Paint a layer of glue/water on the wax paper, apply the tissue, paint a layer of glue/water over the tissue.
Attach the construction paper to the tissues wax paper with masking tape.
Vocabulary
shape, transparency, positive shape, negative shape, stained glassResources
Stained glass Facts for Kids (note, content about stained glass in Christian churches)
Stained glass windows – a brief introduction – YouTube (note, content about stained glass in Christian churches)
Author & Website/Blog
Spencer Holland
Supporting Images