Grade Level
9-10Duration
5 class – 45 minutes
Materials
Still life items with interesting shapes/silhouettes, paper, pencil, erasure
For cut paper version: black paper the same size as the white paper, preferably color fast, x-acto knife, surface to cut on
For resist version: white tempera paint, brushes, black indian ink
Media
Drawing, Paper cutting, Other
Lesson Objectives
For the student to:
Become aware of how to observe negative space which will improve their drawing skills
Develop good craftsmanship
Introductory Activity
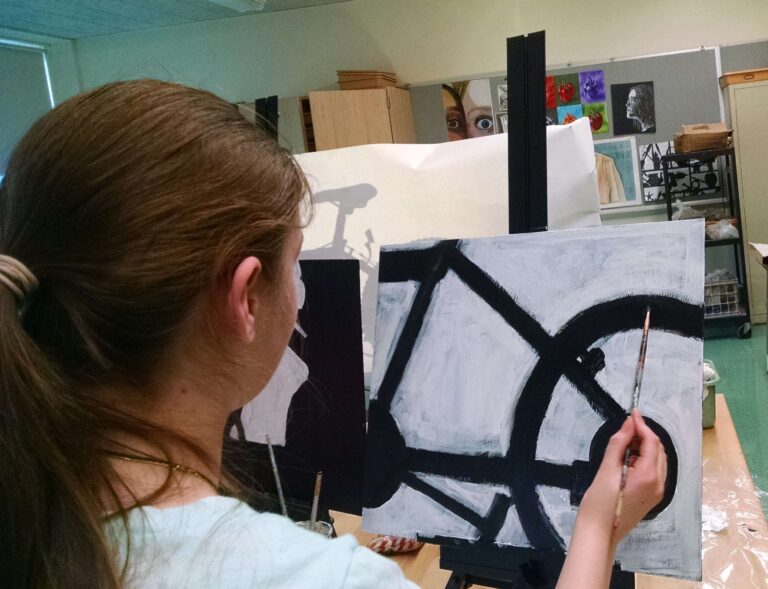
The teacher must set up an interesting still life involving negative space. Using a vertical approach with objects sitting on shelves (possibly use boards and bricks for improvised shelves). Alternatively, I have used a backless curio shelf as well. The closed in openings helps to create a lot of negative space.
Hang a white sheet of paper or cloth in front of the still life and project light from behind the still life (an overhead works very well as does a slide projector- all old technologies that a school might have in storage).
With the class, the teacher should define what the negative space is and the importance of noticing this space while drawing
I start with having the class draw a simple object, like a scissors. If I didn’t have enough scissors for everyone, I photocopy one. We talk about what the shape of the internal negative space looks like. When they have a grasp, it’s time to move to the still life.
Lesson Process
This still life grew out of Betty Edward’s Drawing on the Right Side of the brain. A colleague did a still life and I thought to myself, how can I emphasize the negative spaces even more for them and came up with simplifying it use the light and sheet.
Before starting the still life, I present a few rules and suggestions. Students must draw the still life accurately to the still life set up. They can’t pick and choose the items they prefer to draw. Student will be graded on how accurate the drawing is to real life. Students should think about the size they draw. The must have a set number of objects
(teacher determined) in their drawing and must fill their drawing page fully. If a student draws small, they may end up drawing a lot of the still life. Some students may be up to that, others will struggle a little or a lot. For a student who finds negative space challenging, I suggest drawing large and so the still life isn’t exceedingly complex for them. With pencil and paper, the students should draw the negative space in the still life. until they have completed the drawing. This should take one to two class periods. I encourage a lot of erasing and adjusting. Some students may opt to trace on to a clean sheet at the end.
Over the years I have two methods I have used for students to complete the drawing:
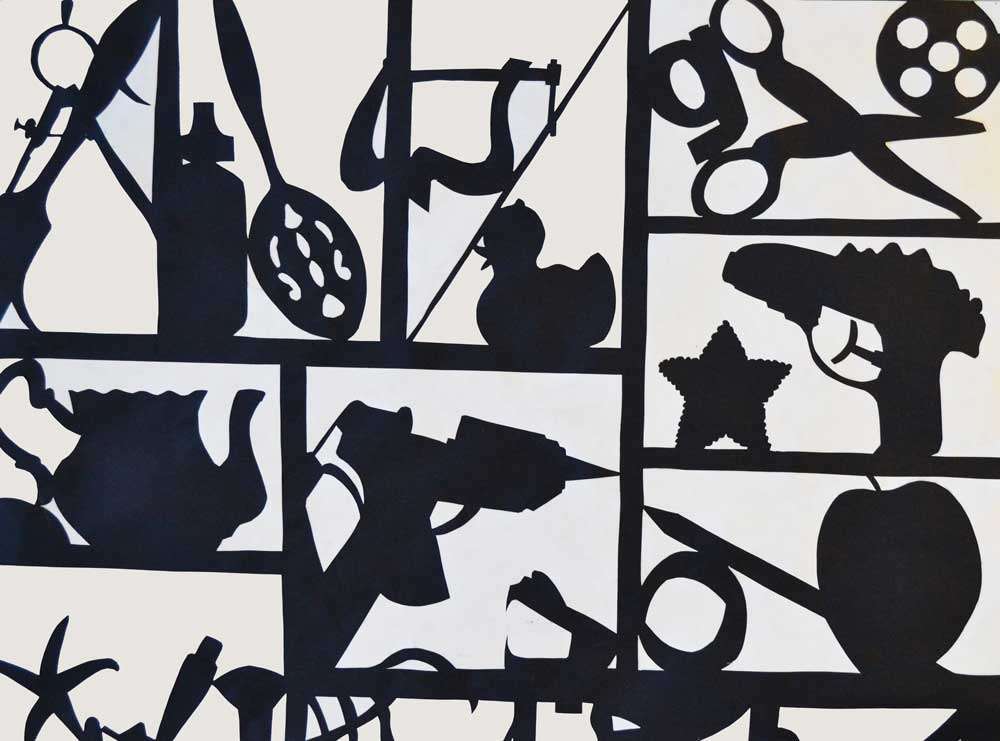
FOR THE CUT PAPER VERSION: Prep students for how to use an x-acto knife safely. Using scissors and/or an Exacto knife, students should then cut out the negative space and glue it in place on a black sheet of paper. Have students cut a negative space out by laying the white paper on top of the black and gluing the negative space where it lines up. Glue sticks work well. If using white liquid glue, demo how to apply paint in moderation neatly. This should take two to three class periods.
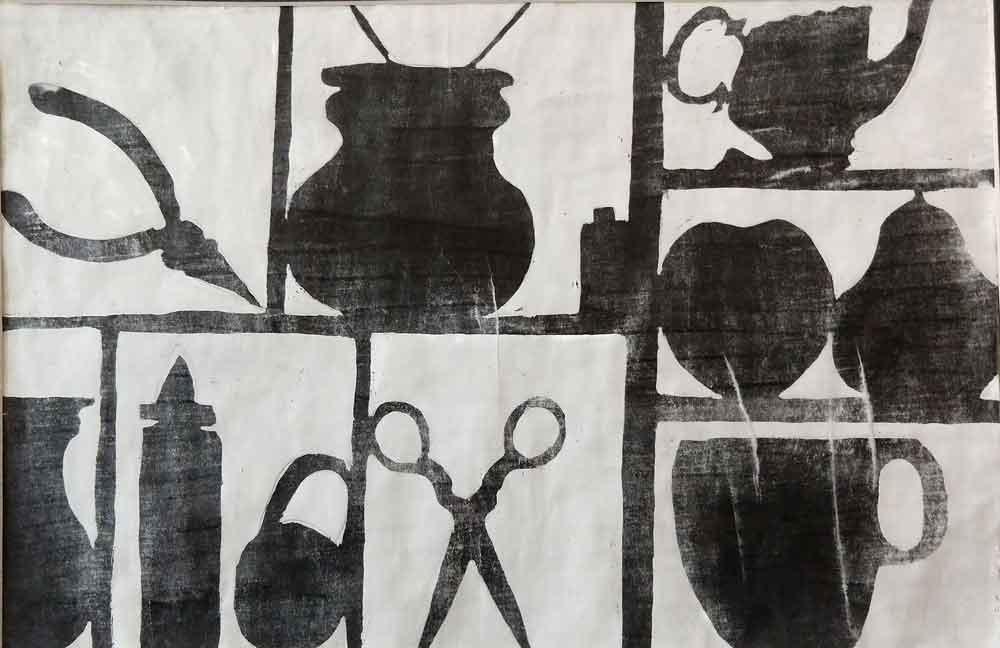
FOR THE RESIST METHOD: students will paint the negative spaces in their still life with white tempera paint. It must be tempera as it is water soluble. After the paint dries, coat with two coats of indian ink. Allow to dry overnight then place the work onto a board or piece of plexi glass and rinse off. A hose attachment to the faucet works really well. Students use a brush to gently agitate the tempera paint areas which will start dissolving and negative spaces start appearing. Allow to dry and press with an iron to flatten the paper.
*The resist method works better with some types of paint/ink combinations. This requires some teacher preparation and experimentation. Even then, I found it to be a bit fickle and occasionally the ink resistant to coming off while other times it works perfectly. It seem to be more stubborn if the ink applied and several days went by before washing the ink off.
Vocabulary
negative space, positive space, silhouetteResources
Betty Edward’s Drawing on the Right Side of the Brain
An introduction to Negative Drawing with Mike Sibley
Draw Tip Tuesday – How To: Negative Spaces – YouTube
Author & Website/Blog
Supporting Images