Grade Level
7-8, 9-10, 11-12Duration
two week project to build two of them. (90 minute block classes)
Materials
3 to 4 pounds of clay
Needle Tool
A tool for scoring
Ribbon Tools
Wooden carving tools
A bag to store your clay
A bag to store your work.
Slip or Vinegar
Sketches what you are going to create
Media
Clay
Lesson Objectives
Learning Targets:
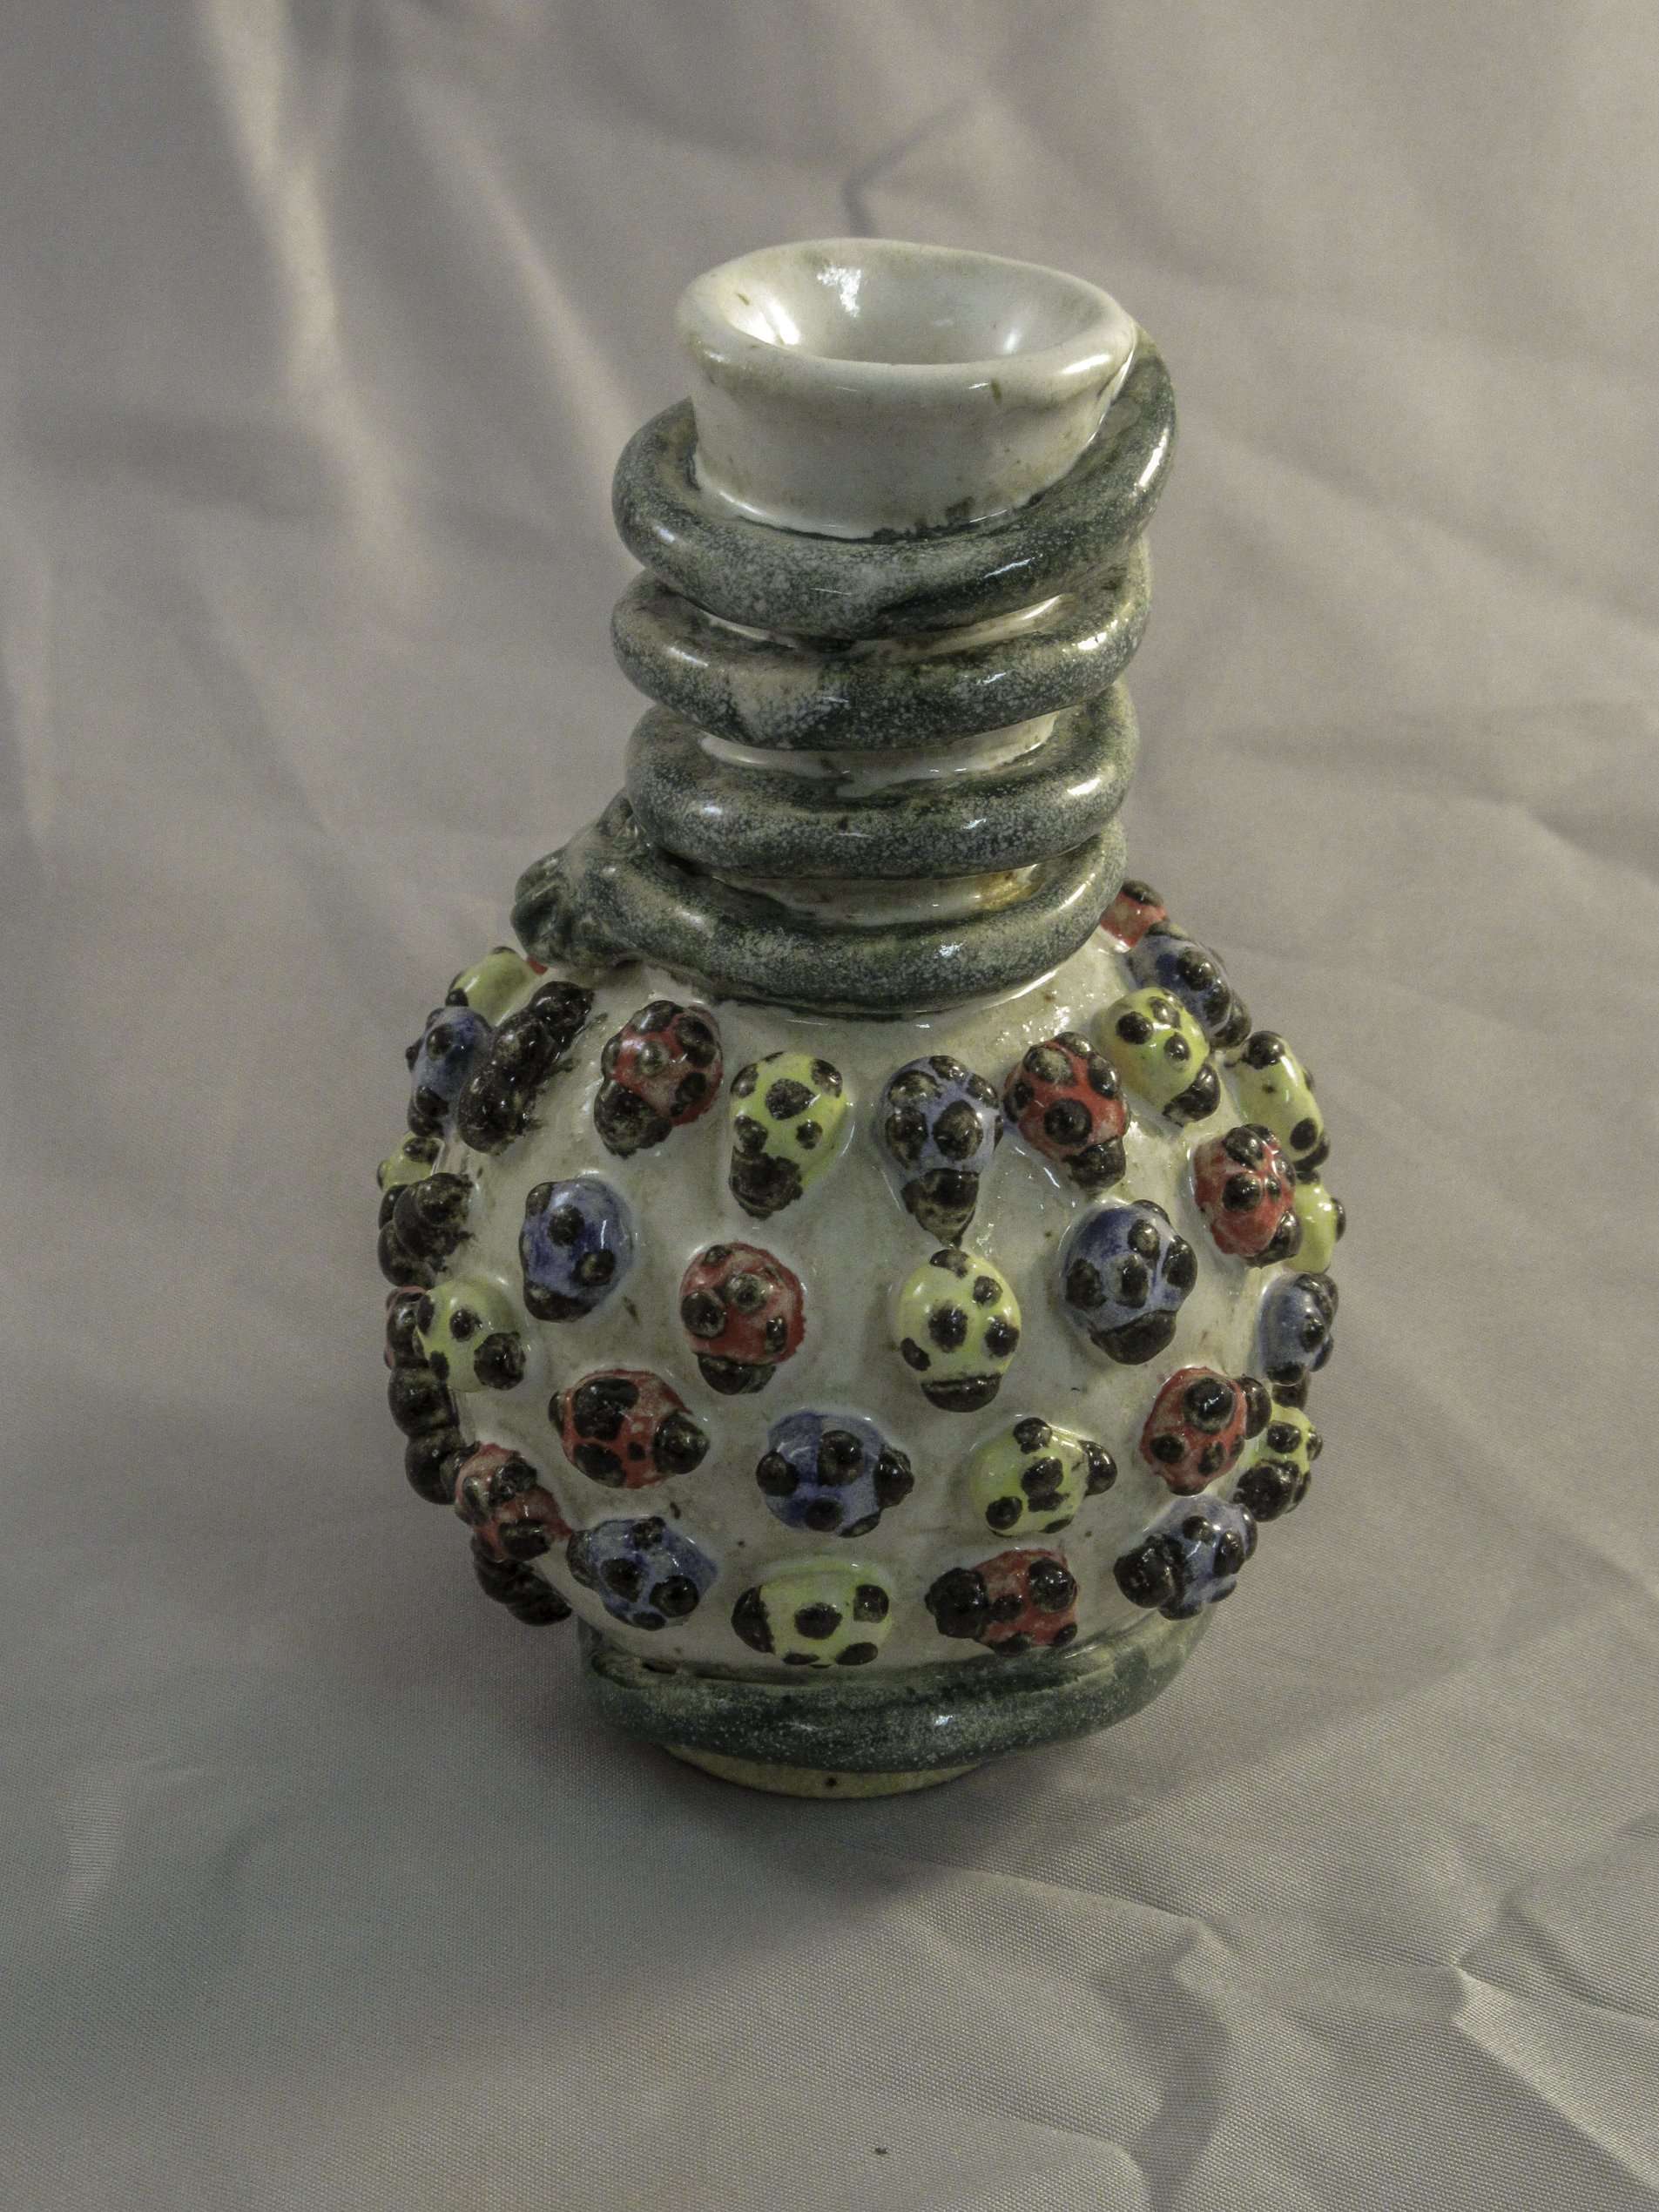
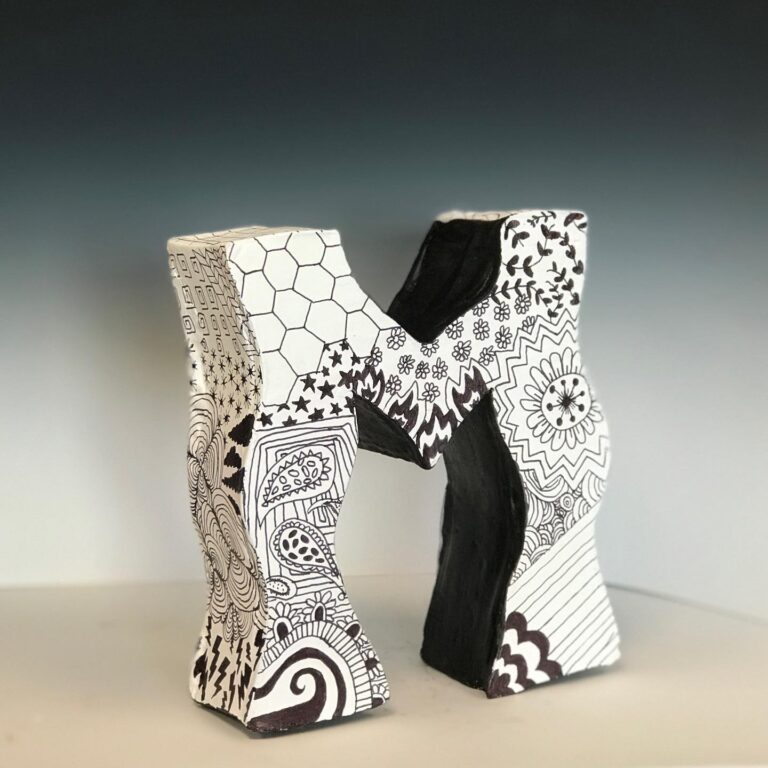
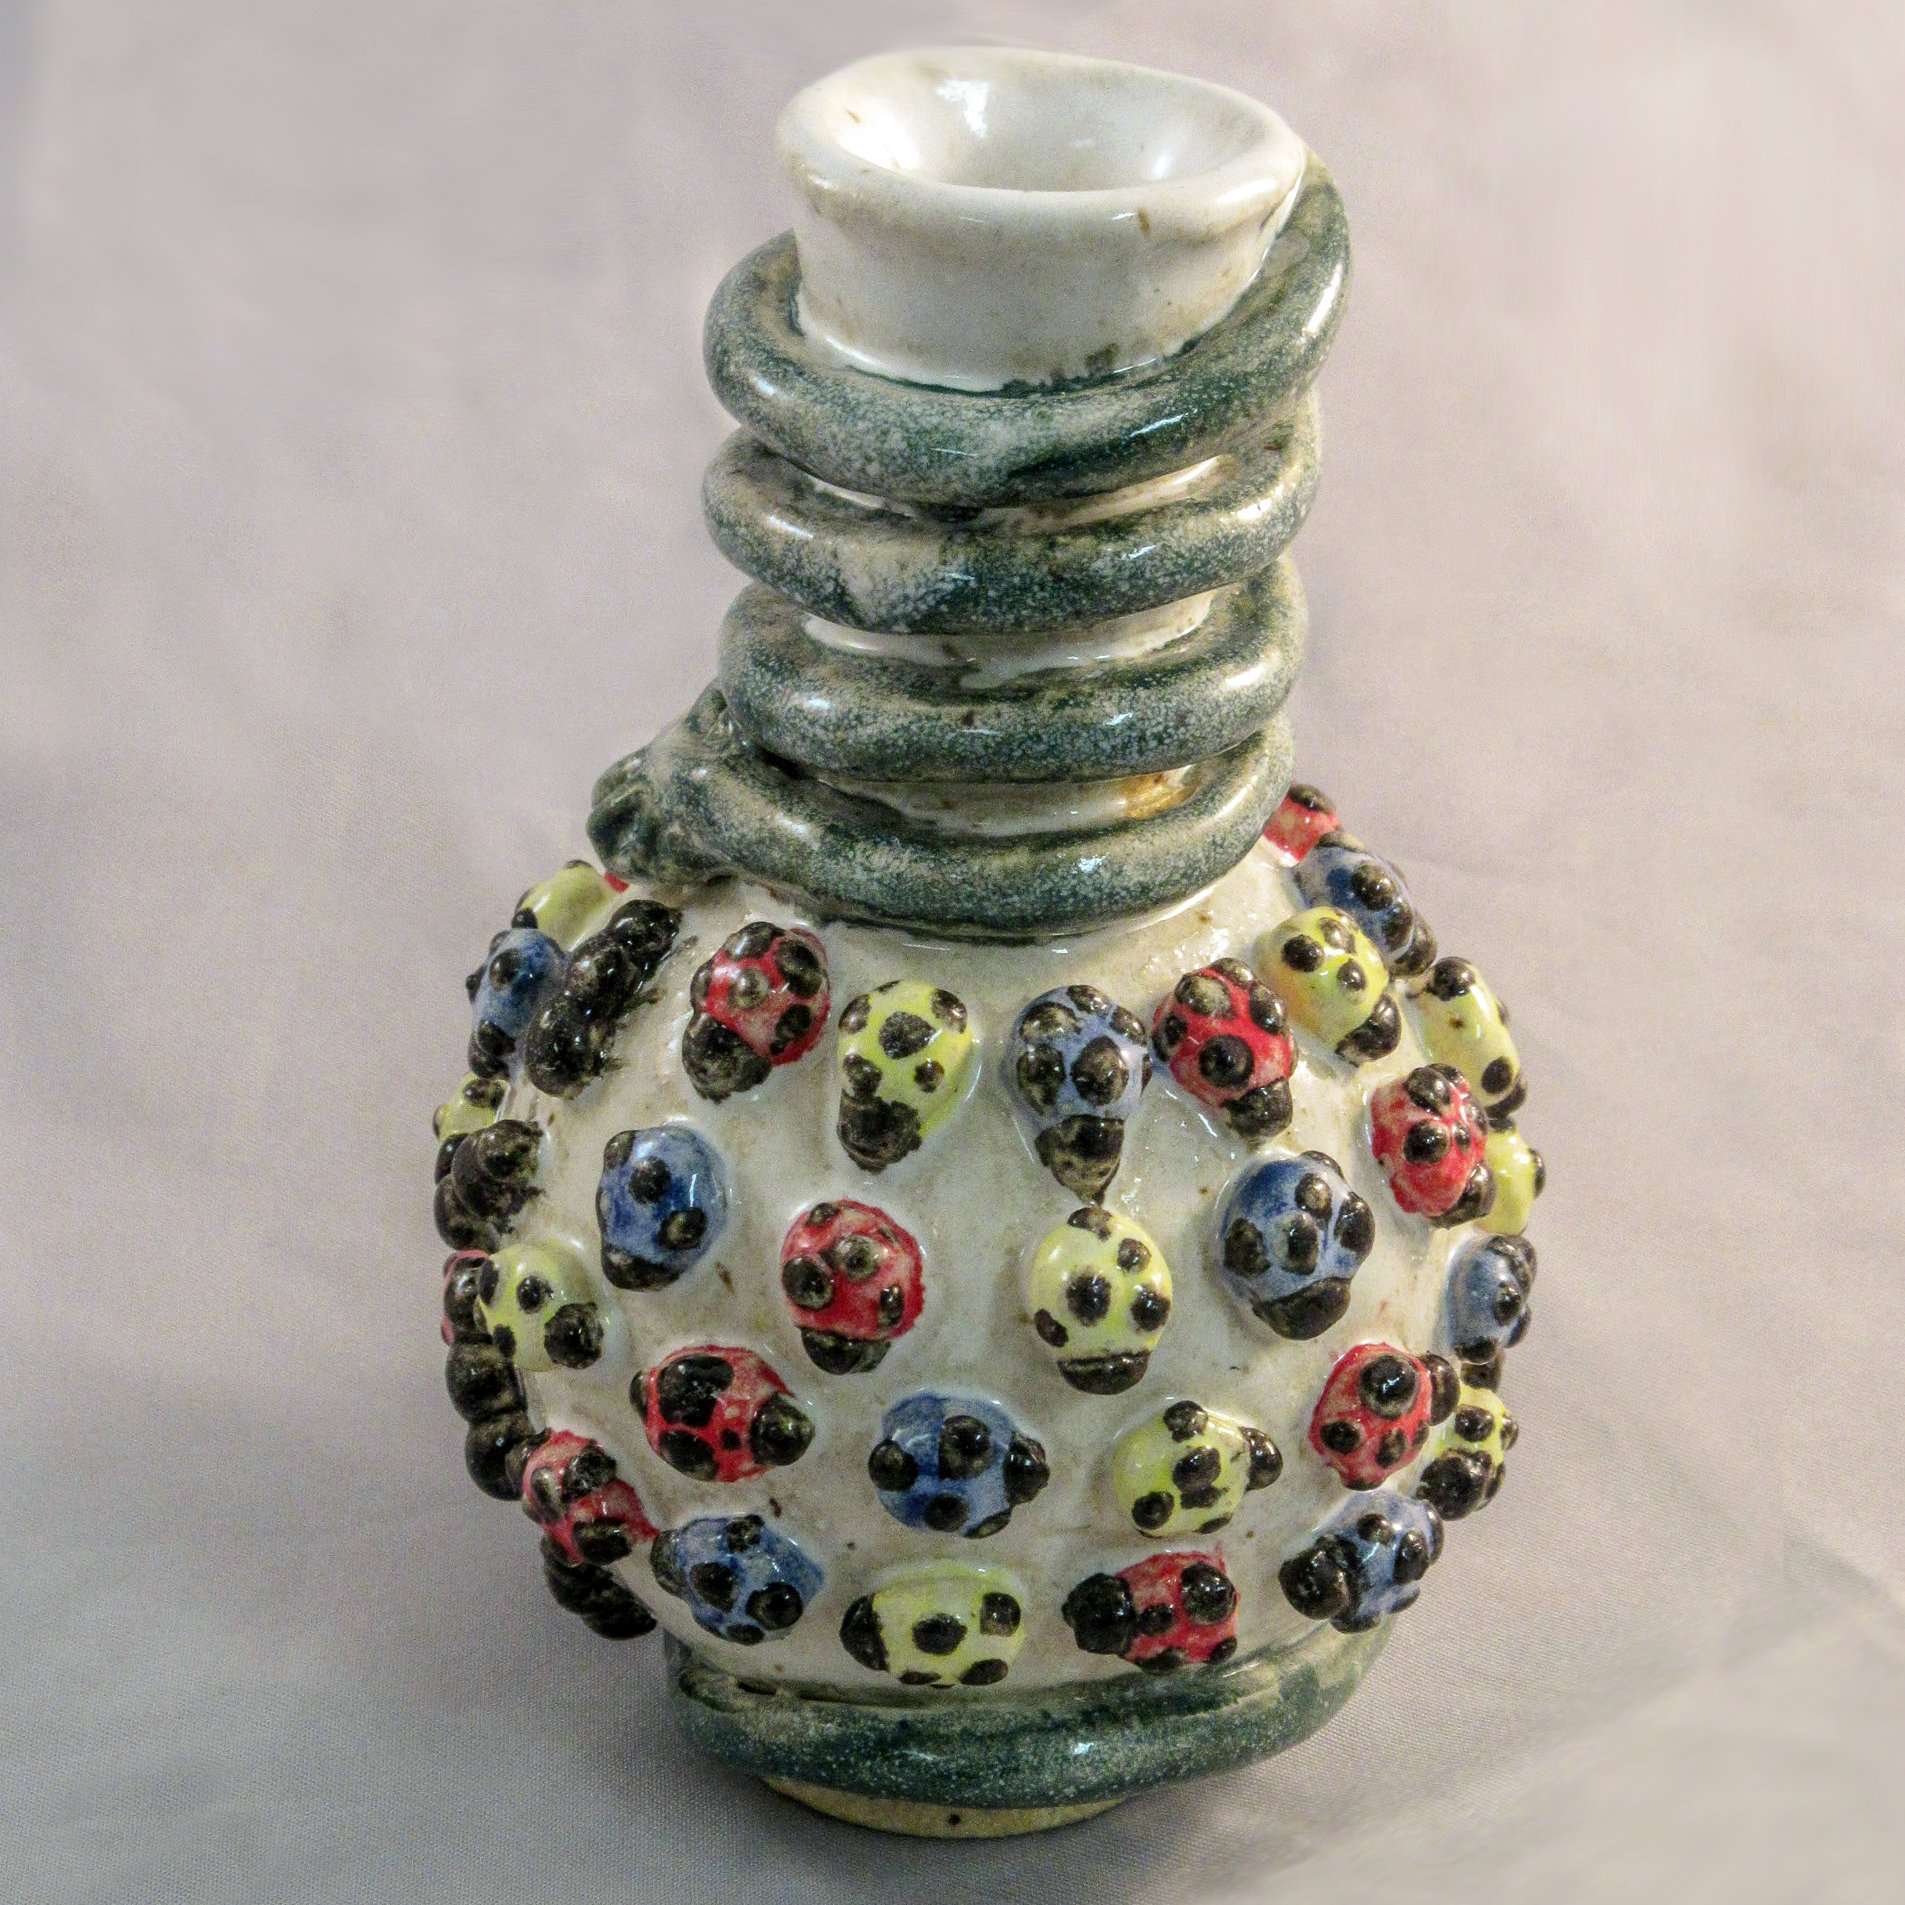
What: Create a vase and bottle using the pinch a coil technique. Each must have a design on them.
Why: That is up to you. What is your why
Success Will Look Like: A completed Vase and Bottle that are 2 inches wide by 5 inches tall. Each will include all a parts of a vase. Both items will have either a incising or applique design covering the whole body of each artistic piece
Introductory Activity
Go over the Problems with the Pinch method. Here is a link to the process: The Problems with The pinch
Once done with that explain the process for building the vase and bottle. Use the videos in the presentations
Lesson Process
Make one Pinch Vase and one Pinch Bottle using the pinch and coil technique
Each will be at least 5 inches tall and 2 inches wide. (Do not make them too big)
Incorporate all “Parts of the pot” (Lip, Neck, Shoulder, body, foot.)
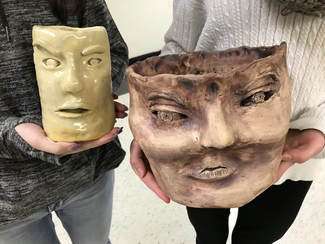
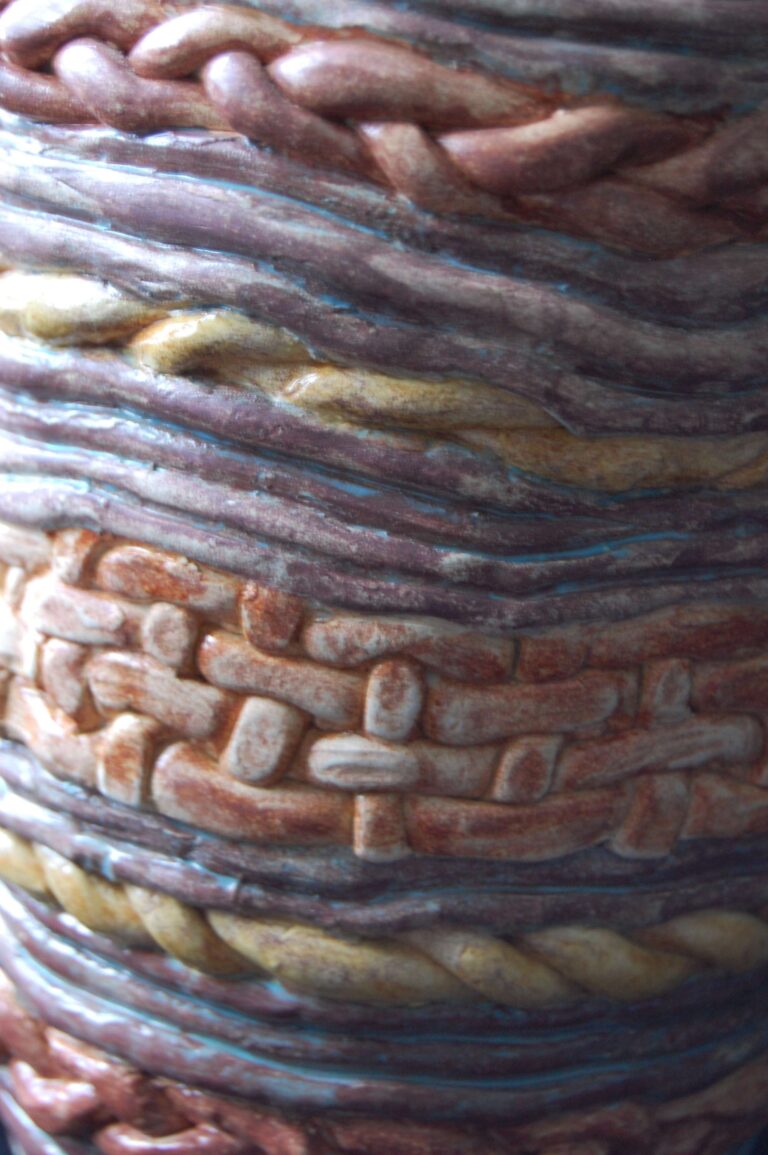
One Vase should have an Incising design and the other vase should have an Applique design
Make sure the designs are abstract (No names or other clichés: Happy faces, heart, fish, etc.) you can use your found objects as well. It needs cover the whole body of the the vase.
Identify your piece with name and period # on the bottom of each. NO PROJECT WILL BE GRADED WITHOUT IT (Mark the bottom of the base with your personal chop if possible).
Vocabulary
slip, applique, incising, scoring, pinch potResources
Frank Eager
The Problems with The pinch
Author & Website/Blog
Supporting Images