Grade Level
9-10, taught in an Art I class at the HS levelDuration
3-5 weeks with 4.5-7 hours of art in a week in a block schedule
Materials
black ballpoint pens or fine-tip Sharpies, quality colored pencils (Prismacolor was used for this project), large drawing paper
Media
India Ink, Color pencils
Lesson Objectives
The student will…
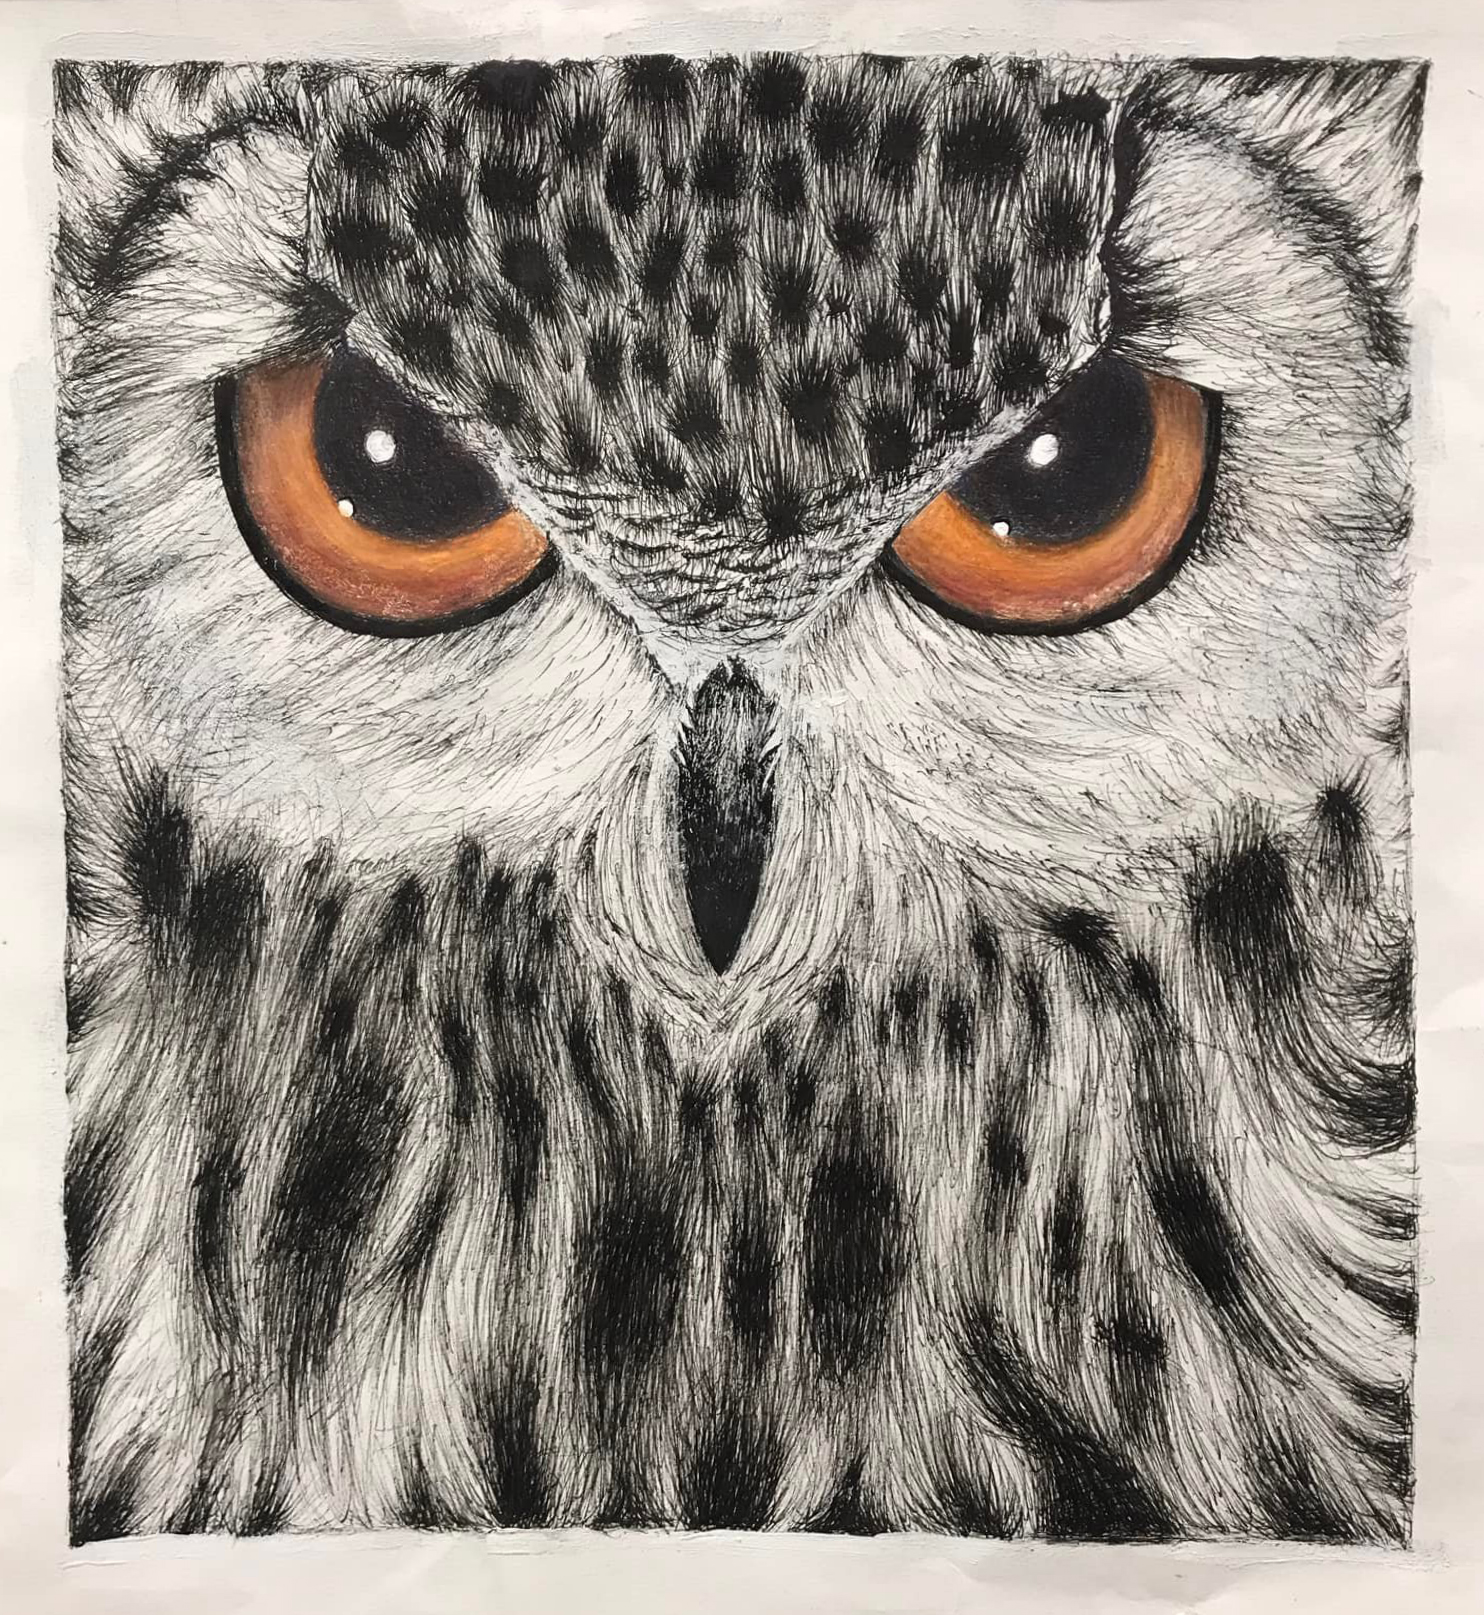
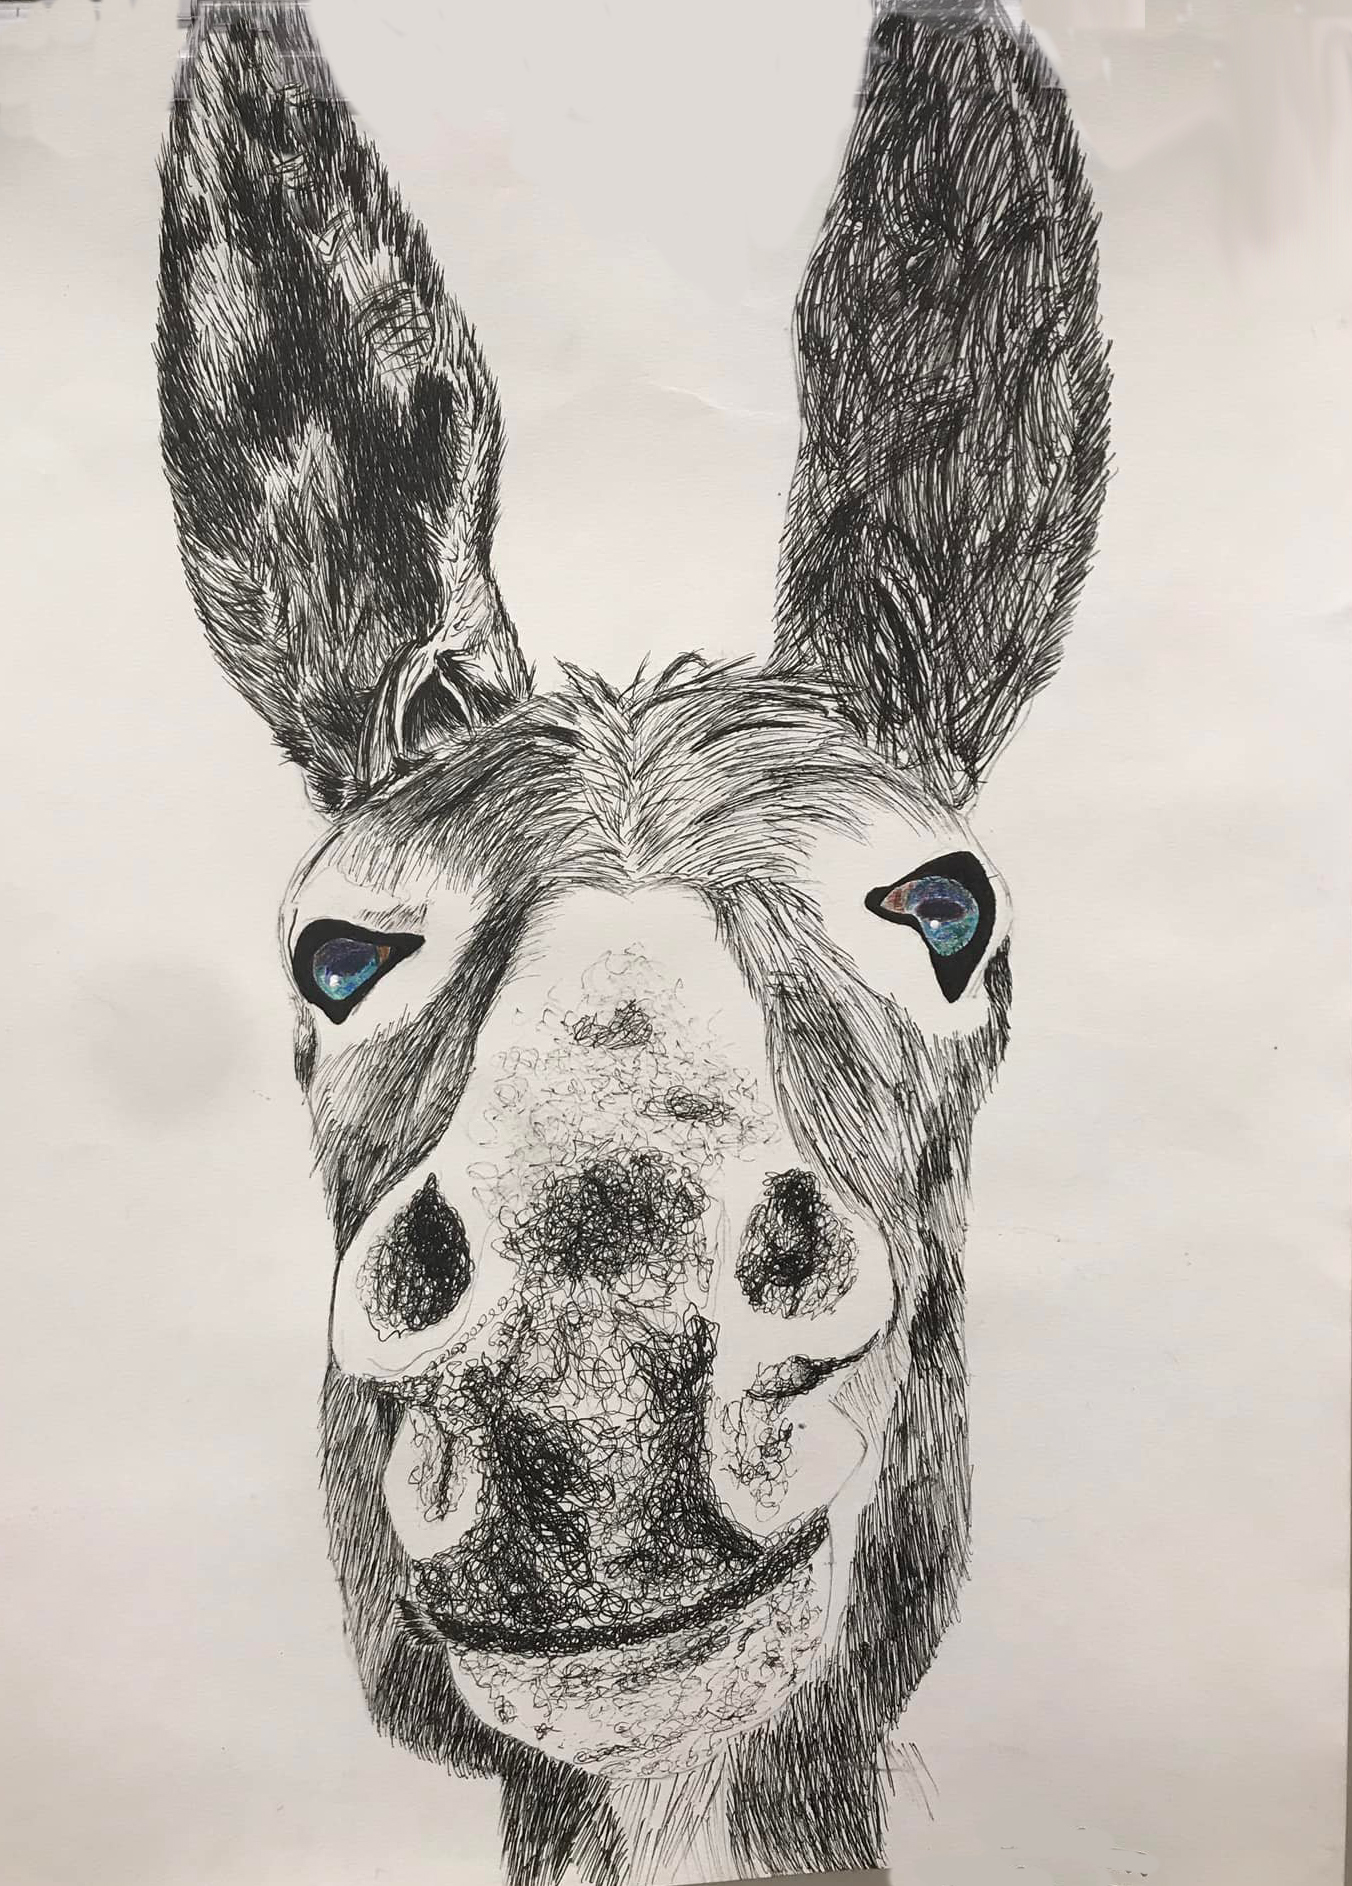
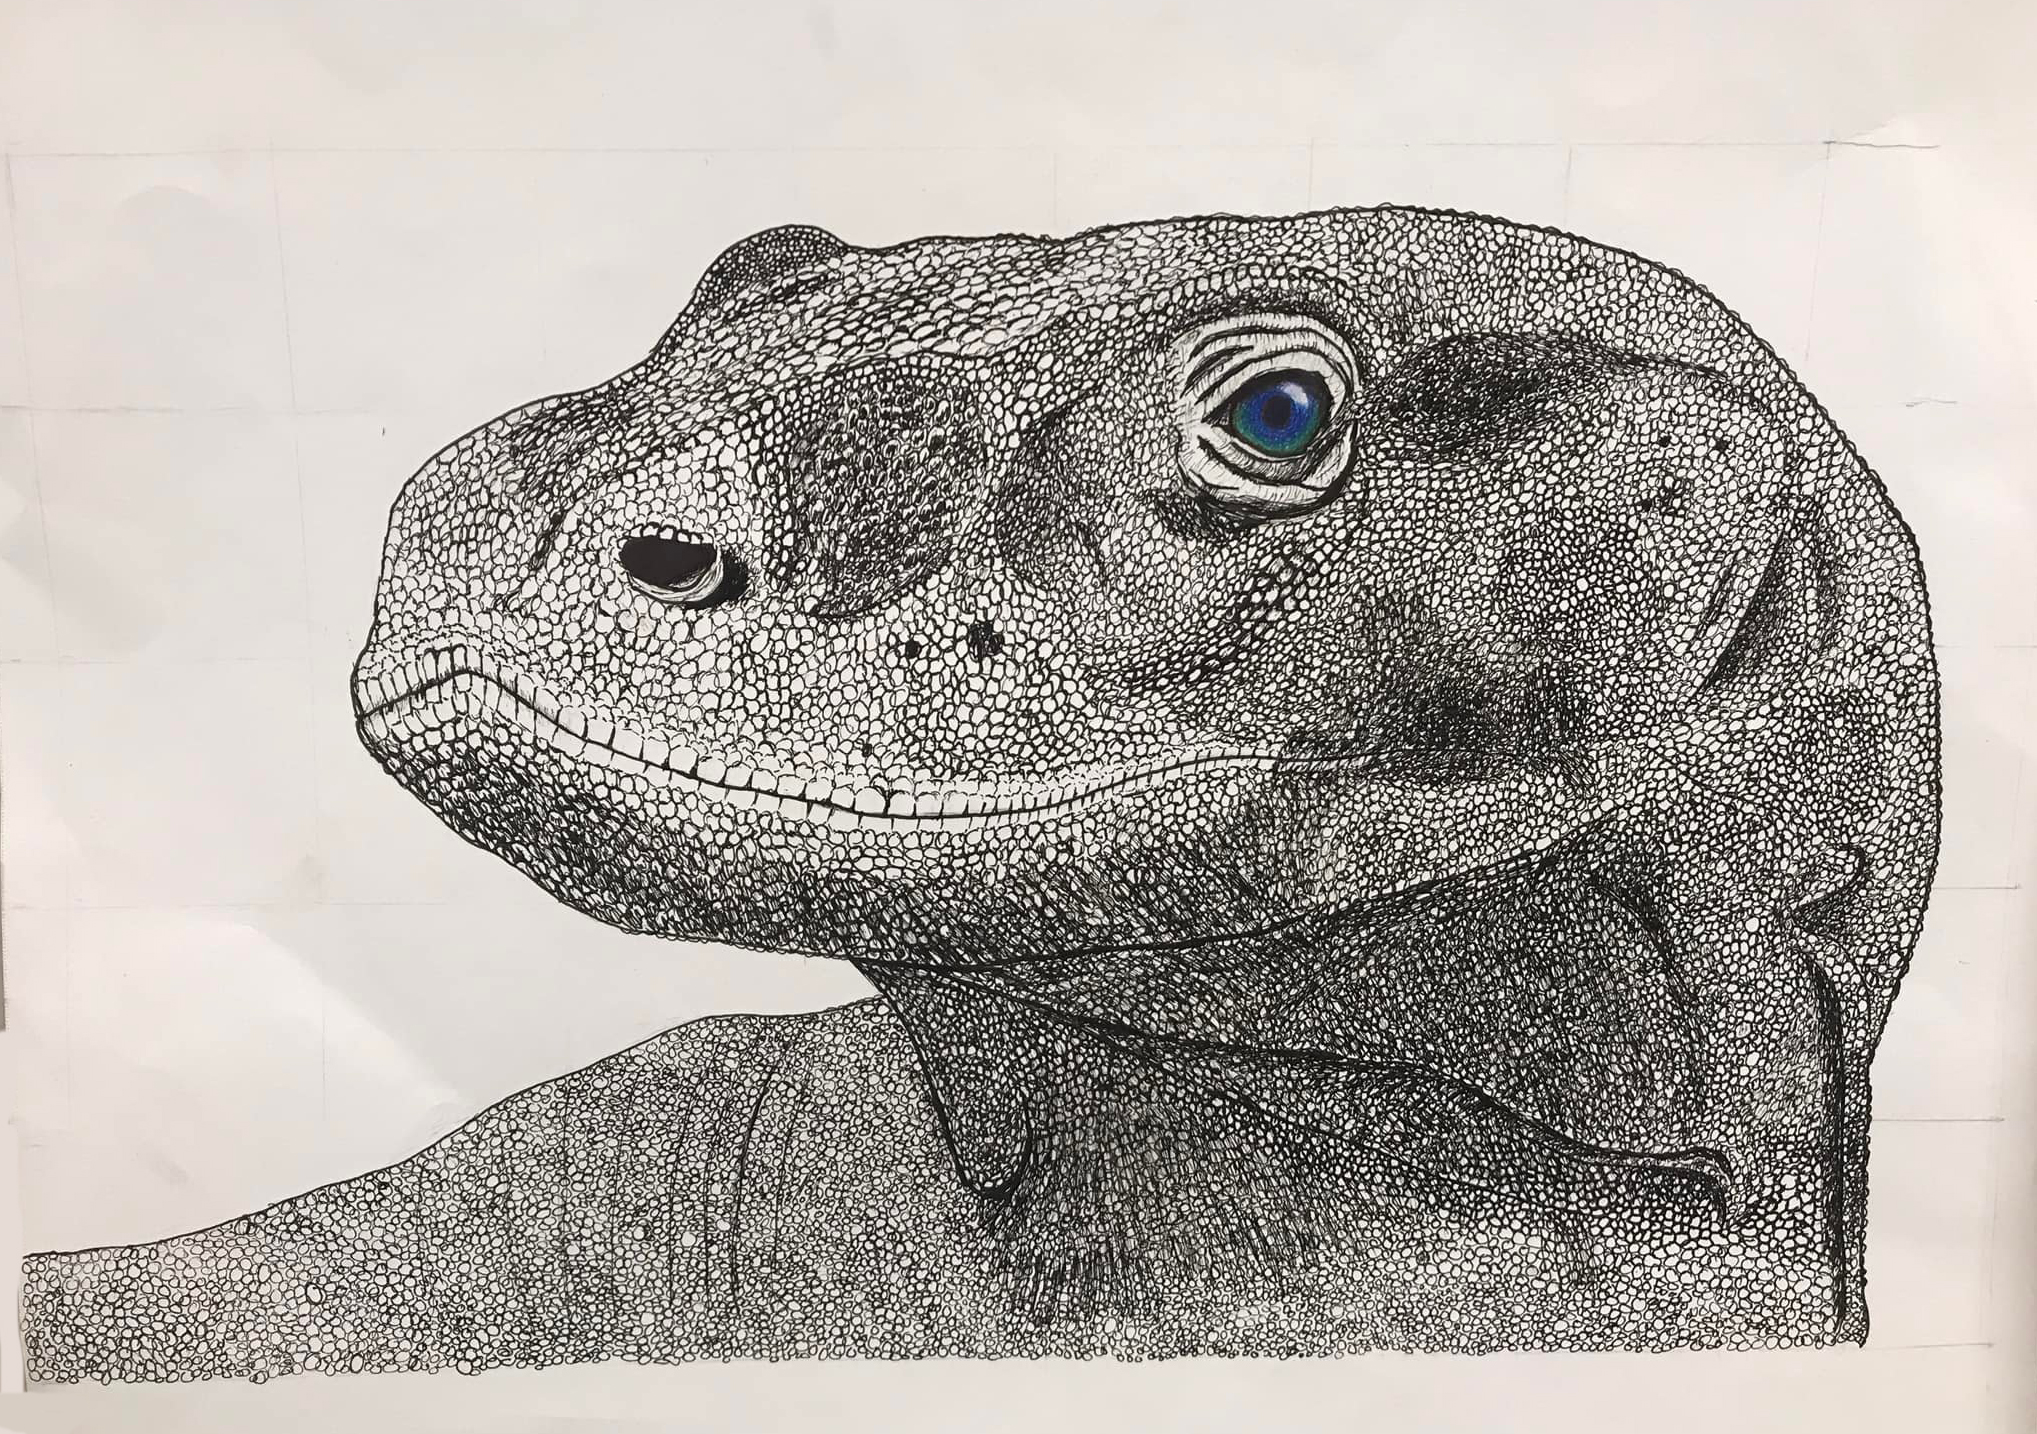
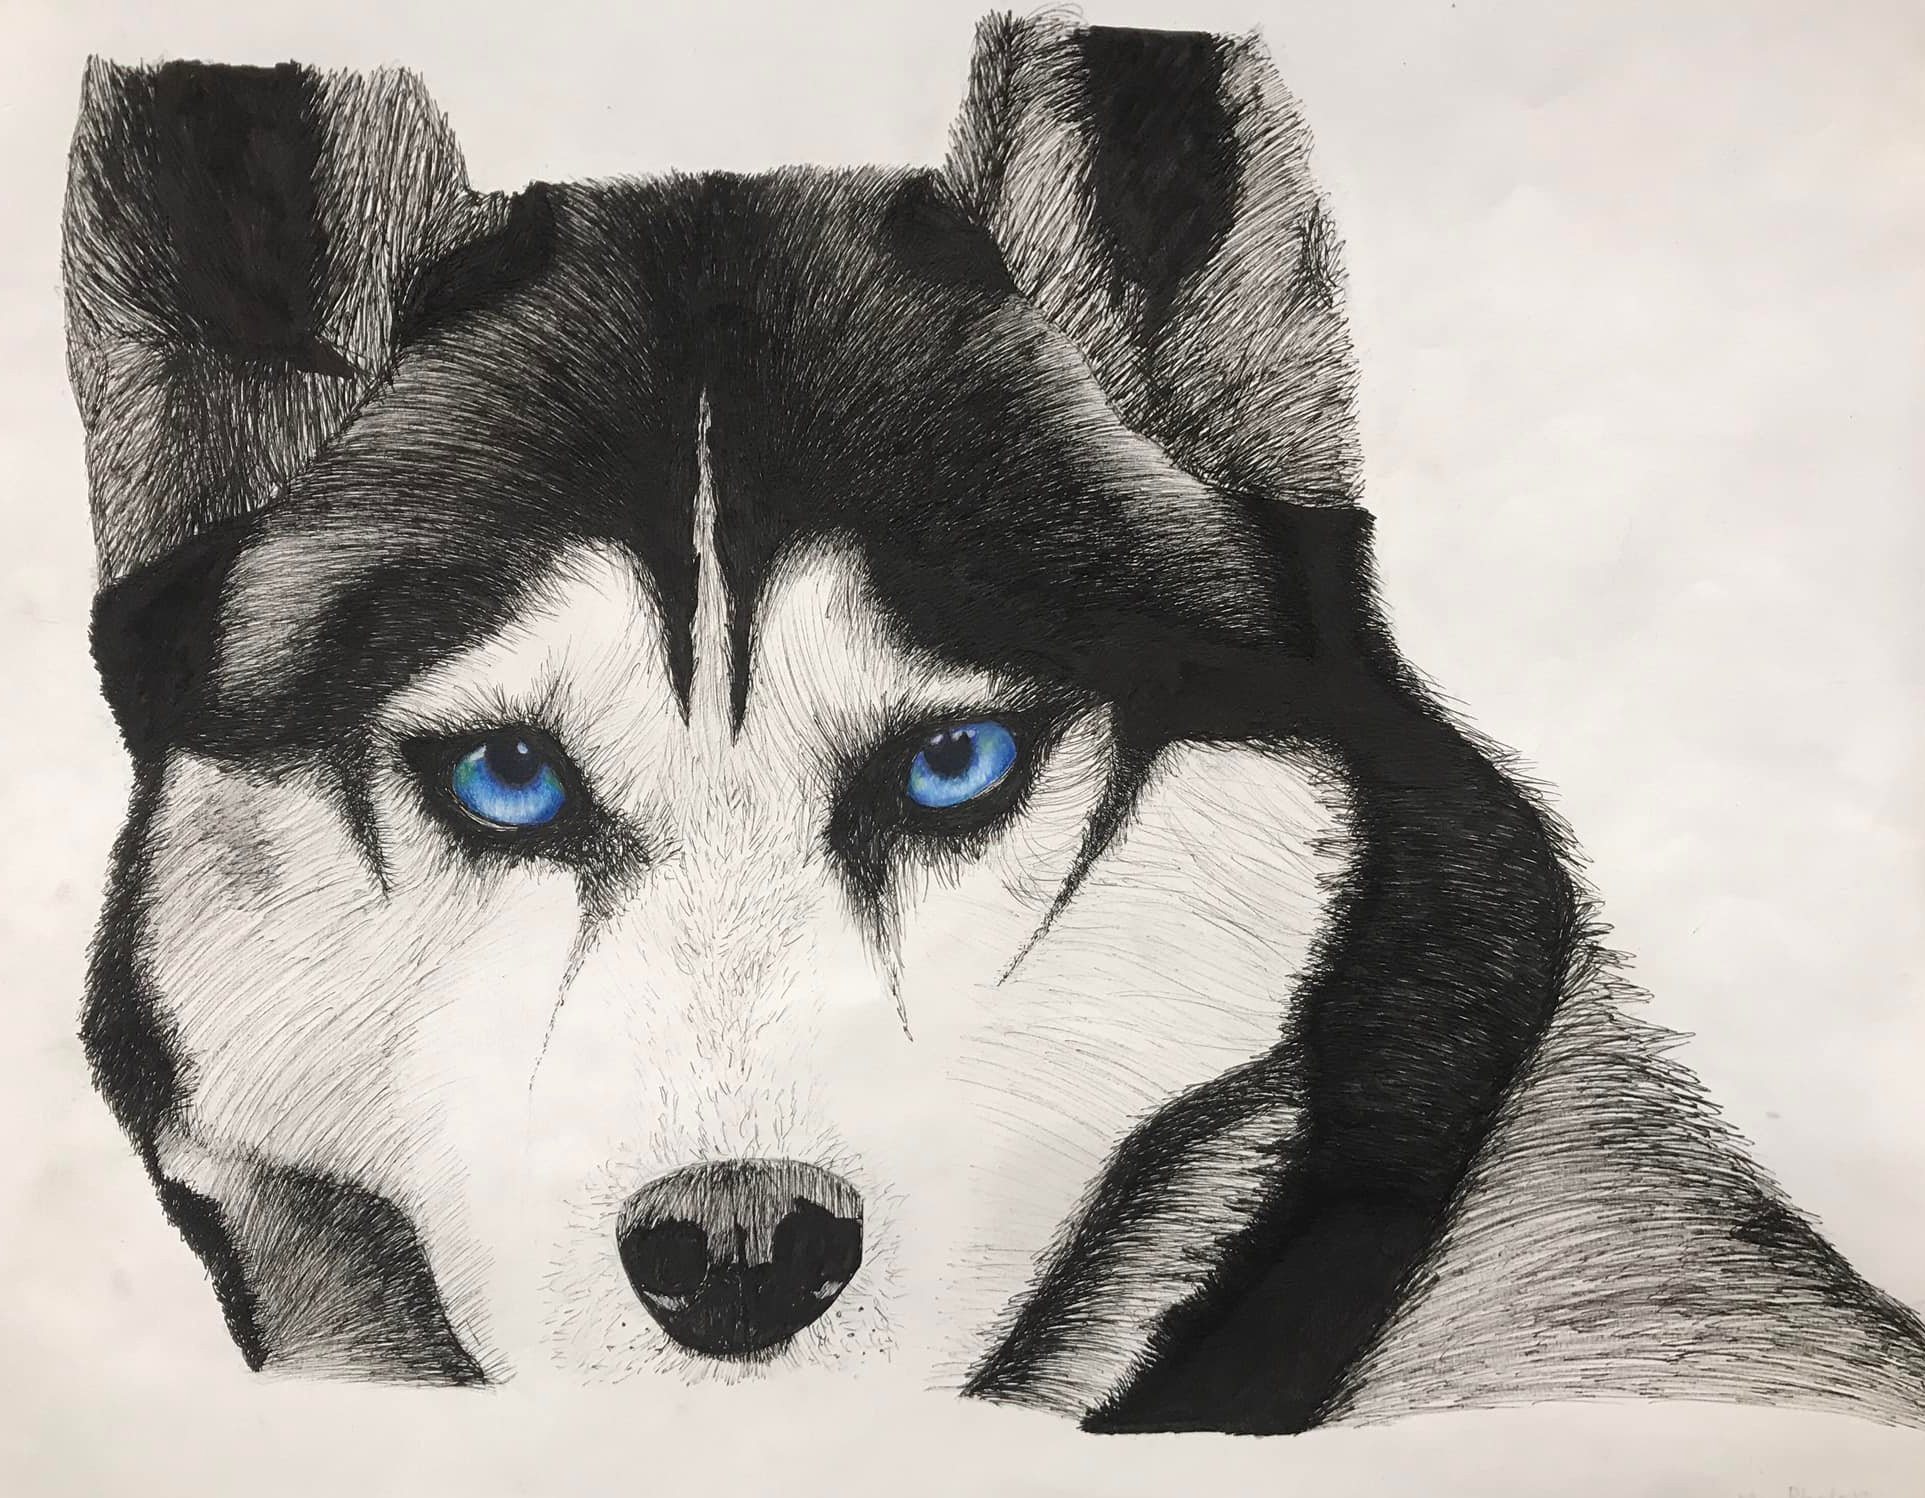
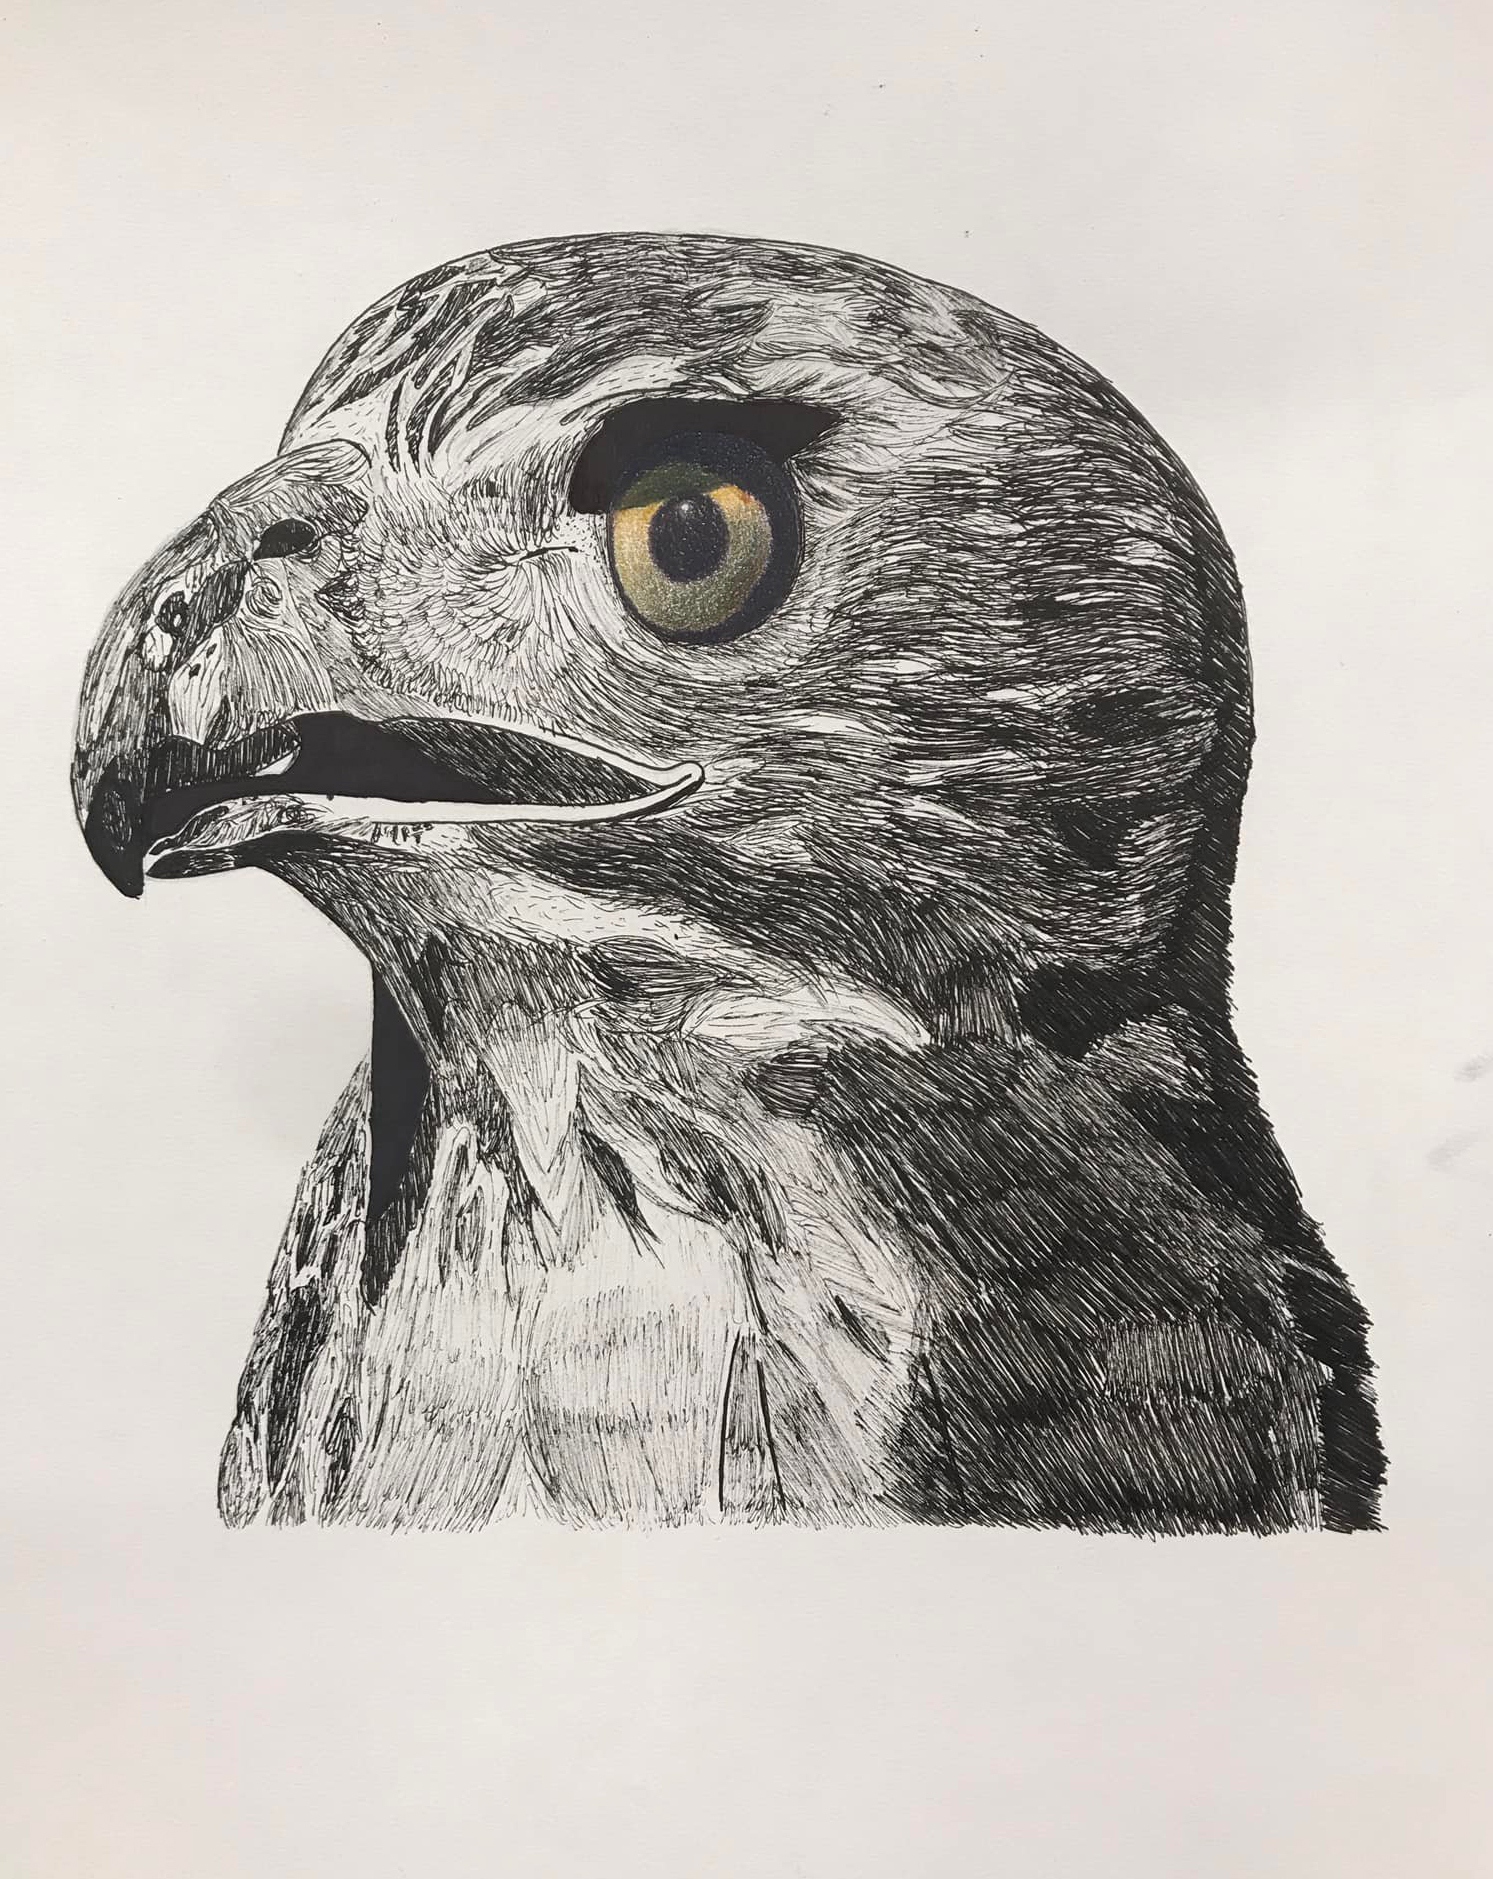
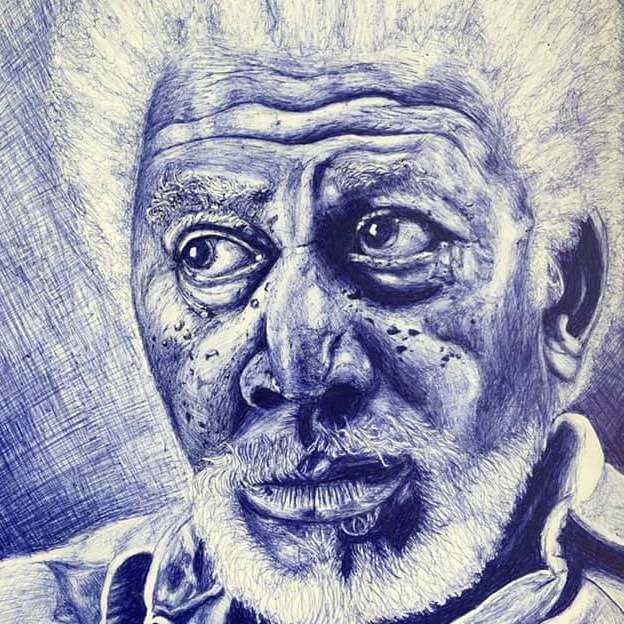
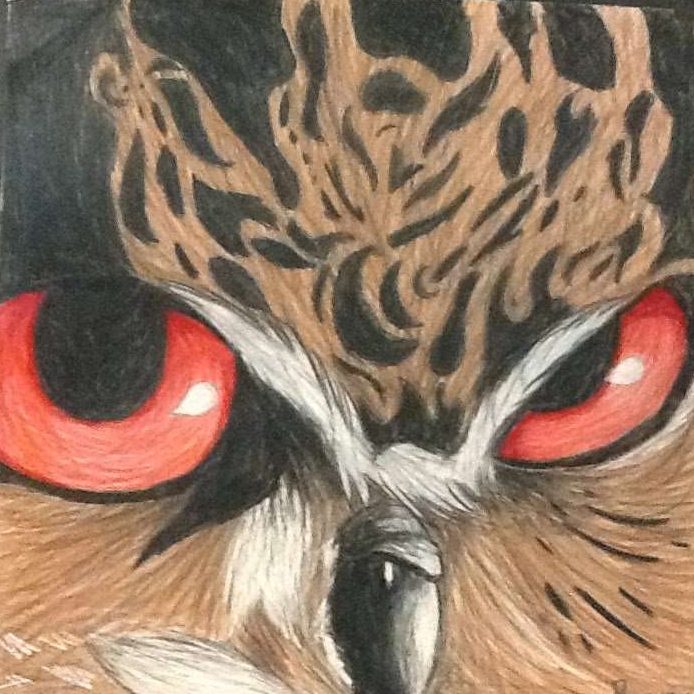
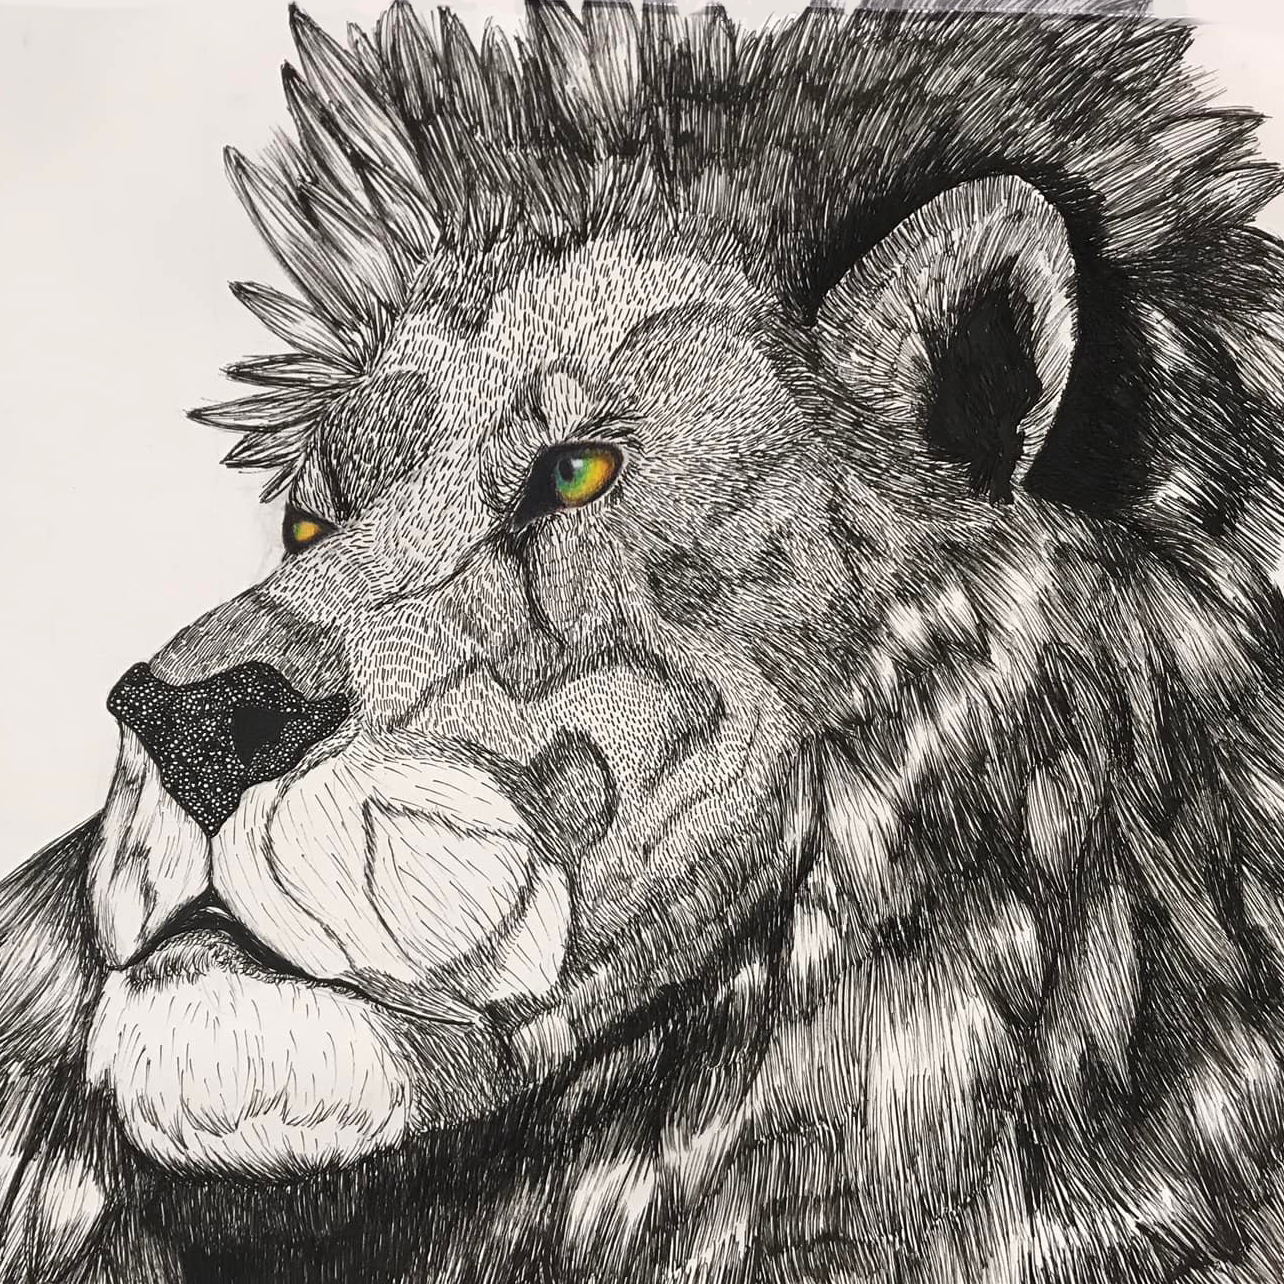
- create implied texture using an ink pen.
- learn how to use color realistically using Prismacolor pencils.
- learn the process of gridding an image and a blank sheet of paper to redraw an
image in proportion.
Introductory Activity
Students research an image of an animal to draw. The photo must be textured, the eyes must be in focus, and the pupil and iris must be easy to see. The teacher prints the images out for the students once they post them in a digital class folder. Typically, the teacher should be able to enlarge the image to a standard 8.5 x 11-inch paper without losing focus.
Students grid the photo every 1/2 inch or inch depending on the complexity of the image selected. Students can enlarge 2x. The larger the enlargement is, the longer it will take the students to execute the project.
Students then begin gridding their good sheets of paper lightly with a pencil. If they are not drawn lightly, the grid will remain visible. The goal should be for the grid to be erased completely and with no trace at the end.
Students should label each grid going down on the left A, B, C, etc., and every row at the top 1, 2, 3, etc. This helps students stay organized when they begin transferring information.
Lesson Process
After the photo and paper are gridded, students can begin transferring the basic lines and shapes found in the grids on the photograph with the coordinating grids on the enlargement. Again, the lines should be light. When all the information has been transferred, students should practice what marks with the pen best describe the texture found on their animal before applying it to their final drawing. Students will NOT use pen and ink for eyes. The eyes will be finished in colored pencil. Once the student feels they have achieved a good representation of the texture in their sketchbook, they may move on to their final sheet.
For the eyes, students will use colored pencil techniques to create a realistic appearance.
Students create a “rich black” by blending jewel tone colors and applying light layers upon light layers (can take up to 25+ layers). Students will also blend complementary colors for deeper shadow values.
Vocabulary
texture, implied texture, proportion, enlargement, value, form, highlight, shadow, emphasisResources
An online tool for grinding photos can be found HERE.
A basic introduction to grid drawing with visuals can be found HERE.
Pen and Ink techniques can be found HERE.
A nice resource for considerations when drawing animal eyes can be found HERE.
Author & Website/Blog
Amy K. Smith Simonton