1. Make it Contemporary
Still life can come off as boring, but it doesn’t have to be. Still-life drawings and paintings are a mainstay of the art world. Why do artists turn to still life again and again? The magic of still life paintings is that they show us a new way of looking at the ordinary objects around us. From the clothes we wear to the objects on our dresser, life is full of objects that tell a story. The example below left is Colors, from Trompe-l’œil artist David Bega, and student works on the right are examples from art teacher Kristy Patterson (find the lesson HERE).
So, as a teacher, think about what objects might appeal to your students; it doesn’t have to be a bowl of fruit. I used to let my students pick a theme. Over the years, we have had a toy still life, a fashion-themed still life, and an Asian-inspired still life, and the students were invited to bring items in to share (find the lesson HERE). I am constantly in awe of the variety of objects we can find in the cupboards of art teachers, from carousel horses to rubber chickens. You can often find me scouring yard sales and free groups for still-life items.
Still life items art teachers recommend:
Toys including stuffed animals, rubber ducks, legos, dice, toy trucks, playmobile figures, etc
Skulls and bones (look into Vanitas, which corresponds with Hispanic Heritage Month)
Skeleton and manikins
Shells
Colored bottles of all shapes and sizes
Art Supplies such as brushes, watercolor boxes, scissors, markers, paint bottles, etc.
Leggos
Plastic dinosaurs, toy soldiers, etc.
Food
Plants (I recently saw a lesson on succulents!)
Old Cameras
A bicycle
Old musical instruments, check with your music teachers!
Clothing, including hats and shoes.
Sports equipment, even old trophies
Chairs and stools
Fall-themed items like pumpkin, gourds, Indian corn, sunflowers
Kitchen and china cabinet stuff
Junk like umbrellas, retro items like Coke bottles, wooden crates, baskets
2. Make it personal
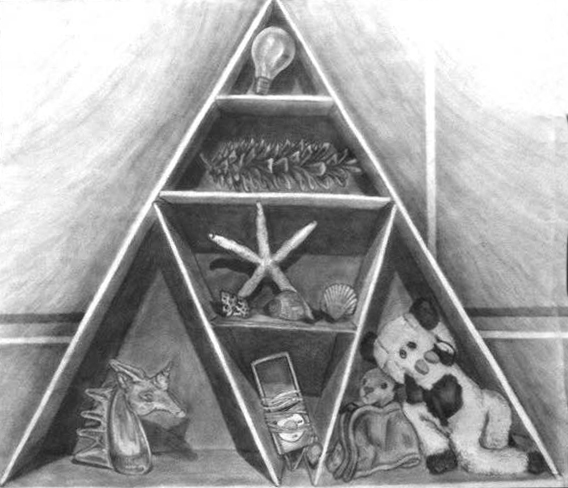
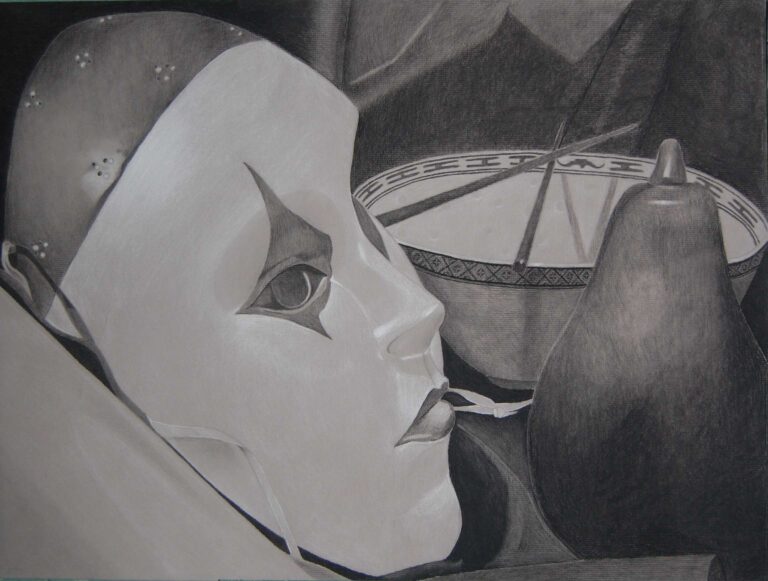
Ask students to bring in items! Retired Art Teacher Connie Rubin Berger’s students made what she calls “autobiographical still lifes” found in the top two images below. Students brought in objects and created a cardboard shelf to display and draw as part of the still life. Connie Rubin Berger explains, “I had the kids bring in the personal objects BEFORE building the box. It was important to see the size and shapes of the objects in order to design spaces for them. Have as much cardboard available as possible. The boxes that paper comes in are great sizes, 12×18 and 18×24. For fast attaching, use glue guns, but then drizzle Elmer’s glue for strength and permanence. They dry clear overnight. Large bull clips are helpful for keeping everything in place while drying (work like clamps).”
She also suggested working on a paper that corresponds to the actual box size. Through the years, her students have used graphite pencils, graphite powder, and charcoal. Her tips also include having students fill out a form saying what they were going to bring and why, as well as if they could bring it to school. She adds, “Of course, I had some kids use the random junk in my still life closet, but most kids actually came up with meaningful ideas on their own. Oh, and I put a reminder in Google Classroom too!”
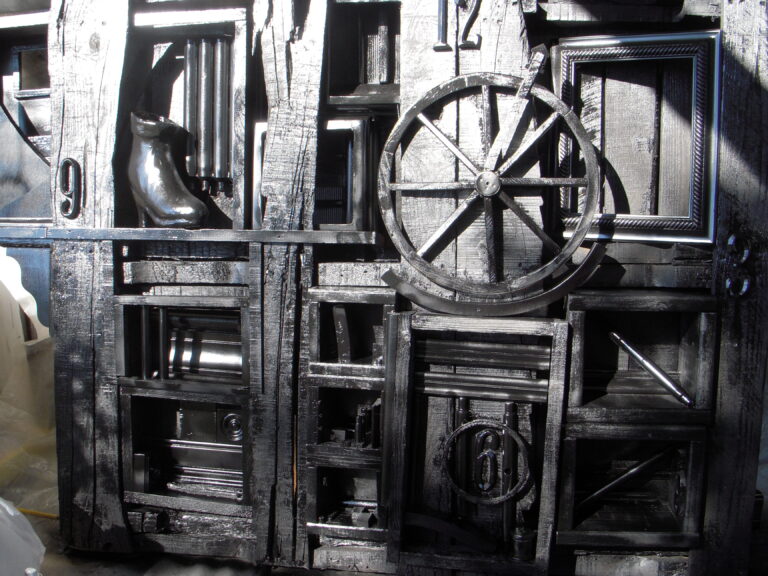
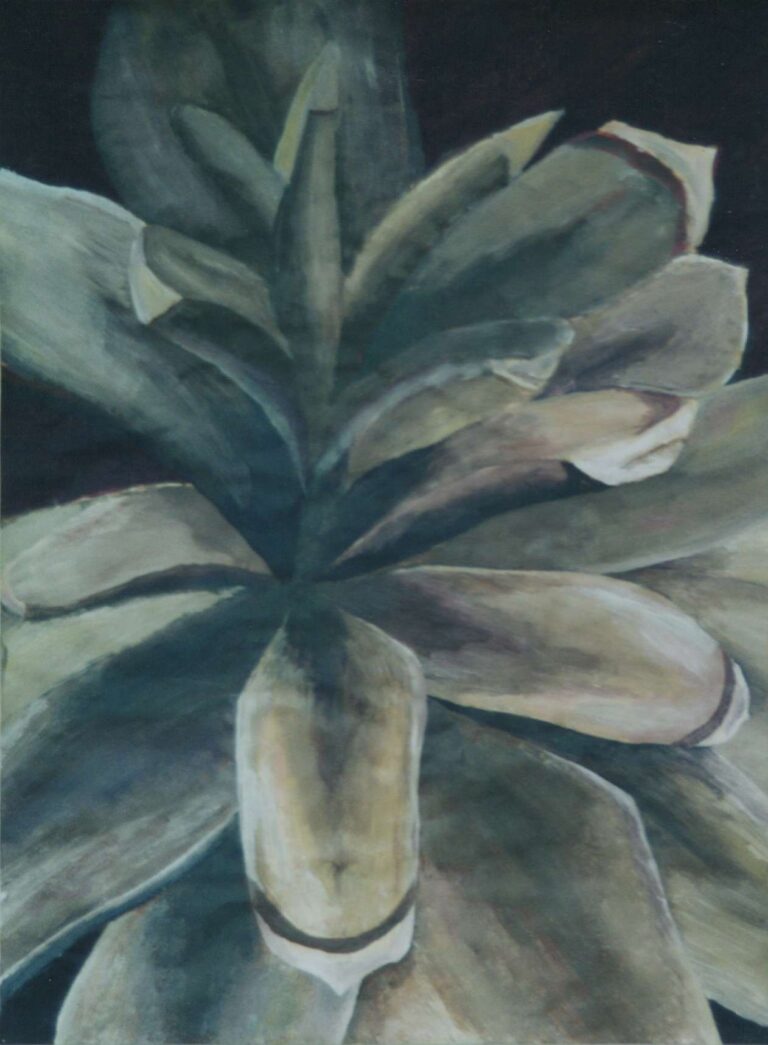
The bottom two images are from student exemplars from art teacher Allison Fantry’s lesson titled “Past, Present and Future.” Students were asked to bring an object that represented who they were at different points in time.
3. Make it small!
Even if you have a small classroom or move classrooms, get creative. Still life can take up a lot of space, but they don’t have to! I used to have students glue three different shells down on cardstock, and the whole class left their tiny still lives in one bin.
Small-scale items can include:
Pasta
Matchbox car
Candy
Shells
Glass marbles
Jewelry
Science lab equipment
4. Get Your Supplies
Use various-sized boxes to build up different levels of the still life. Put the boxes down and then throw your fabrics over them. If you have the room and this works for your room layout, consider setting up a still life in the center of the room on a table so students can use the full 360 degrees around the still life. If not, you can do more than one still life against the wall or mini still lifes mentioned earlier.
You will also need lighting like these lights. When setting up the light for your studio, consider a single source of light, preferably falling on your objects from the side. You are looking to emphasize the form of the objects and create both highlights, shadows, and cast shadows.
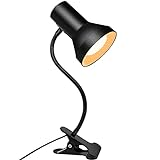
For smaller setups, try clip-on lights. Drawing Boards and tabletop easels are helpful for students to work on.
5. Composing your still life
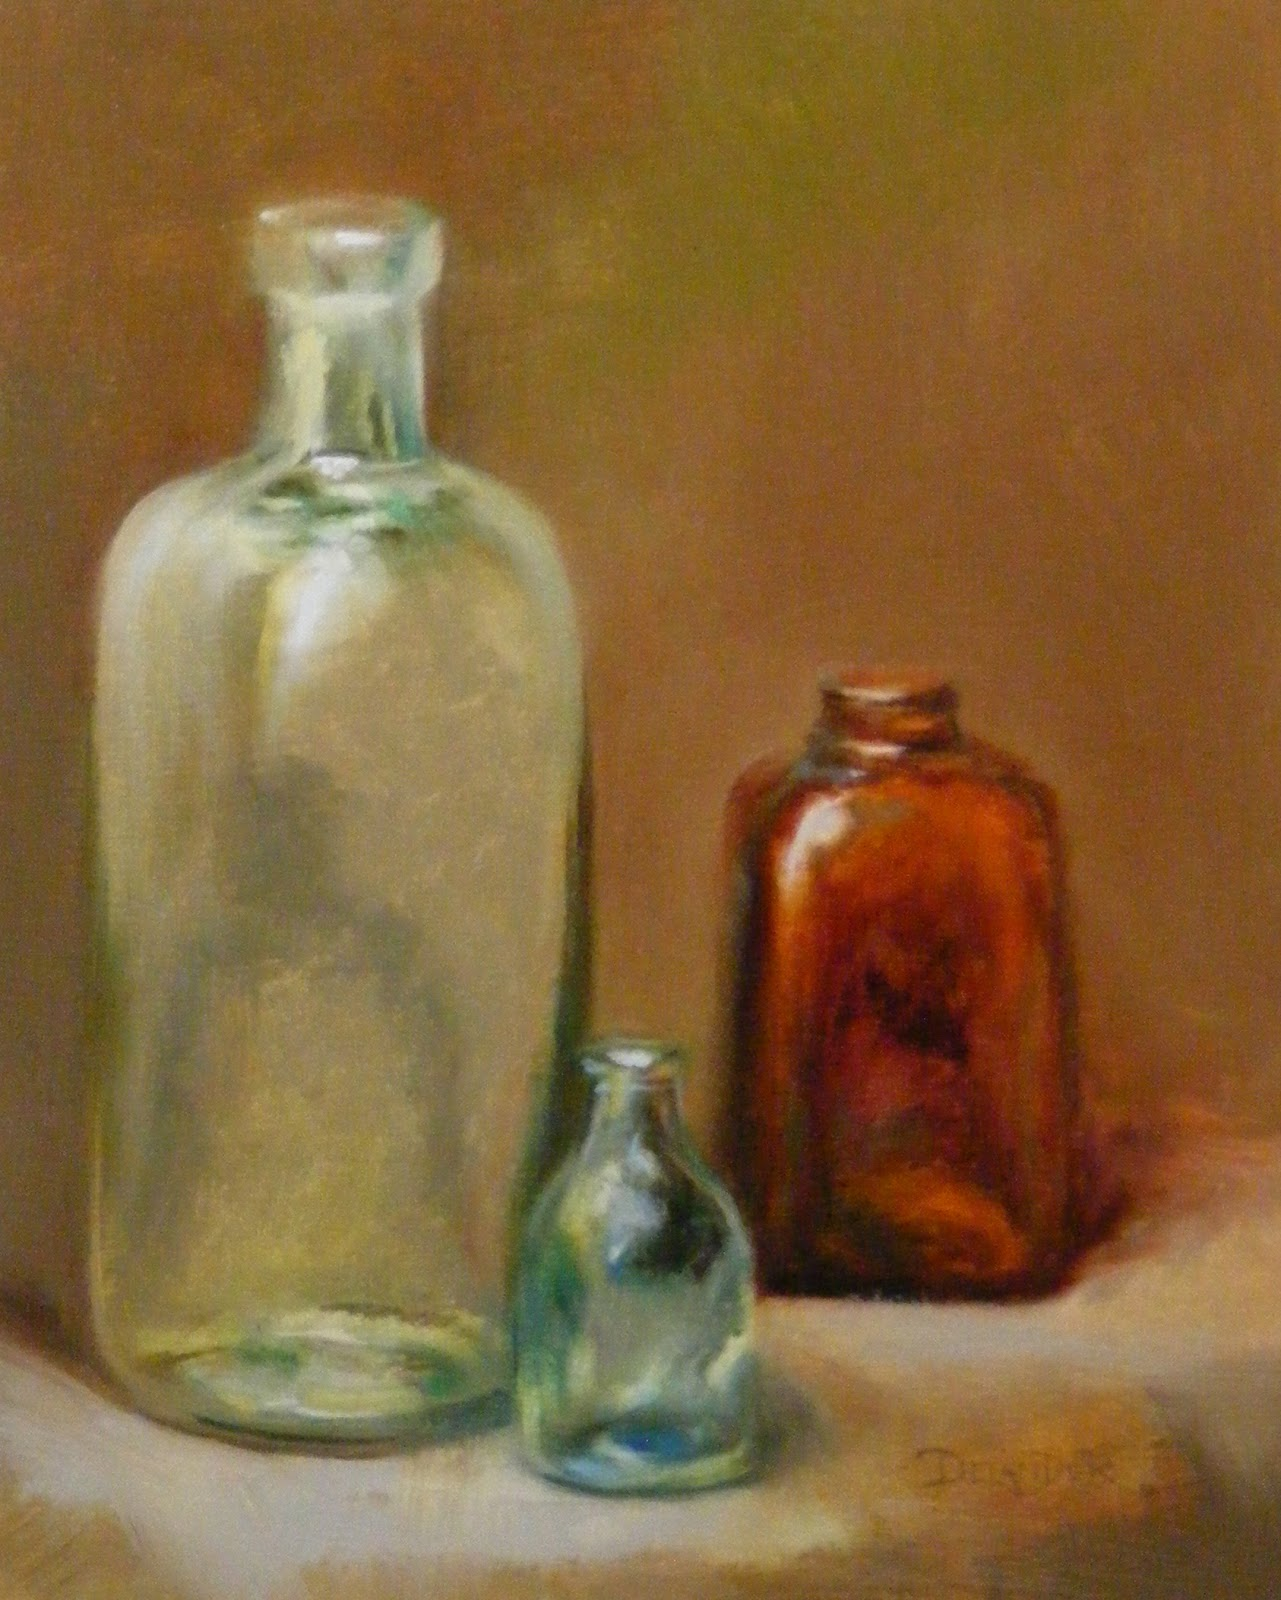
There is an art to arranging a still life study to paint. You must take into account composition, tonal relationships, and relationships between objects. When arranging your still life, I recommend creating sections with clusters of three to four items with overlap and hierarchy. Overlapping items will help create a sense of space, as can be seen in the below still life. Contrasting visual elements in the composition creates a hierarchy. So, you might choose varying shapes and sizes, as displayed in the still life of bottles shown here.
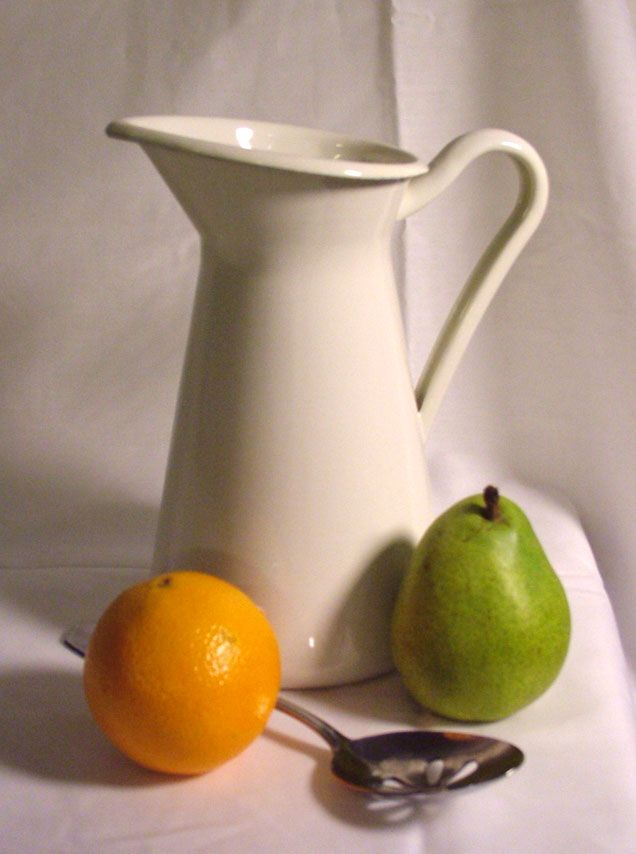
Notice, also in this still life, the use of lighting that helps the fruit look three-dimensional. Notice the shadows that help anchor the objects to the table.
6. Prepare
Before embarking on your still-life-making, take time to show students a wide variety of still life artists so they can widen their concept of what still life means. Look at artists like Janet Fish, Tjalf Sparnaay, David Hockney, Alex Katz, Michael Craig-Martin, and David Brega, as well as masters like Paul Cezanne, Henri Matisse, and Vincent Van Gough.
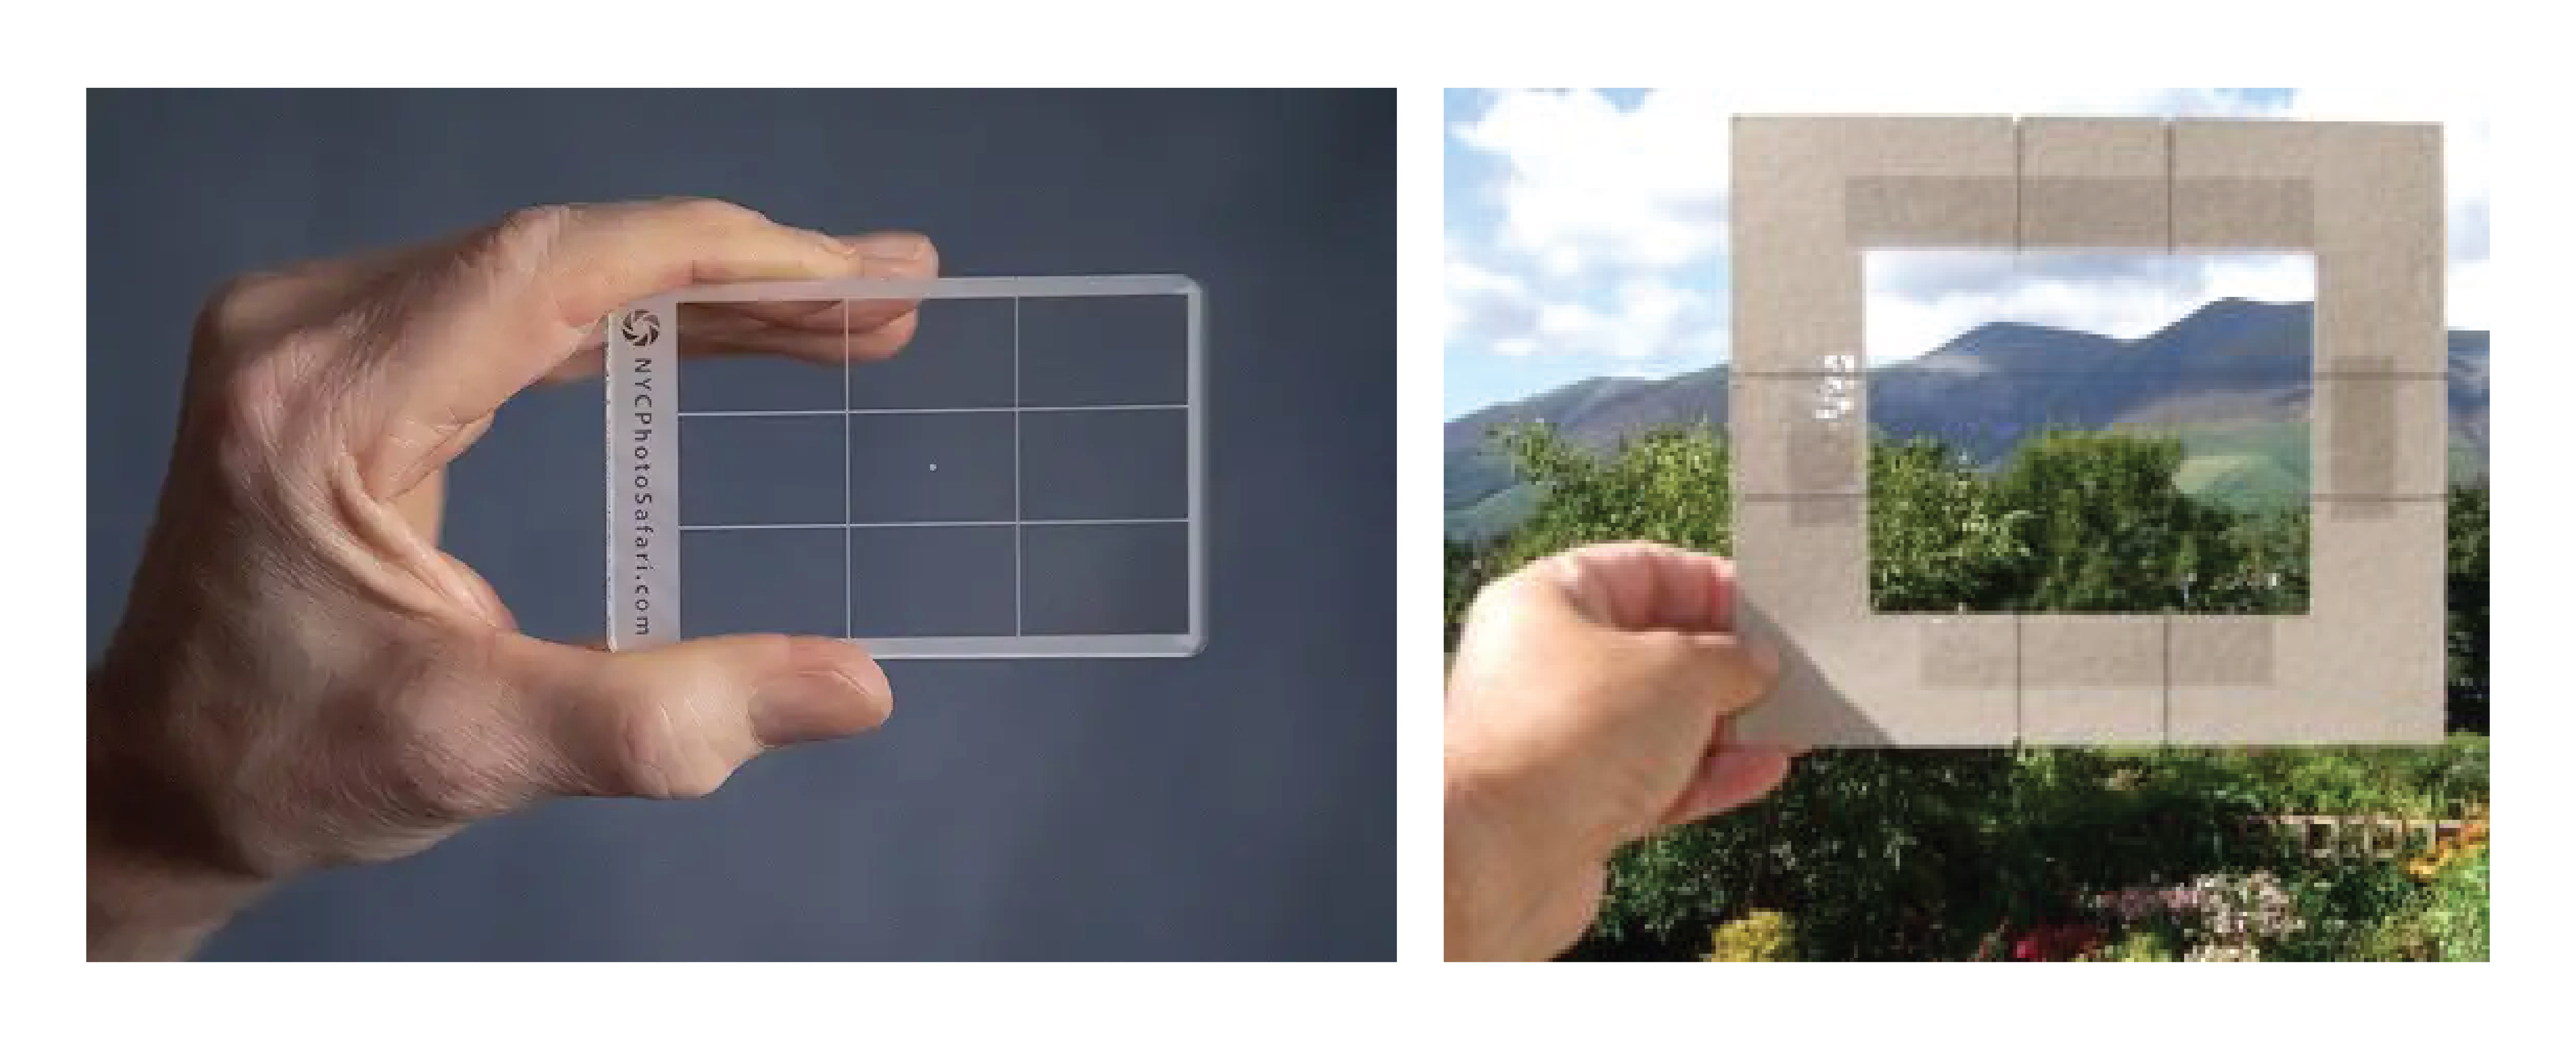
This is a good time to talk about what makes a still life successful. Introduce composition concepts like the Rule of Thirds, Leading Lines, avoiding awkward alignments, and creating balance. Next, students should create thumbnails and more thumbnails with the use of viewfinders. This is crucial to student success. You have to stress that thumbnails allow the artist to choose the best composition. A viewfinder is an artist’s tool that enables artists to frame or crop a particular scene to arrange the composition. It is usually a square or a rectangle made out of cardstock or plastic, through which you look at an area in more detail. It can be bought, like the one on the left, or made from a window cut from cardstock, like the one on the right, or printed onto transparency paper. A good website for explaining how to use a viewfinder can be found HERE. All the work that goes into thumbnails really helps students arrive at the best composition. If you don’t have a good composition, even excellent execution can’t make up for a poor composition.
Still life drawings and paintings can be a large commitment of time when developed properly. Don’t let working on a project for an extended time deter you from tackling it. One of my students was accepted to art college on the spot and given a scholarship based on a still life she created in an Art Studio I class. Just be sure to grade all steps. So, for example, I grade their thumbnails, their line drawing, and eventually, the final shaded still life.
With younger grades, middle school, and even freshmen in high school, be aware that a surprising number of students don’t understand that still lifes need to remain still. No joke here! There is nothing more exasperating than large or small changes to a still life after students have started drawing it. I even had one student take a bite from a fake apple. So, be ready to train your students not to touch and be ready to guard your still life and put a sign up that says “No touching.” Often, I take some photos and put a small piece of tape under objects to mark the location should something be moved; it helps to return it to its exact location.
I hope this helps you tackle still life drawing and makes it more exciting for all. Share any of your tips when working on still lifes below in the comments!
Related Lessons:
Trompe L’oeil Self Portraits
Still Life on Gray Paper
Negative Space Still Life
Melted Still Life
Linear Shells with Suminagashi
Resource:
A video on the History of Still Life