Grade Level
9-10, 11-12Duration
Duration 7-10 periods, 60 minute periods
Materials
• Linoleum, Either a roll or flat 36” x 36” linoleum sheets in Battleship Grey or Golden Wonder Cut, cut down into 4” x 4” pieces for students.
• Paper for sketching out potential designs
• Paper cut down to 9” x 17” pieces of paper for final prints *You will want a lot of cut paper to allow students to print as many times as they want.
• Jig for printing on; a piece of mylar or plastic (see video on how to print)
• Make sure you have fresh gouges and enough handles (#1 and #5 are the most useful)
• Cranfield Safe wash black ink *Tubes are preferable as cans of the ink dry out fast.
• Speedball Soft Rubber Brayers
• Plexiglass sheets, For rolling ink.
• Pallet knife or putty knife, soap, lots of sponges
• Barens, In this lesson the teacher made barens from two wood cabinet knobs gorilla glued together. Wooden spoons are another substitute.
• Bench hooks, this teacher made them out of scrap wood from the shop class.
• Cotton rags (cut up t-shirts)
• Bandaids
• Transfer paper or Carbon paper
• Permanent markers
• Rulers
Media
Printing
Lesson Objectives
For the student to…
carve a design from linoleum with the understanding of relief printing.
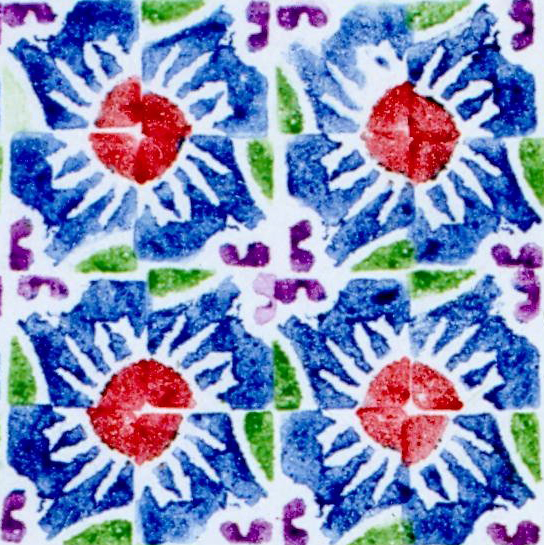
print a radial design through eight repeated positionings and printing of the linoleum block.
Introductory Activity
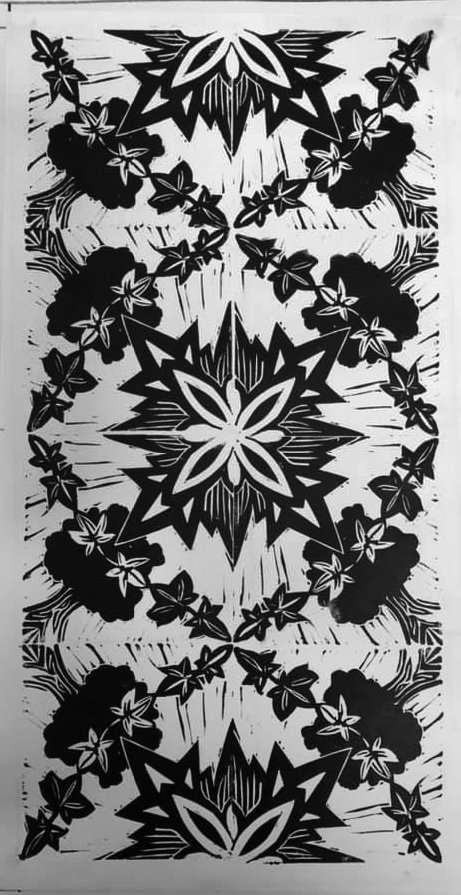
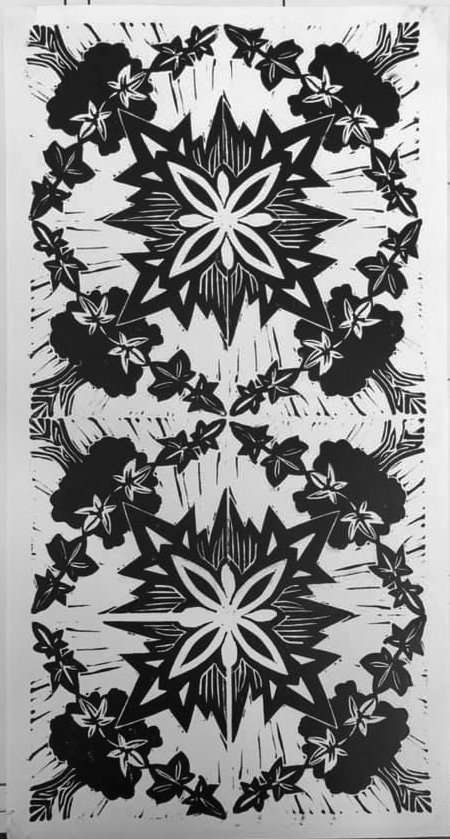
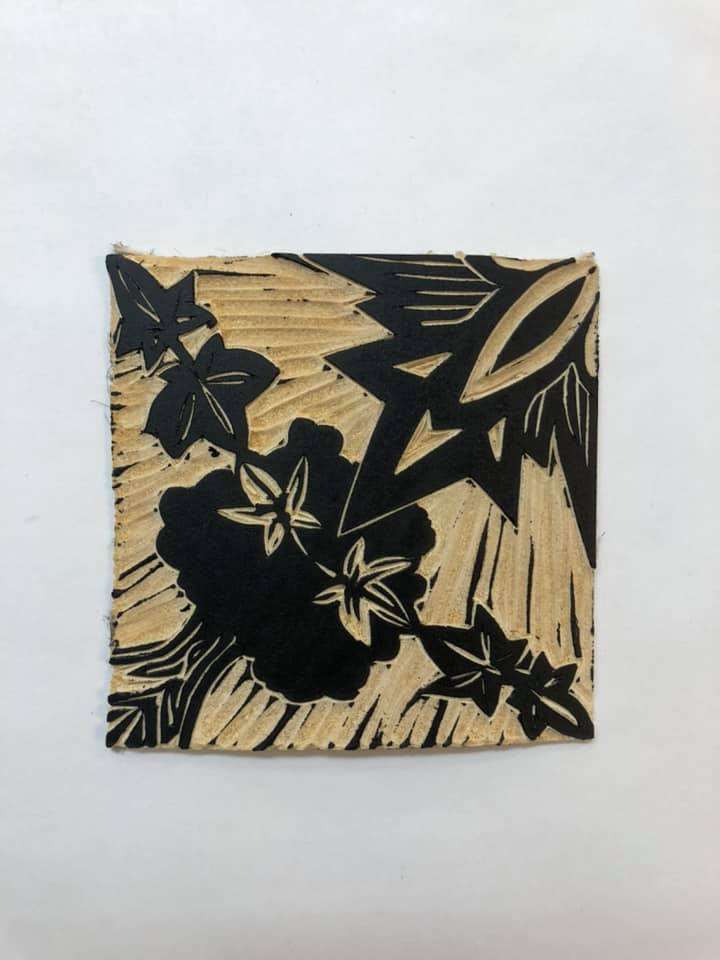
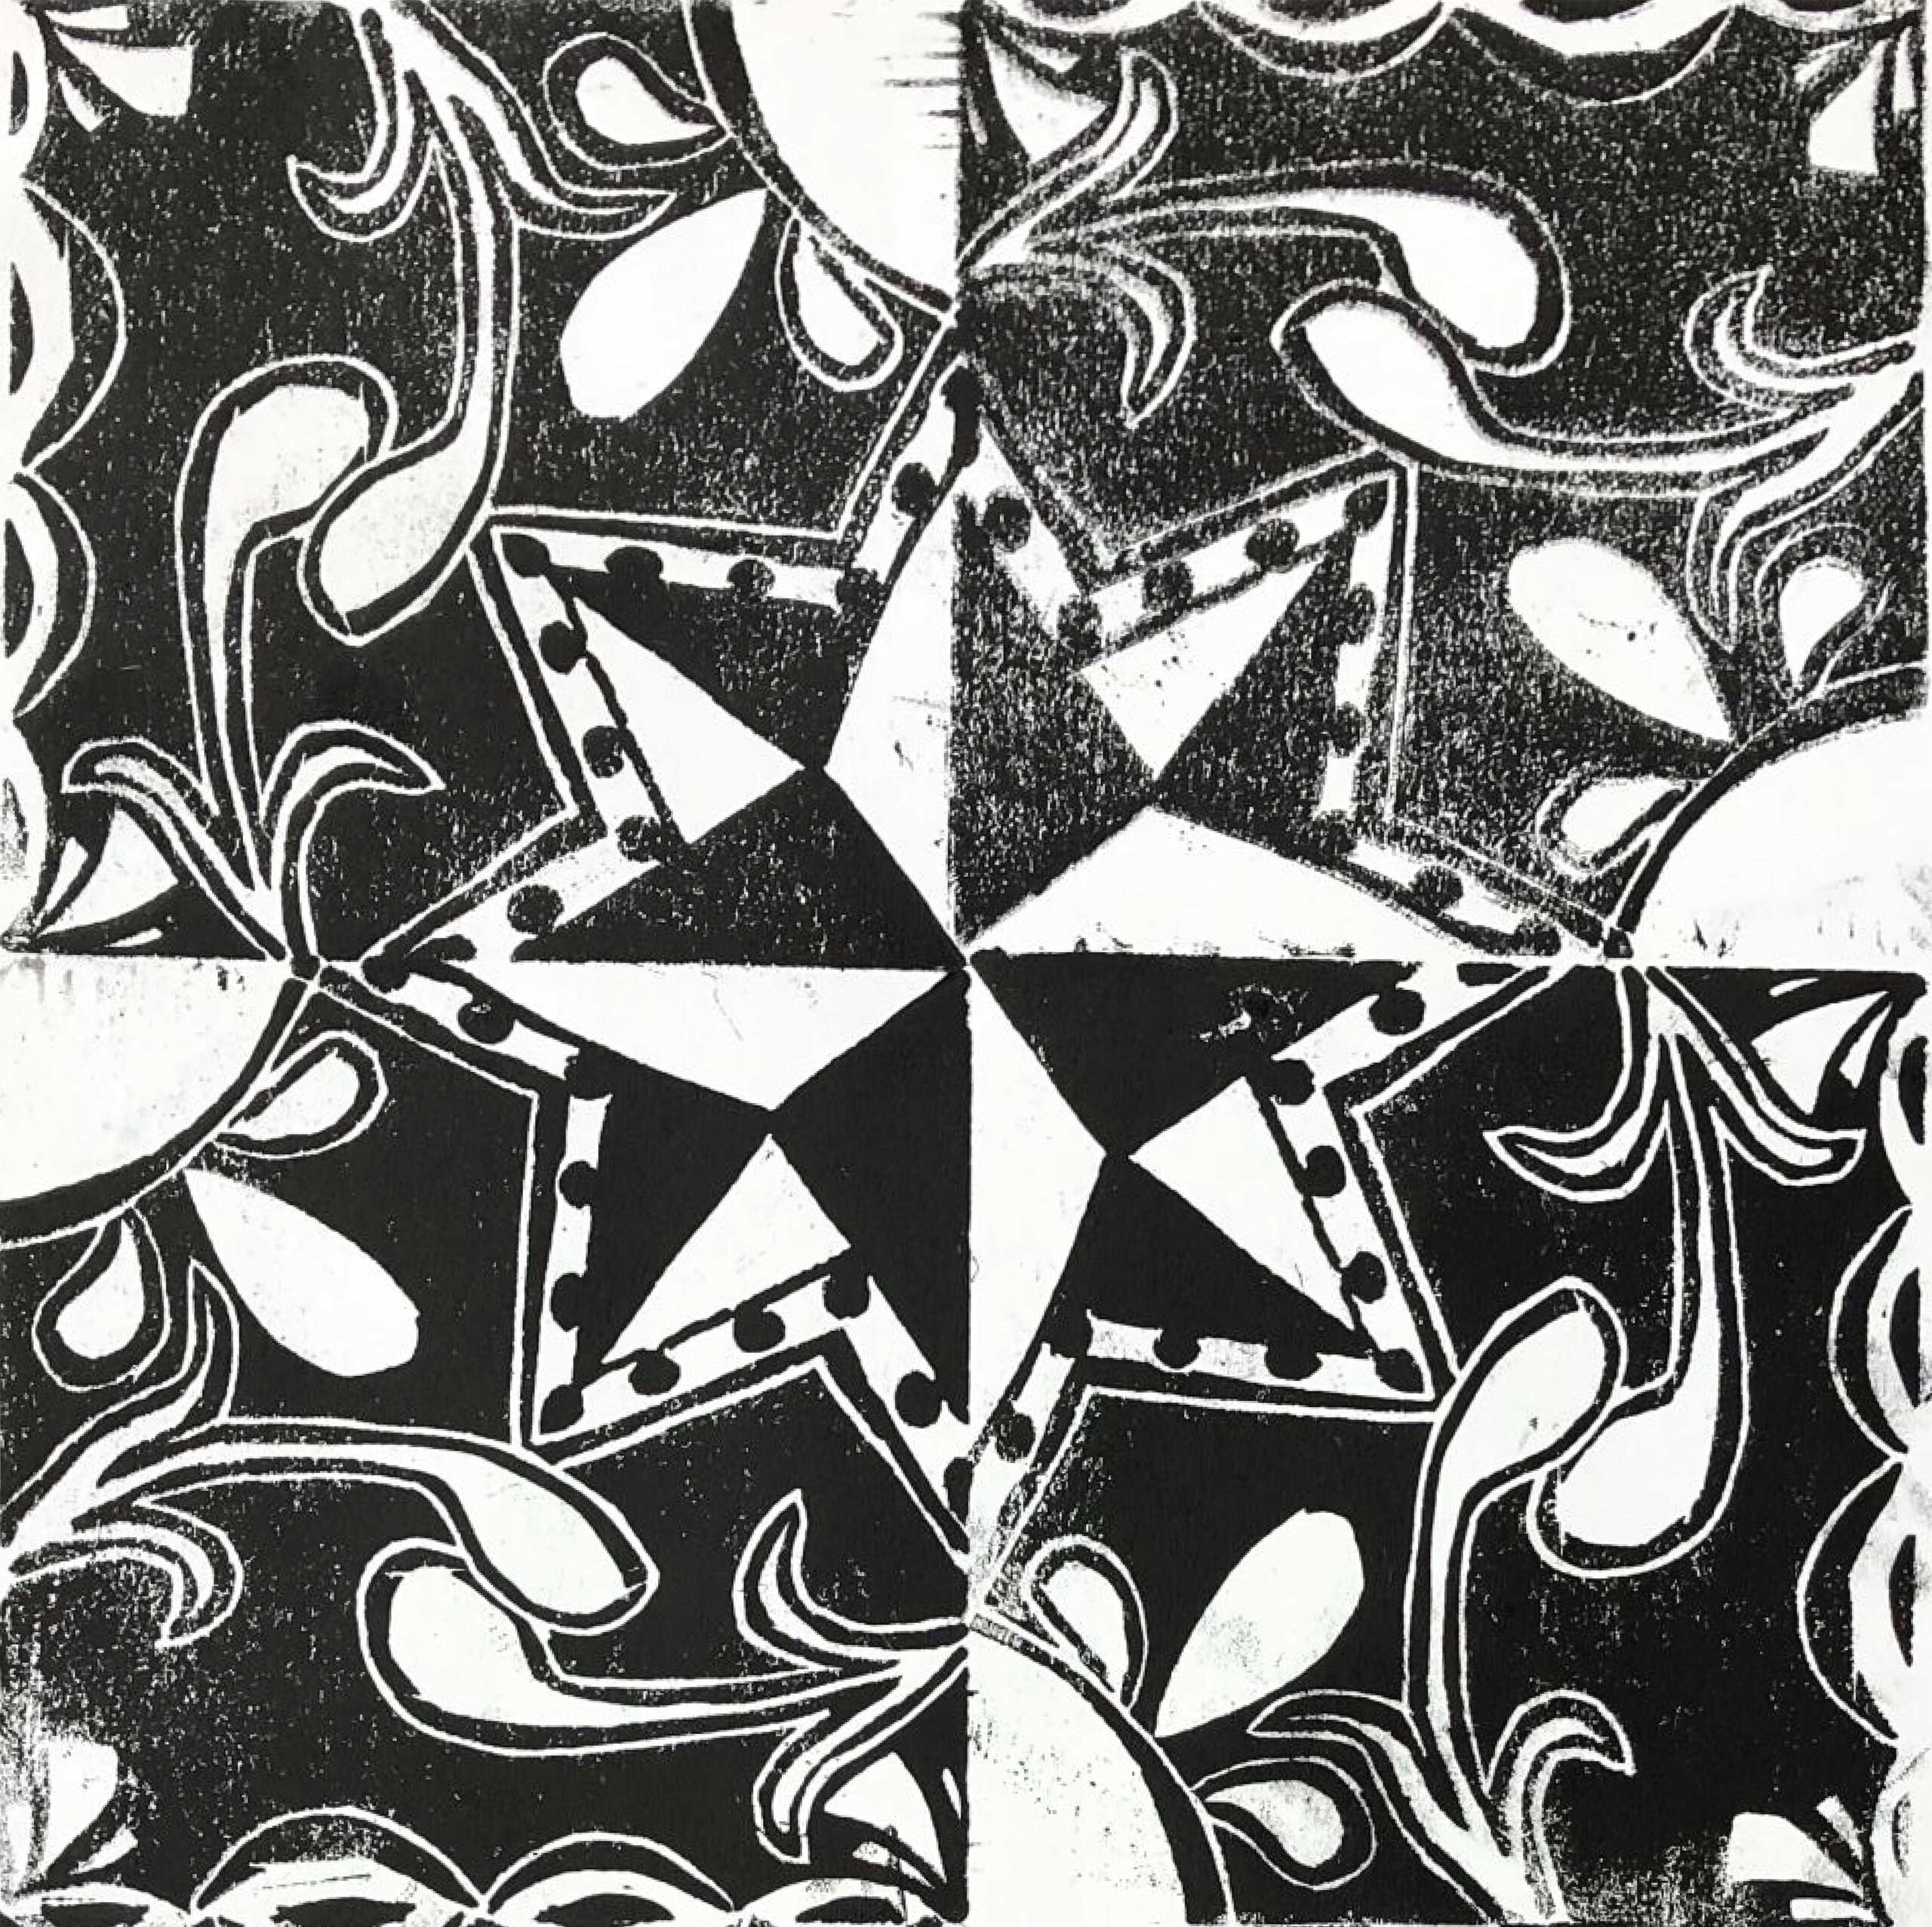
Show the students a finished printed radial design and the piece of linoleum it was printed from. Explain the concept of a relief print. In relief printing, the artist draws a design on a smooth block of material, known as your matrix—usually wood or linoleum—and uses tools known as gouges, to carefully cut away the areas that are not to be printed, leaving behind a raised surface of lines and shapes. The surface of the block is inked using a brayer. A sheet of paper is then placed on top of the block and vertically pressed against the surface; this can be done by hand or using a printing press. A stamp is a simple form of relief print that the students usually have experienced. Show how the relief design they will create will be rotated and printed 8 times. If the students have had geometry, you can tap into that knowledge. Explain how the pattern will pivot one corner of the design
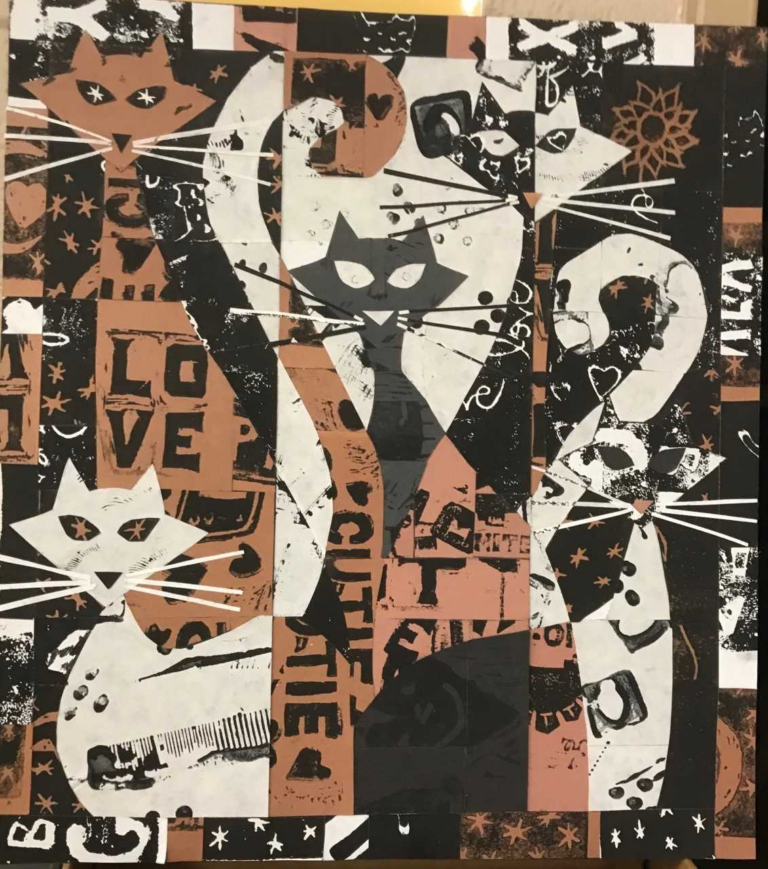
At this point, you can provide precut 4×4 paper for students to design three variations, one of which will be selected for carving and printing. Teach them to think about the edges and consider how the ends will meet up and become continuous if designed in such a fashion. The video shows some “tricks” to use in creating quarter circles that when printed will create a circle. Students also need to consider making their designs larger in scale because there are limitations to how small you can go with lines and shapes created with the carving tools. Students can draw on the linoleum or transfer their design from the paper version with carbon paper or any transfer method the teacher would prefer. Once the design is on the lino block, use a sharpie to block in the areas you would like to remain uncut, these are the areas that will receive the ink eventually. Students can also experiment with which corner of the design will pivot as it will give a different look to the final design. If you look at the image examples provided for this lesson, you can see that the three images were all created from the same linocut, but with different corners of the design being used to pivot.
Lesson Process
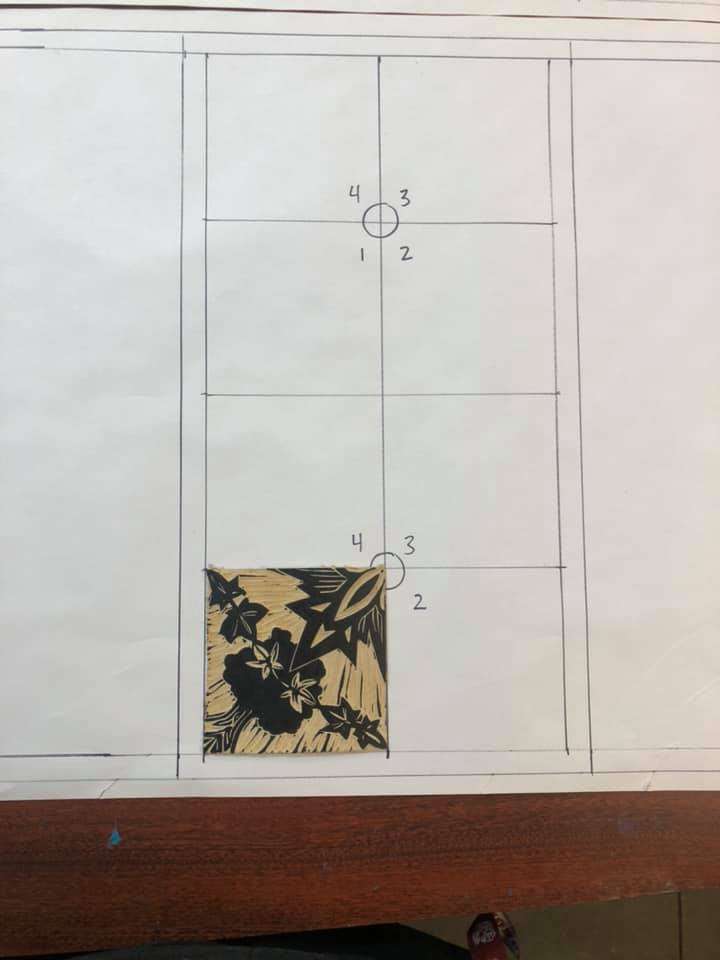
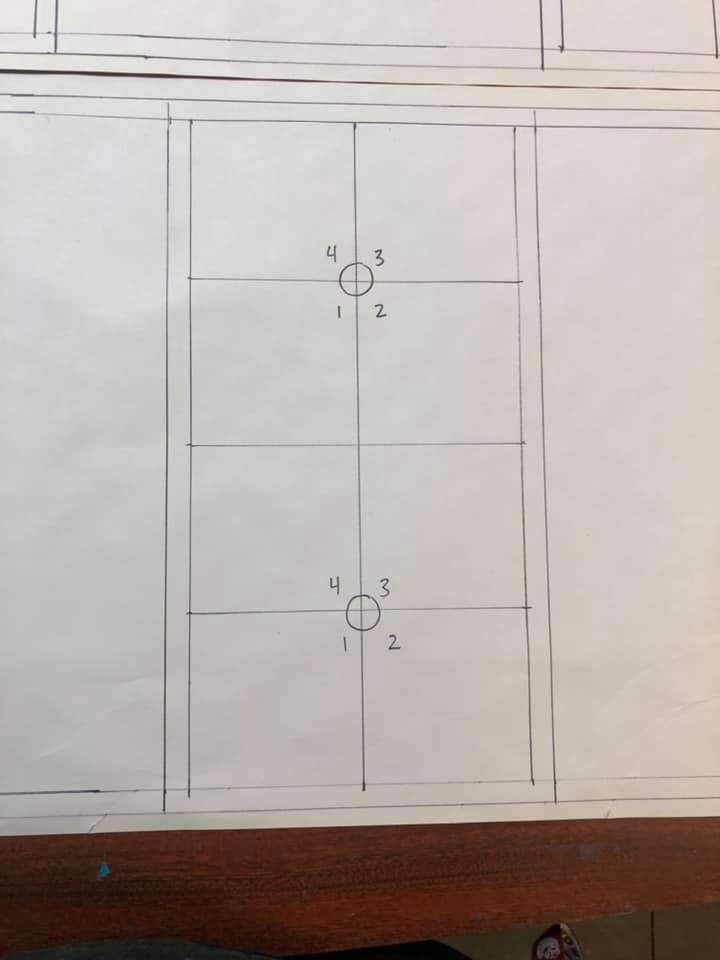
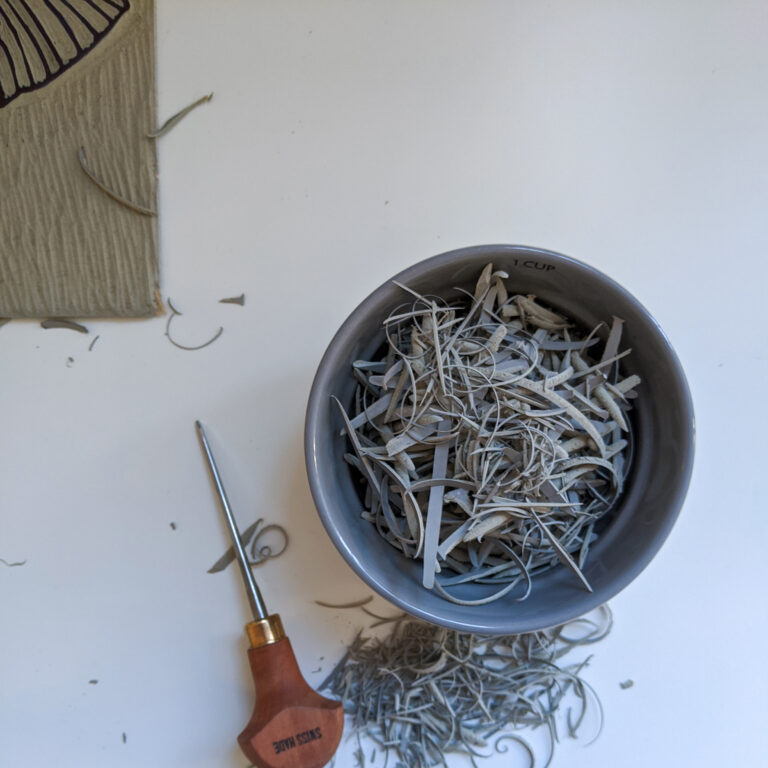
Demonstrate using the bench hook and carving the lino block. A common strategy is to outline with the smallest V gouge and then use the larger U gouge to carve the larger areas. When demonstrating, remind students to turn the lino block so they are always carving away from themselves and never place a hand in the path of the cutting tool. If the linoleum is hard use a clothing iron (best to use an old one exclusively for the art room) to heat the lino block, by placing it face down for 3-4 seconds directly on the linoleum. This softens the material and makes it easier to carve. Demonstrate how to set up for inking and printing with the lino block. The teacher should have prepared a jig. A jig is a printing tool that will be used to show the fixed orientation for imprinting all the variations needed for the project and aligning the paper during all those printings. Demonstrate how to align the block, paper and how to apply pressure with the baren. After applying pressure and see if the image transferred successfully and then repeat, rotating the block 90 degrees for the second print. And repeat until you have done four for a full rotation. And then one more set below the first set. After all 8 prints are complete the print is placed on a drying rack and the workspace is cleaned up. Students need a minimum of ten minutes to properly clean up all the workspaces and tools.
Vocabulary
Brayer, negative space, linoleum, positive space, relief, burnish, radial symmetry, bench hook, gouges, radial balance, block, printmaking, linocut, linoleum printing, block print, block printing, printingResources
Lesson Instruction Presentation: Radial Print
Overview of the project
Planning your lino block
Using the bench hook
Carving your lino block
How to print #1
How to print #2
How to print #3
How to print #4
How to print #5
Author & Website/Blog
Kayla Rich
Supporting Images