Grade Level
7-8, 9-10Duration
10 classes, 45 minutes
Materials
For making the collagraph plate: Thin cardboard (like cereal boxes), thicker card to mount on, corrugated card, string, hot glue, white glue, Shellac (to seal)
For printing: water based inks in red, blue, yellow, brayer, plexiglass for inking, printing paper, printing press (alternative, use a baren)
Media
Printing / Printmaking
Lesson Objectives
The student will…
plan towards their future print as they select materials to make their collagraph plate.
follow printmaking steps of inking, registering and using the press in multiple layered color printings of their collagraph plate
create a collagraph plate to be used in printing a three color print
understand how to sign and number an edition of prints.
share their work with the teacher and peers in an informal critique.
Introductory Activity
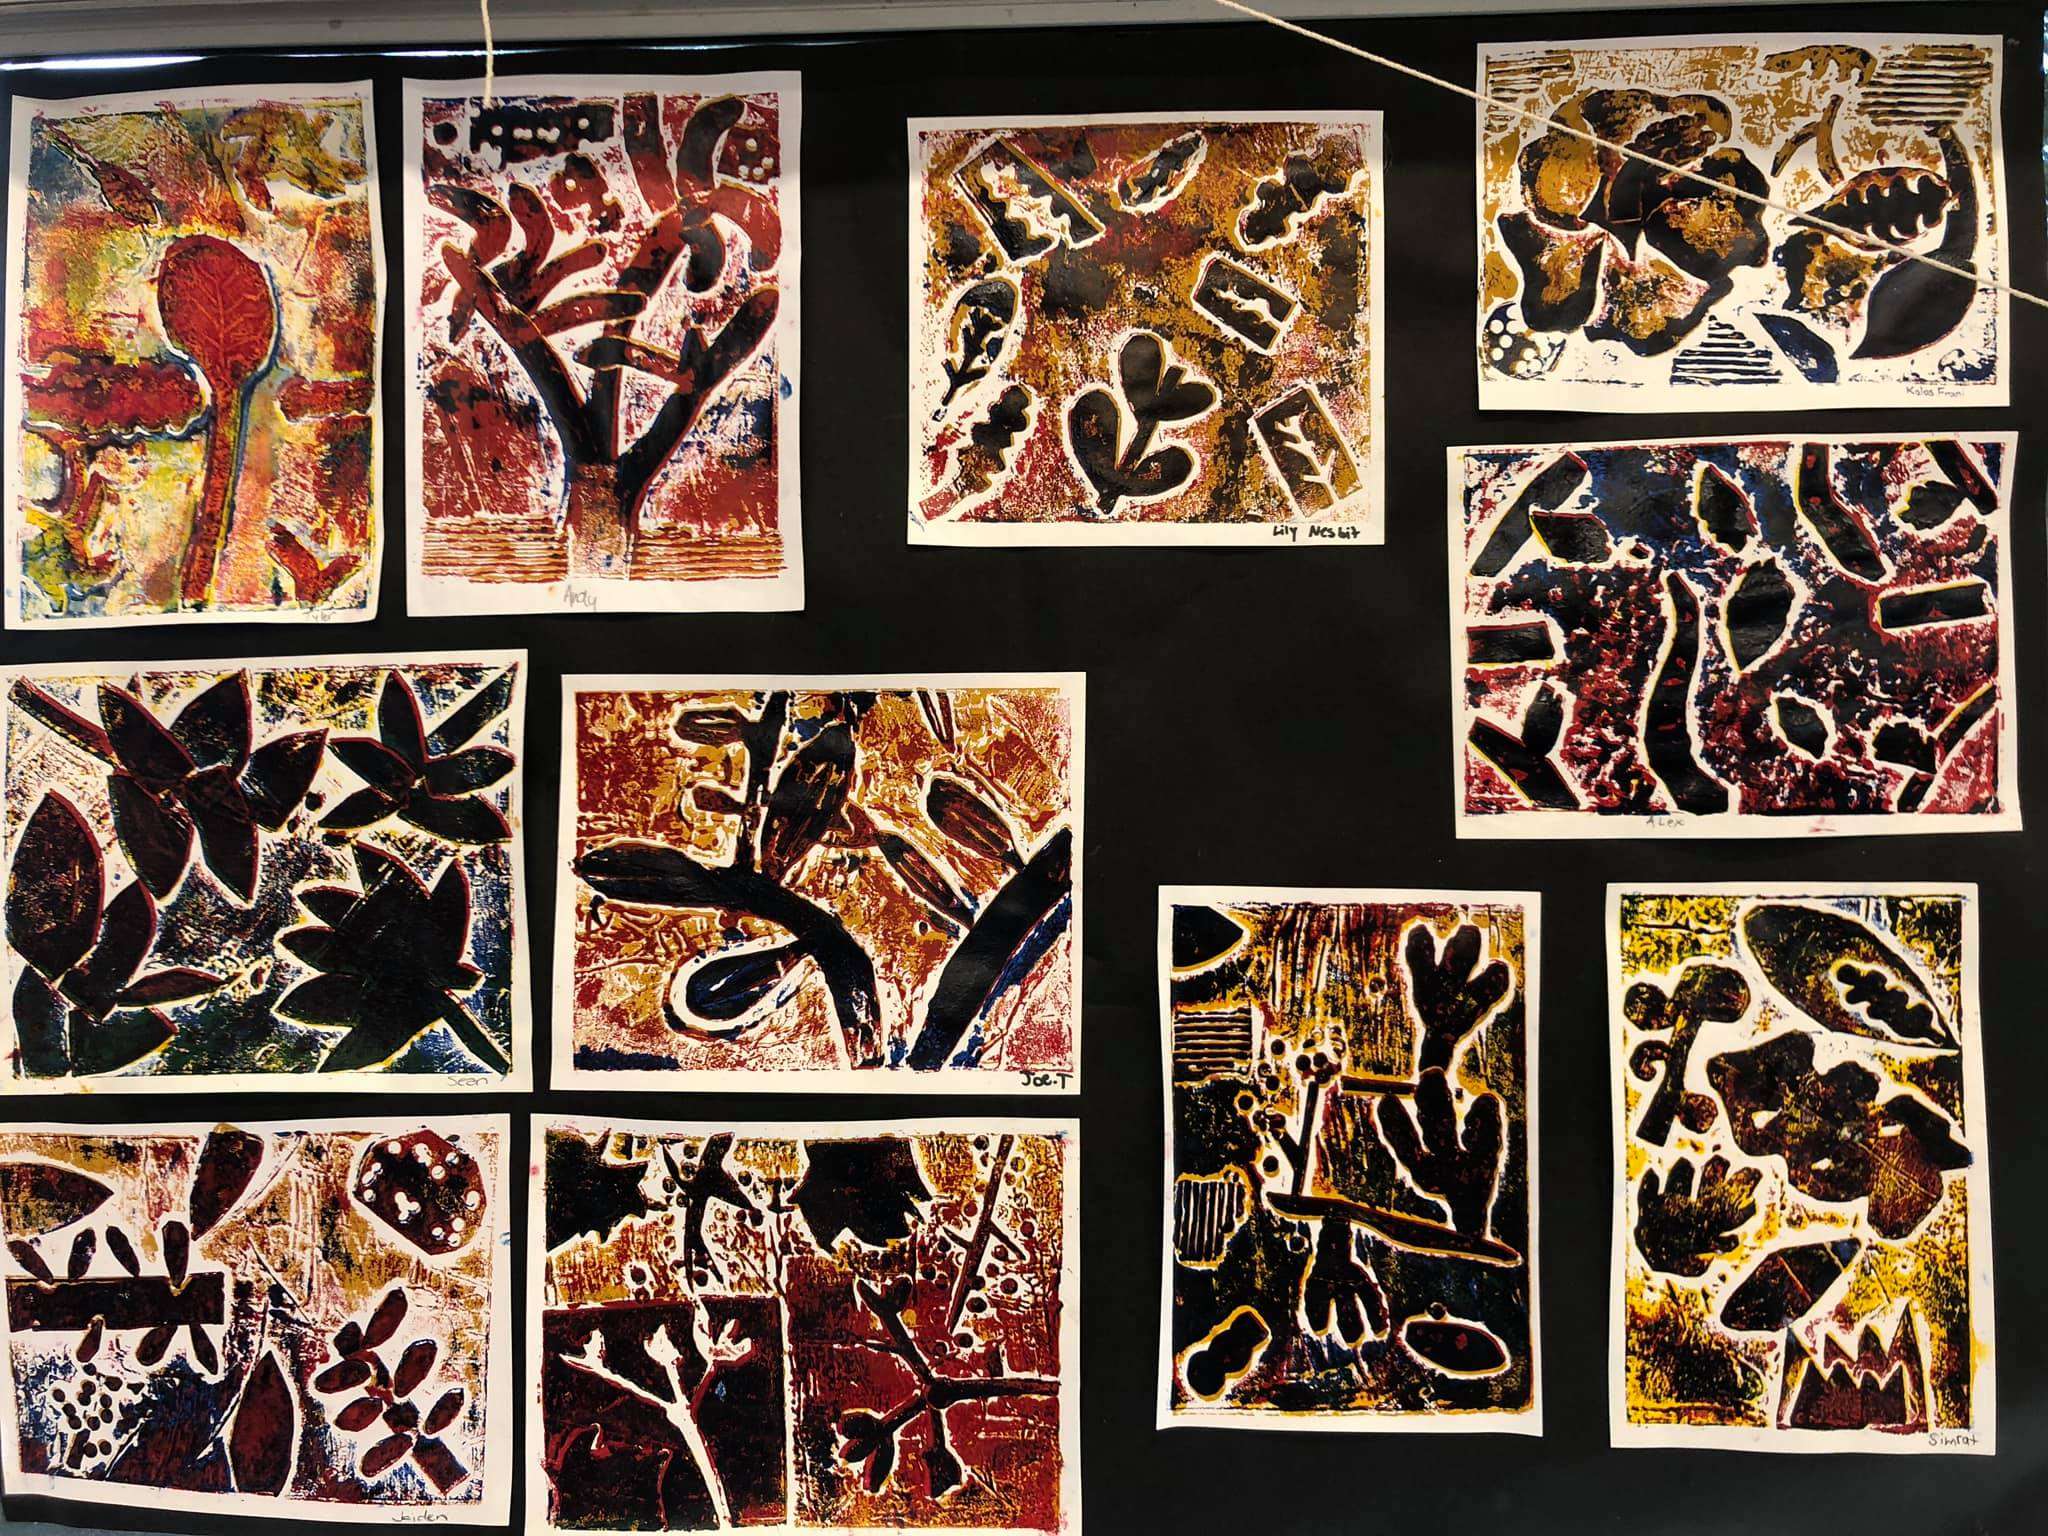
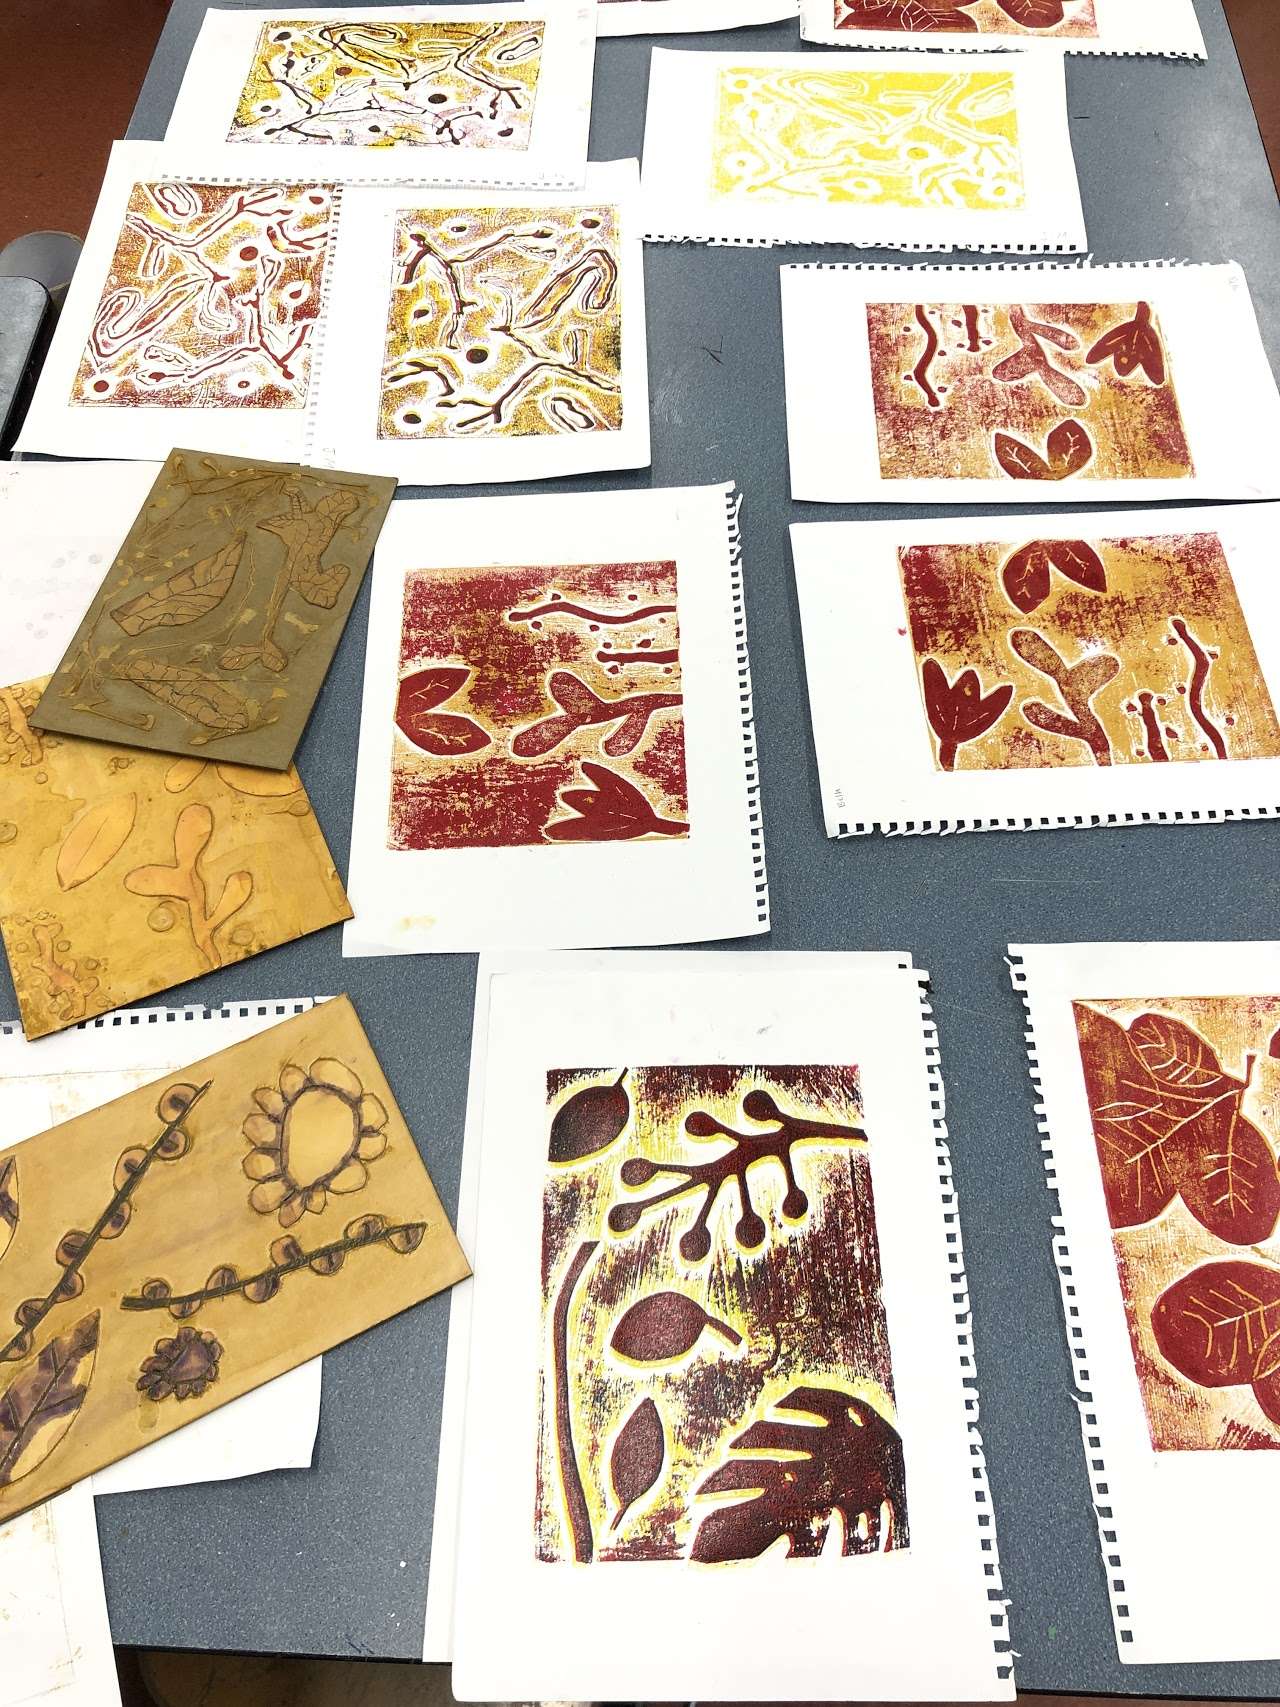
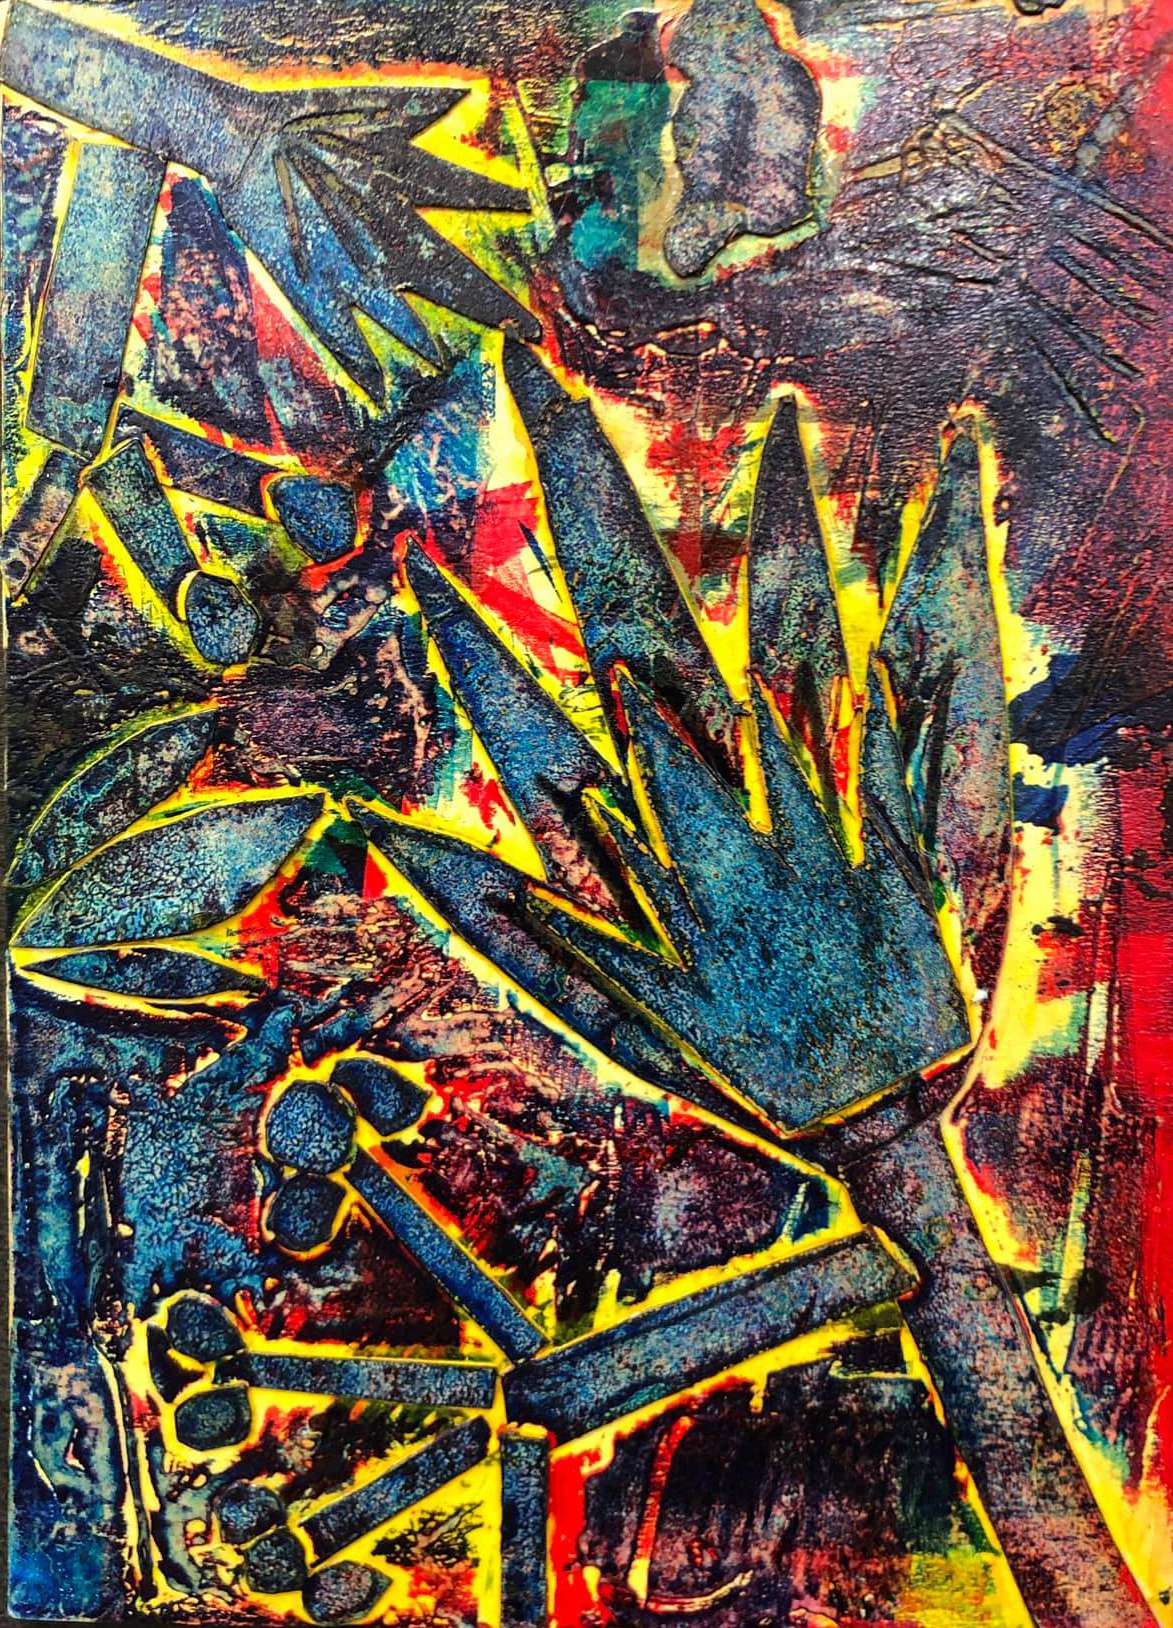
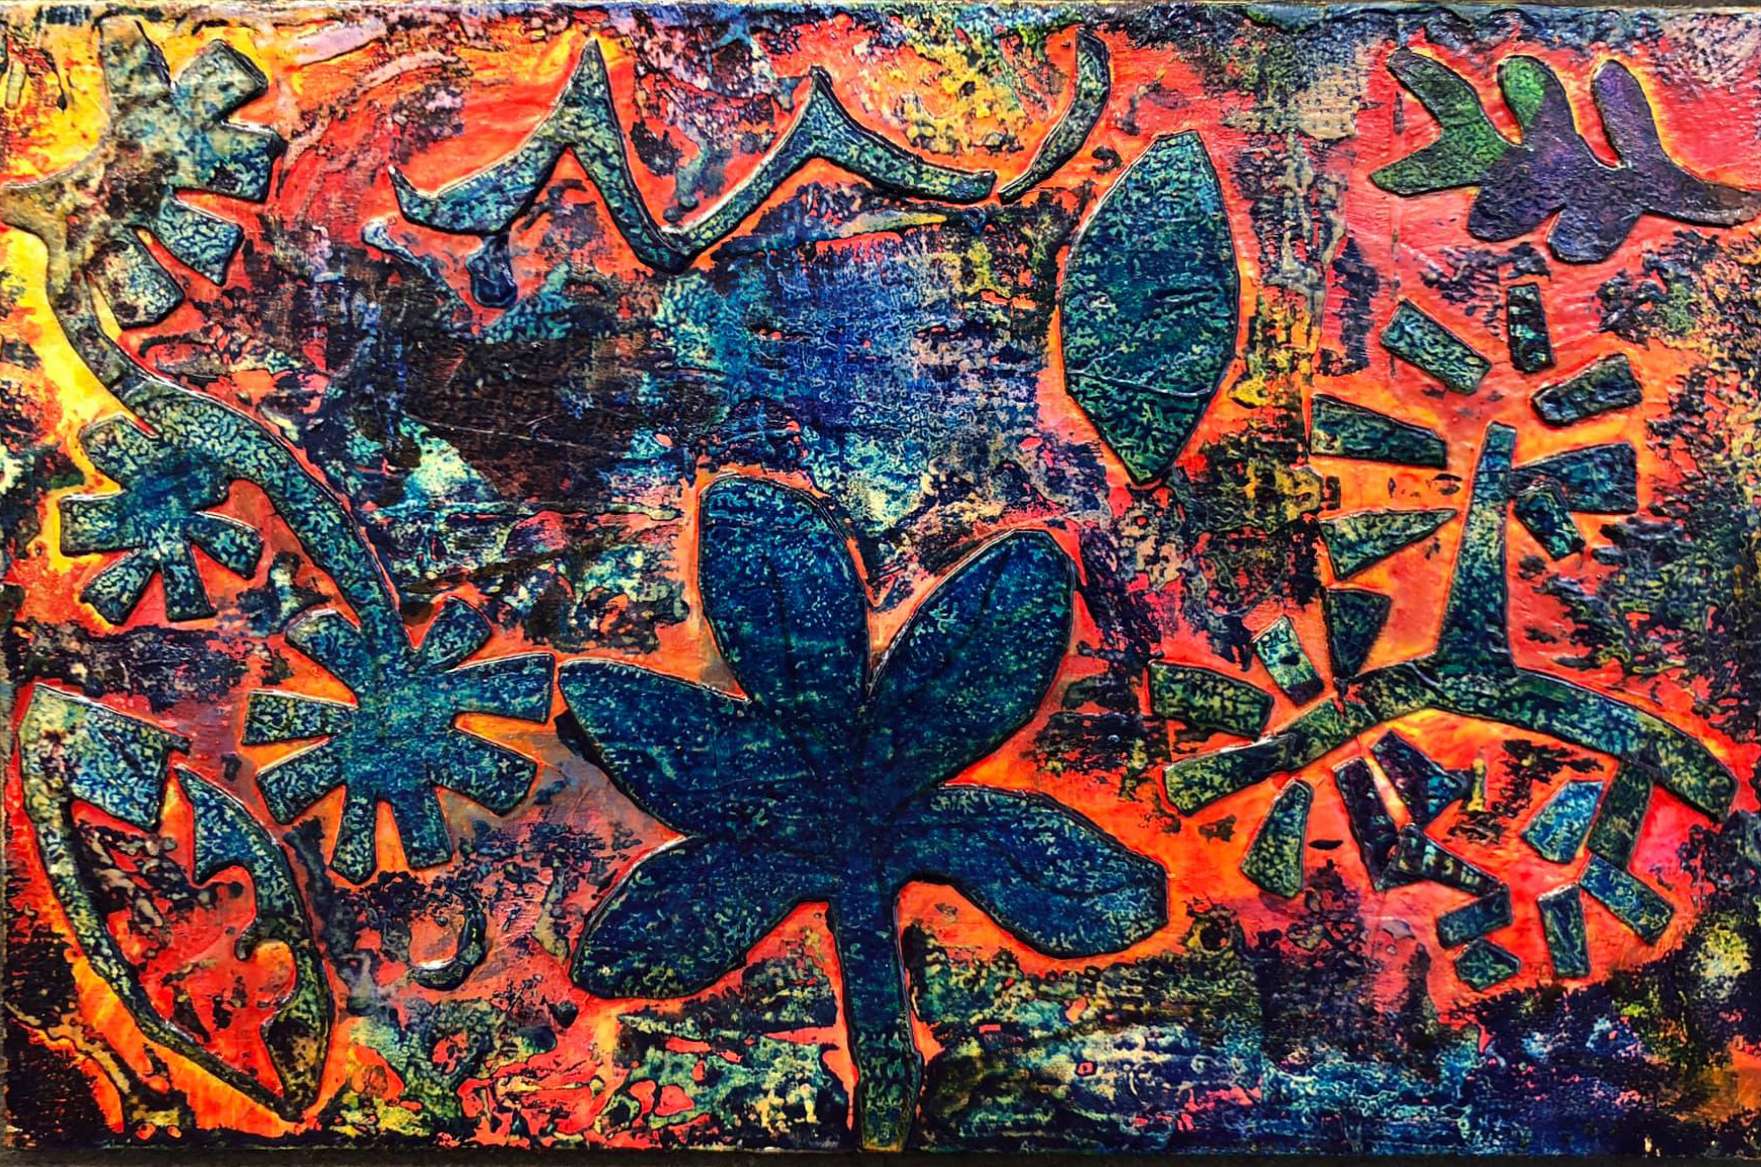
For this class, this focus project will combine previous skills learnt in line, shape, and color.
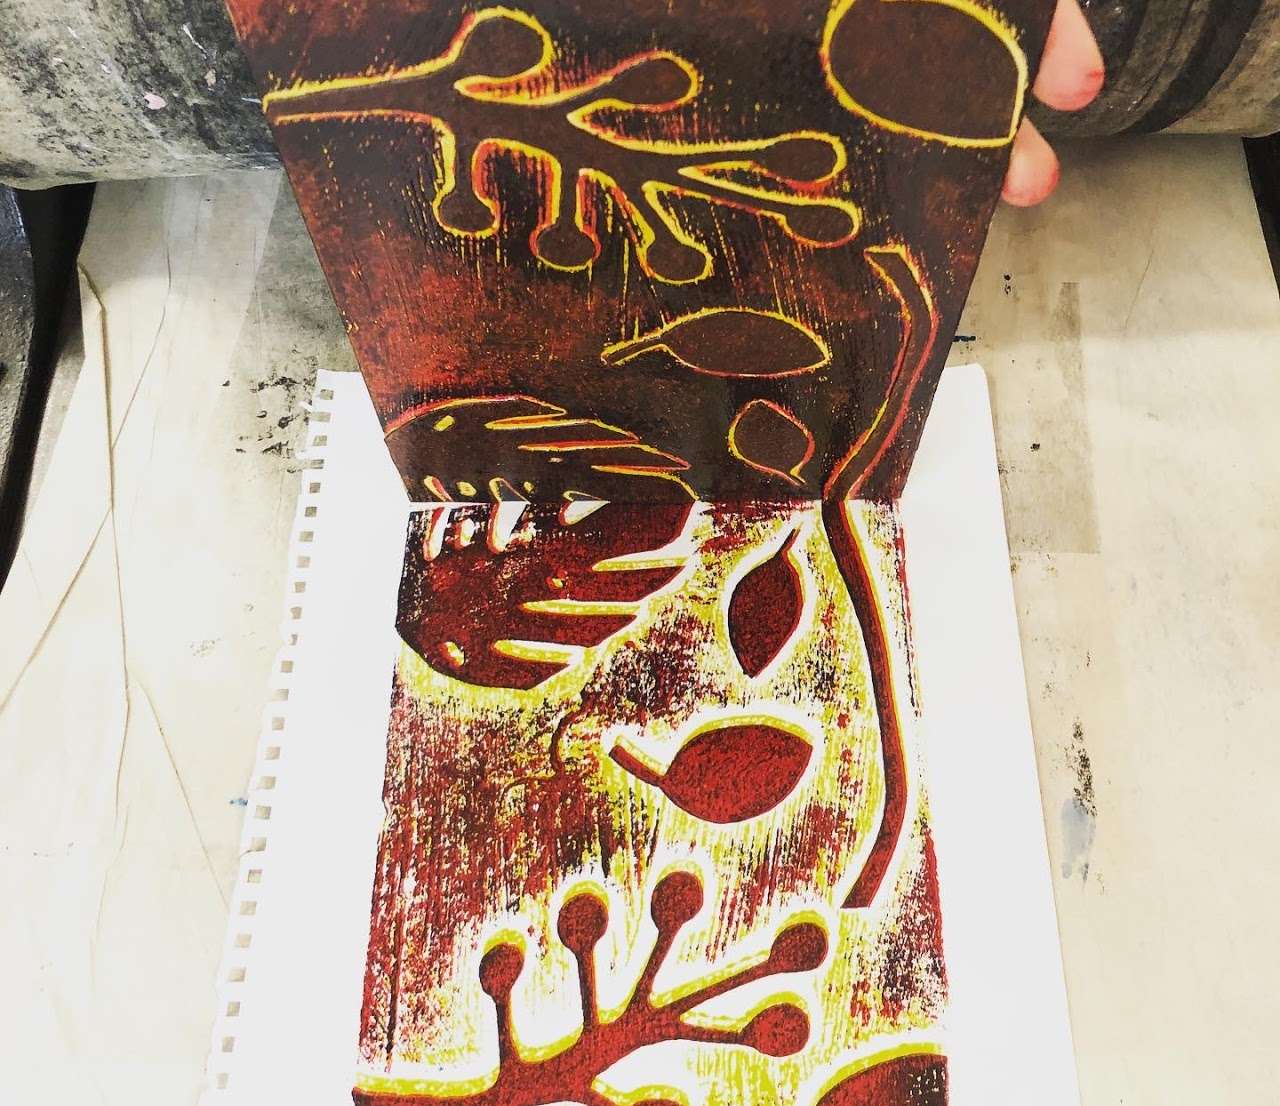
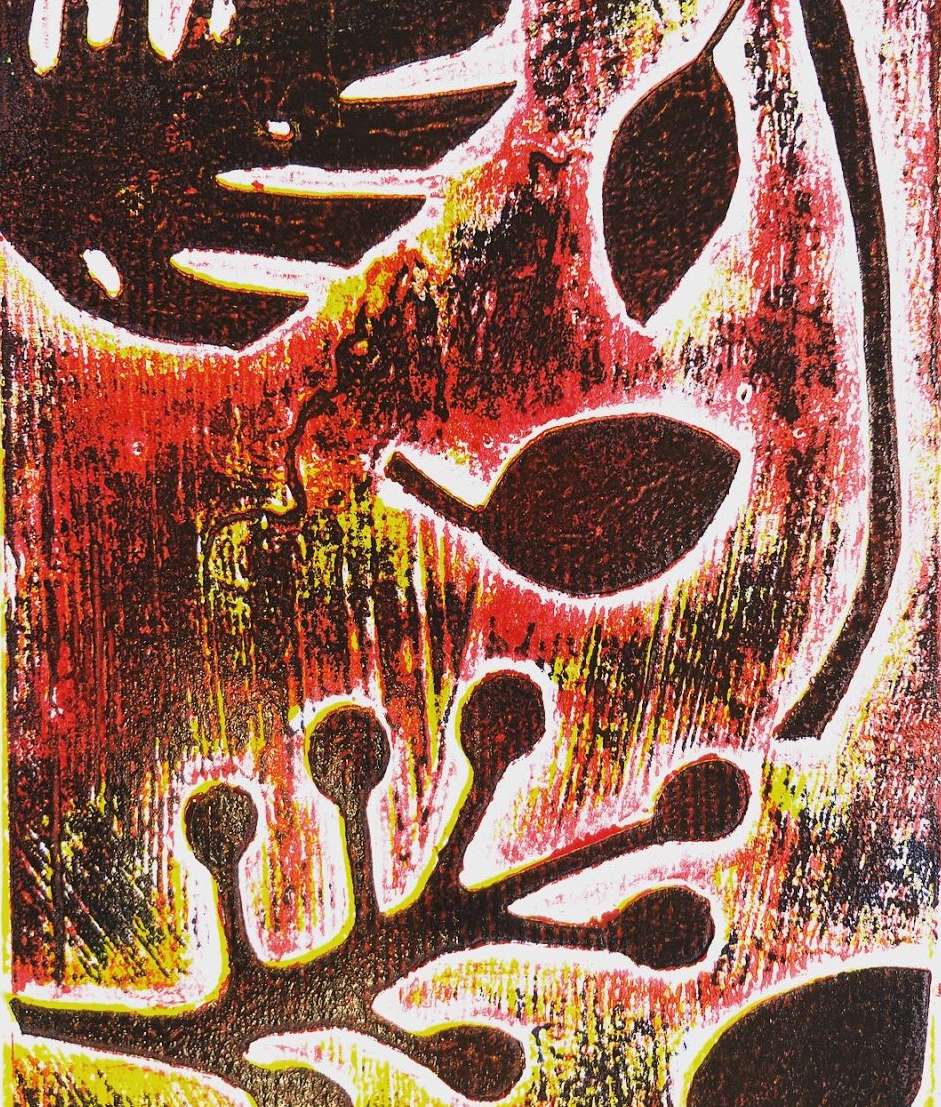
Process for Creating your printing plate.
Do a series of continuous line drawings of plants and leaves from surrounding areas
Select some of the drawings to simplify down to simple organic shapes.
Cut these shapes out of thin card (cereal box) and arrange them on a thicker card “plate” in an interesting composition. Think about cropping, focal point and rotation and repetition. You can add lines and details with a biro pen or skewer
You can add extra texture with corrugated card, string, hot glue etc
Glue shapes down thoroughly and allow to dry
Coat your printing plate on both sides with Shellac to seal it.
Lesson Process
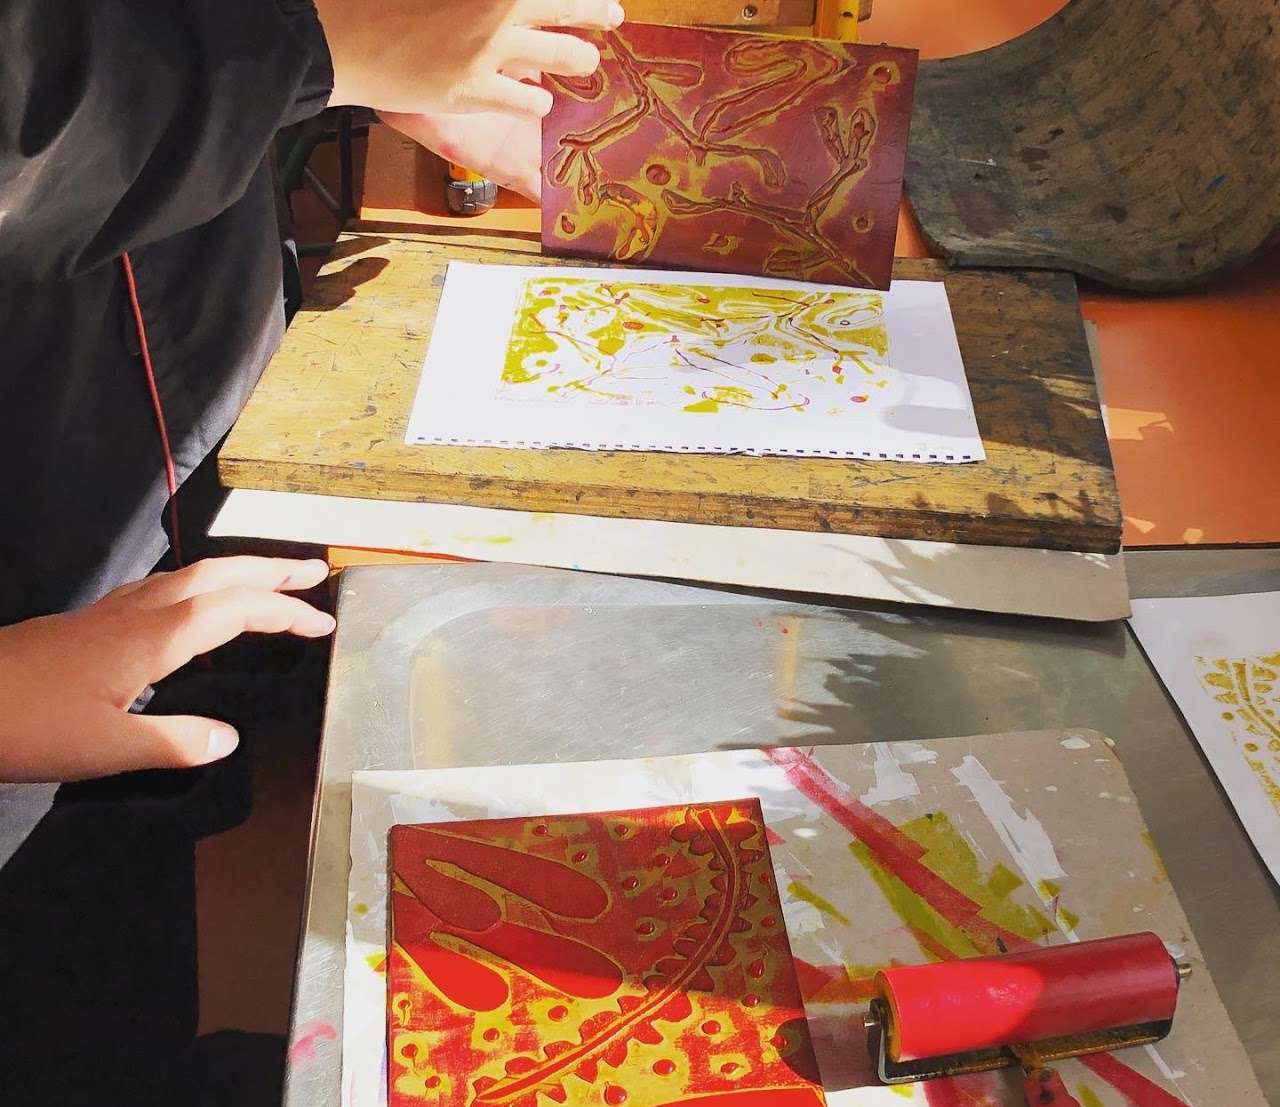
Process for Printing
Color 1: lightest ochre or yellow
- Use a hard roller to roll printing ink across your plate. You only need a small amount of ink. Too much and you will lose detail.
- Use an old brush to get yellow into the areas the brayer (roller) can’t access (only do this with yellow, not red or blue).
- Place a clean piece of paper over the top and run it through the press 3 times.
Color 2: red
- Roll ink over plate, focusing on the shapes and less red in the background. You need to use less ink then the yellow, otherwise you’re just covering all the yellow.
- Line the plate up exactly on top of one of your yellow prints.
- Flip it over and run through the press.
- Repeat this on one other yellow print (leave one just yellow)
Color 3: blue
- Repeat as per color 2, again focus on the shapes and less ink in the background.
- Experiment with rolling just sections.
Extension: you can do some single black prints on white or on a watercolor/painted background.
Vocabulary
organic shape, Brayer, printmaking, relief, plate, collagraphy, registration, burnish, proof, editionResources
Ms OGrady’s Art Course: Printmaking
Author & Website/Blog
Su O’Grady
Supporting Images